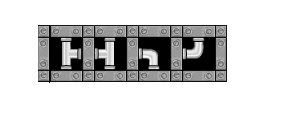
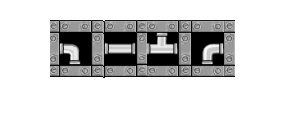
Sewage surfer is a puzzle game. You will be presented with a puzzle and have to place the pipes to complete a circuit from the start to the exit without any gaps. All the possible pieces are below:

The gamepage looks like this:
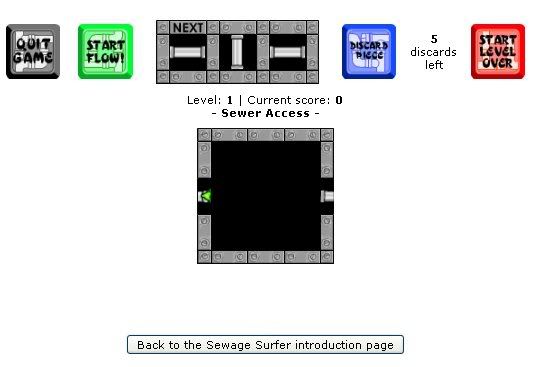
1. The puzzle – this is where you place the pieces with a left click
2. The next pieces for placing
3. The number of discards you have left for the level
4. Quit the game (do not press!)
5. Restart the level
6. Start the flow (only press when you have completed the puzzle)
7. Discard piece – discards the next piece so you don’t have to use it
There are some important items to note:
• On each level you will only get certain pieces. For example, many levels do not have the 4-way piece available
• When you play a level, the order in which you are given pieces and the mix of pieces will, in most instances, change if you replay the level. For example, first time through you may get:
Second time through you may get
• If you fail a level or choose to restart a level you lose 50 points. A gold trophy score is in the region of 30,000 so its not the end of the world and it is very unlikely you will do all 50 levels without having to restart some puzzles, and often will have to restart the same puzzle a few times
• Sometimes the game gives you pieces which are impossible to complete the level with. It’s annoying but there is nothing you can do about it except restart and hope for better pieces next time
• If you have run out of discards you can place pieces into blank spaces you don’t need instead. These pieces lose you points
Avatar

To obtain this you have to play all the way through to level 50 and then quit. It does not matter what your score is, you will have the avatar. So if you are playing for the avatar, do the simplest solutions you can. This is not what this guide is aimed at, we are going for a trophy and need a high score. If you want a guide to help you in getting the avatar, I recommend:
Now it is possible you can follow my guide and get a trophy before reaching level 50 and then quit to get the avatar too. It will take longer to get the avatar though and clearly without the last level it makes it harder to get a high score. To maximize your chances it is important you know how the high score table works.
High Score Table
Upon completing a level you obtain a score for that level, this is added to the scores you got for previous levels and gives your current total. So if I have 50 points for completing level 1 and then 80 for level 2 my total score at that point is 130. To record a score in a month you have to complete a level in that month. The level you are working on is carried over from the previous month, for example if I complete 10 levels in this month then when I play the following month I will start on level 11 and my cumulative score will also be carried over.
It is also important to note that your score only updates to the high score table when you complete a level divisible by 5 (ie when you complete levels 5, 10, 15, 20, 25, 30, 35, 40, 45 and 50).
So for example, if you want to try to get the avatar and trophy in one go, play all the way through completing level 44 using this guide. Place all the pieces for level 45 but do not press the button to complete the level (unless you are confident your score is good enough for a trophy based on the high score table at the moment). On the first day of the next month when the high score tables have cleared, complete level 45 which will submit your score to level 45 score for the month. Wait until the following day and then play through to level 50 and quit level 50 and you get your avatar. If you are lucky and have scored really well and other scores on the high score table are very low you might get a bronze for your level 45 score. However, getting on the highscore table when others may have completed all 50 levels is going to be very tough. I recommend play through for the avvie quickly and then play again for a trophy score.
I’m not certain you have to wait a day, I suspect the score you had upon completing level 45 would stay on the high score table even if you quit, but I have not tried it and having slogged your way through 45 levels I suggest you wait a day before quitting, just in case. If anyone can confirm this please let me know.
How to Get a High Score
The secret to getting a high score is simple. Every piece you use as part of the solution gives you points. The more pieces you use in a solution the better. I haven’t managed to work out how much each piece is worth, I believe the junctions are worth more than curves are worth more than straights but if anyone knows and can mail me that would be great. Not knowing this didn’t stop me from getting a gold trophy and frankly its probably a level of complexity too far, its hard enough try to complete the puzzles without worrying about this too. You use the pieces it gives you and hope you don’t run out! Every piece you place which does not form part of the solution loses you points. Restarting a level loses 50 points, as does starting the sewage flow when the pipe network was not complete. So basically to get a high score use loads of pieces, never place any you don’t need and never restart or fail a level. Unfortunately it’s not quite that simple.
You will have to make judgment calls. Some levels only get you around 100 points. Others give you 2000. It may be worth restarting a high scoring level and losing 50 points in the hope of a really high scoring solution. In the case of a low scoring level you may go for a simpler solution to avoid failing the level and losing 50 points. There is no hard and fast rule on this. Clearly if you fail a level and then get the perfect pieces so you score 500 more it was a great decision. However, if it then gives you 10 games with the wrong pieces, you lose 500 and end up with the same solution you had before, it wasn’t so good.
As a rule of thumb, if the level scores over 1000 I try very hard to get a high score on the level. There aren’t many that score that high and for a trophy we need the points so it’s a calculated risk. 500 to 1000 I look for at least a good if not great solution. Below 500 I just make sure I don’t fail them if at all possible and get the best solution I can.
Here is a picture of the high score table after I finished walking through all the levels and completed level 50. Ended up third, pretty good considering I restarted so often. You can see w0x0x in first place – beaten again! And there in tenth lies my guild leader – what a small world.
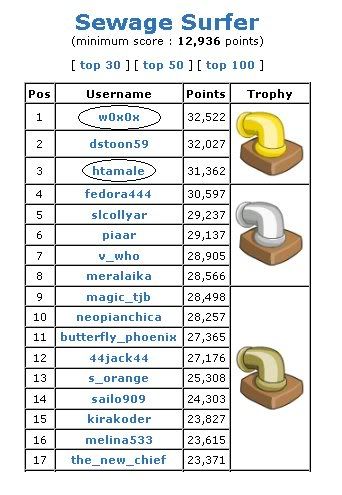
A quick note regarding grandmaster status for sewage surfer. You need a score of over 40,000 which unless you had perfect solutions throughout is impossible. There were some occasions in the past when the database glitched and everyones game was reset to level 1 but their score at that point was kept. w0x0x had just completed level 49 when it did this and therefore got to restart at level 1 from a 49th level score (I’m not jealous). Personally I would say anything over 32,000 should be a grandmaster score but for the moment its not so lets just focus on the trophy and hope neopets have a change of heart.
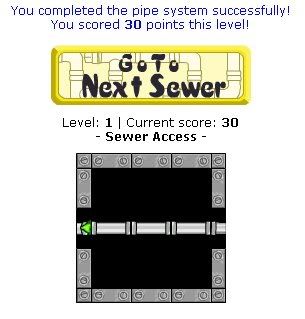
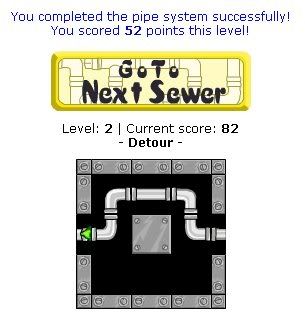
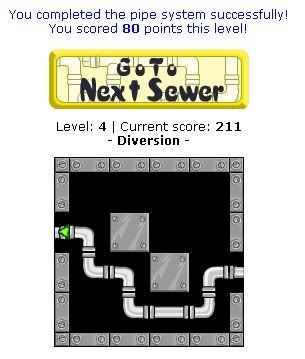
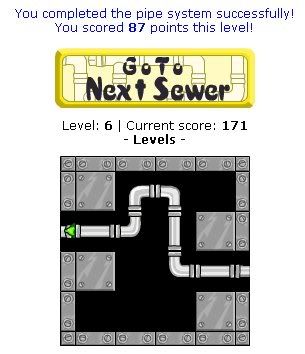
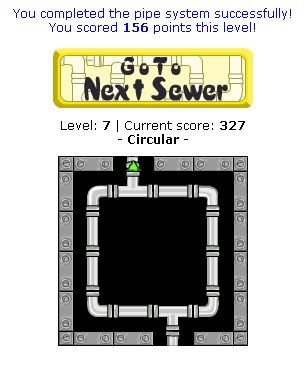
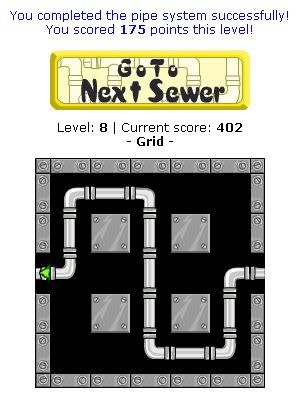
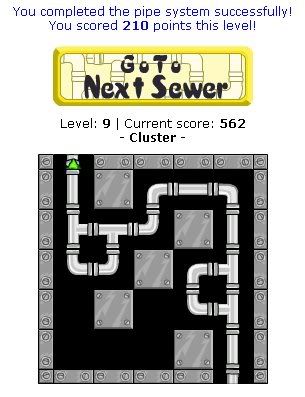
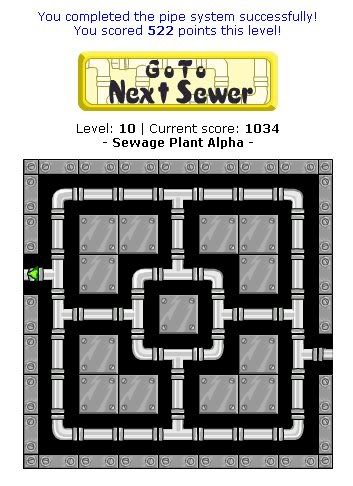
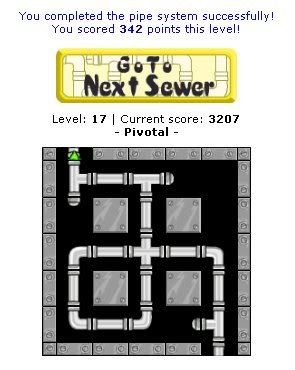
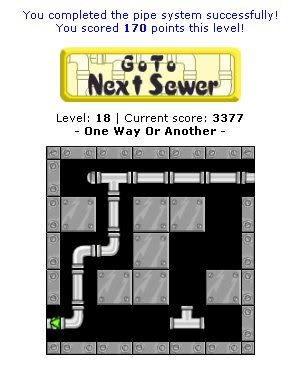
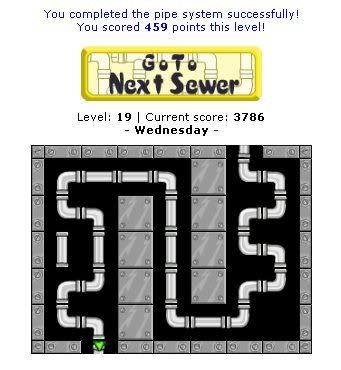
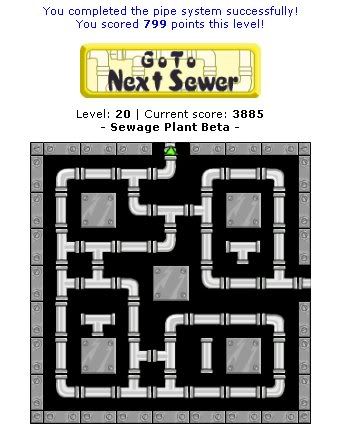
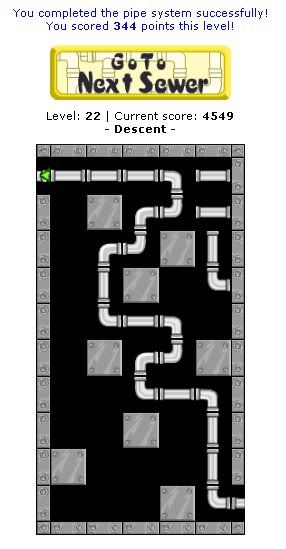
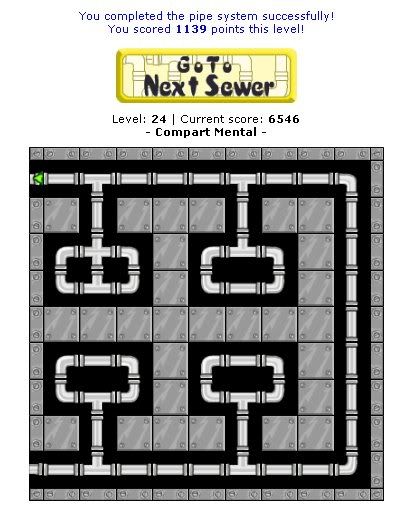
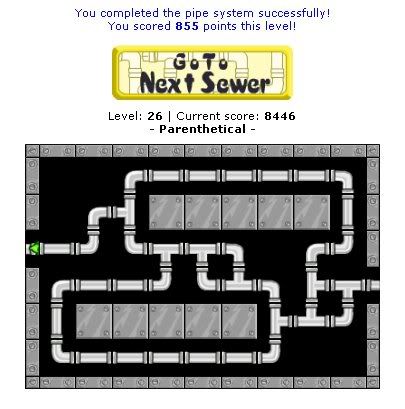
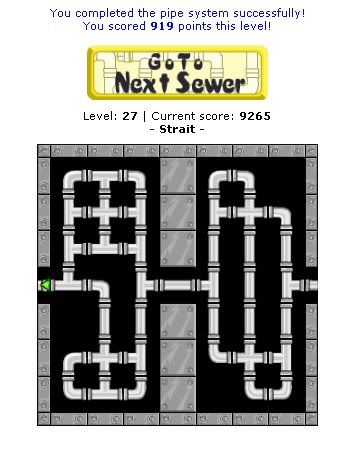
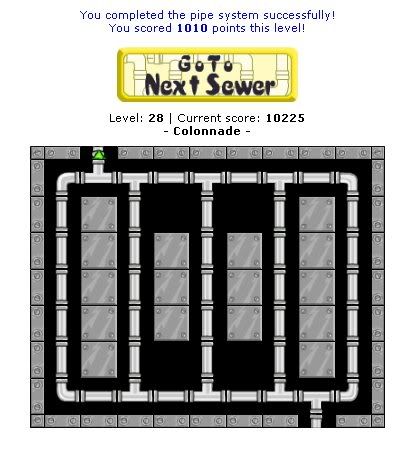
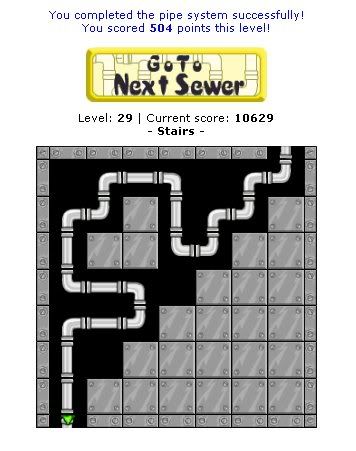
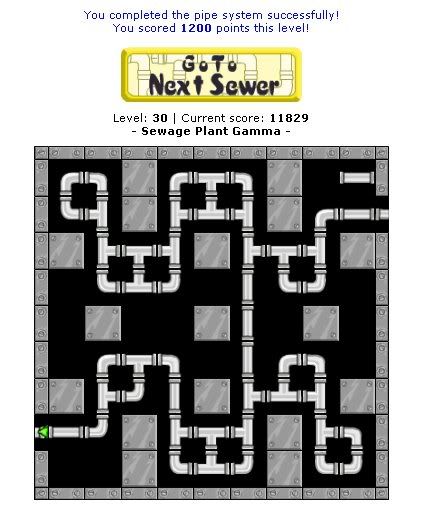
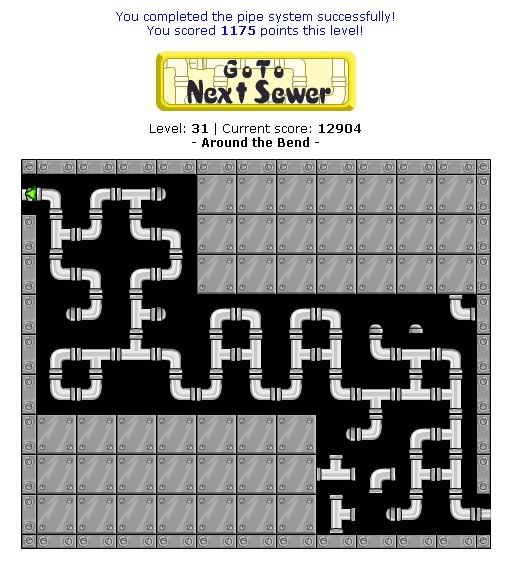
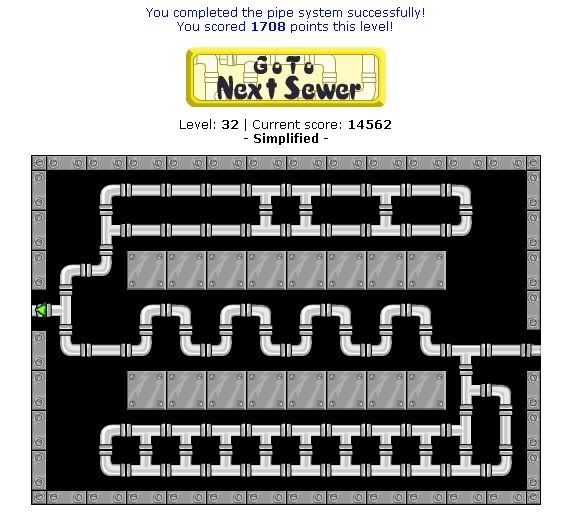
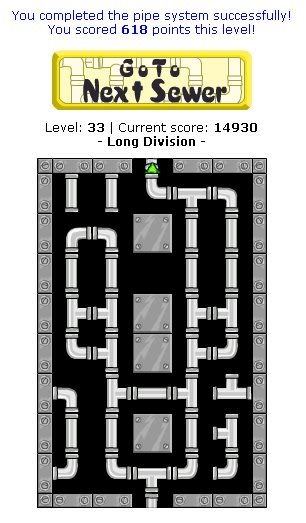
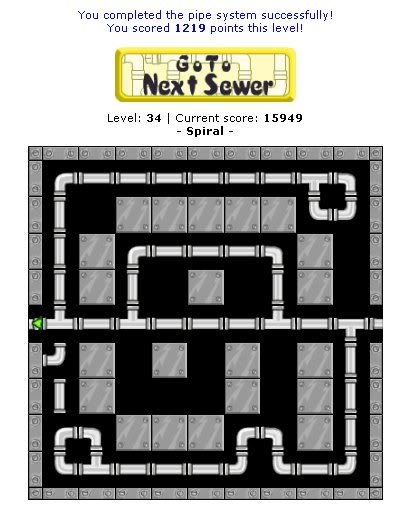
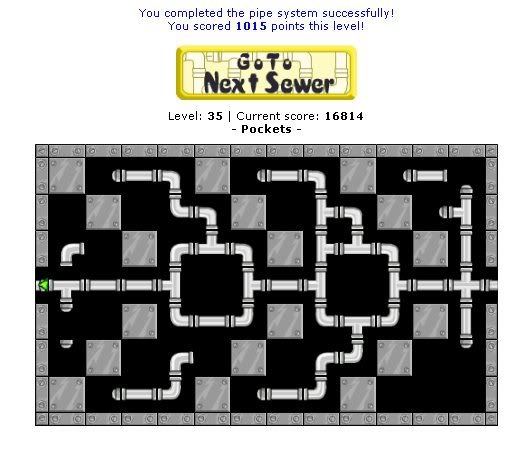
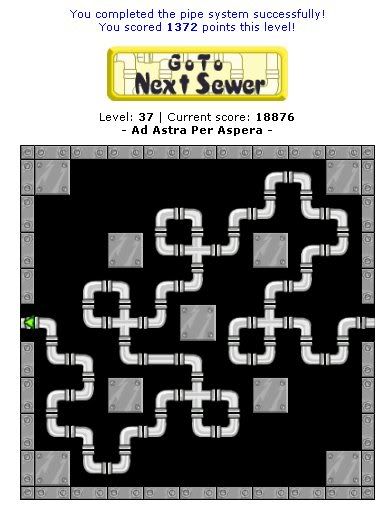
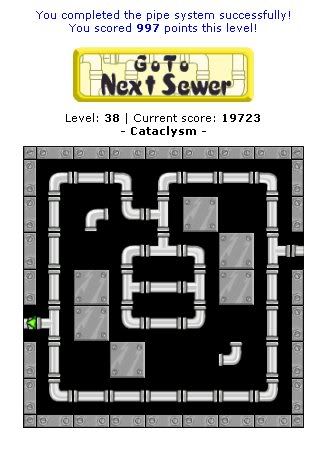
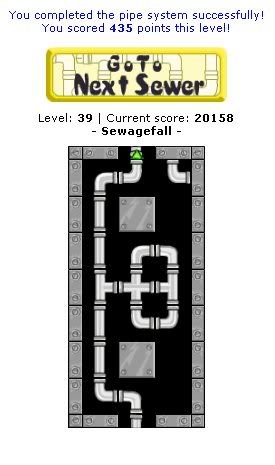
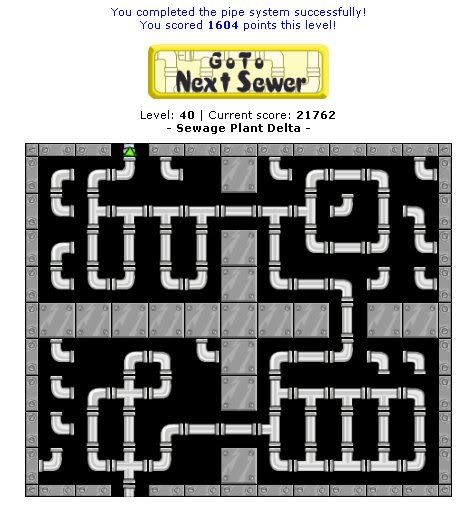
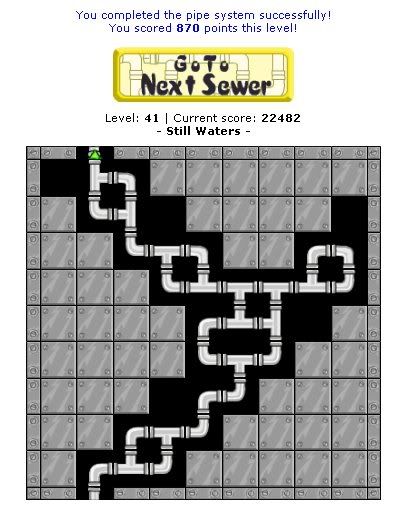
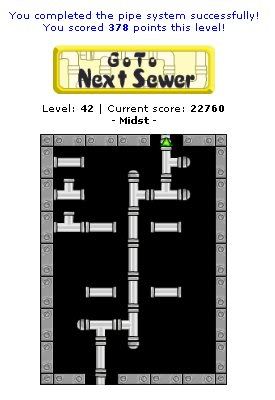
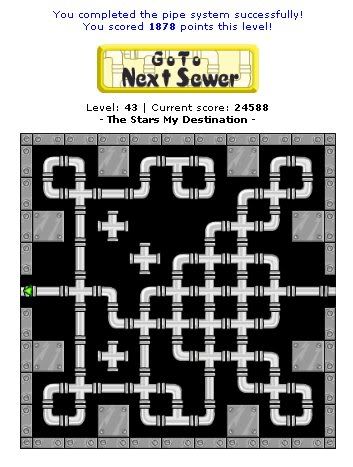
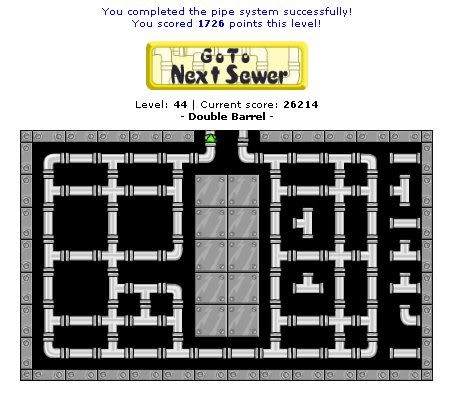
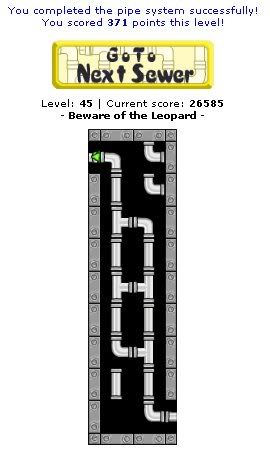
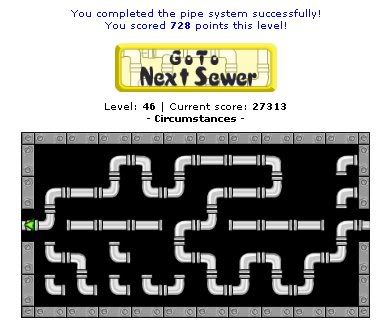
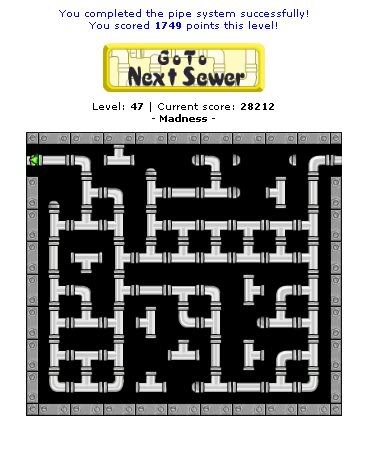
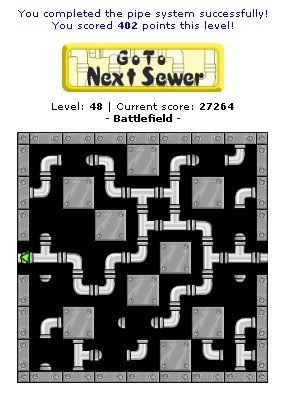
Solutions to levels
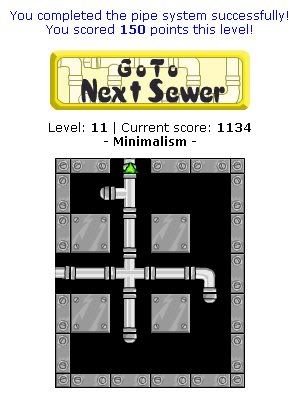
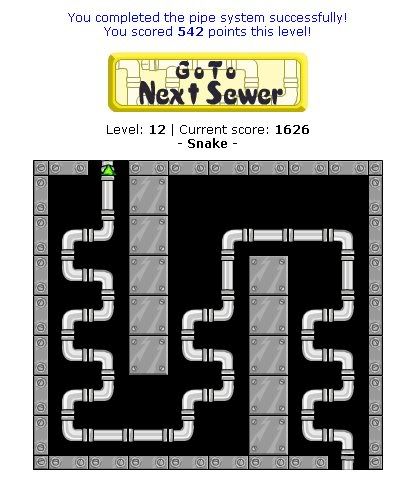
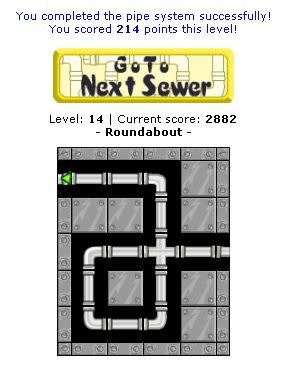
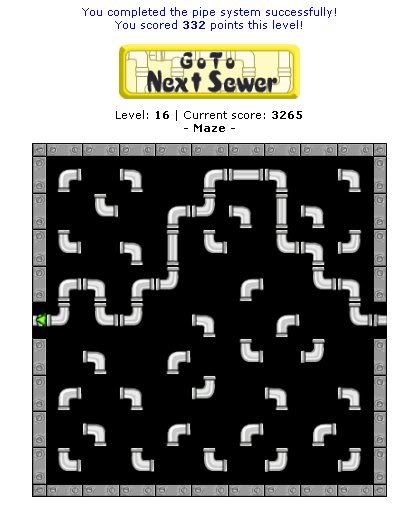
Below are high scoring solutions to every level. I have indicated where I believe that this is definitely the solution to go for (for example Level 1 can only be solved in one way).
However, and this is very important, for most levels your solution will not be exactly the same. It depends upon the pieces you are given.
Use the solutions as a guide on how to get a high score for the level but you have to react to the pieces you have been given. If you just blindly try to copy my exact solutions you will fail levels so often (and lose 50 points each time) that you will not get a trophy.
On many levels you can score more than I did – I am not pretending the solutions below are an exhaustive list of the best solutions – they aren’t. However, I did restart very often until I got a high score for each level to create this guide. In terms of getting a high overall score I would have been better off scoring a lower score on some levels and not failing so often. This is up to you to decide.
If anyone believes one of my levels to be horribly flawed and a much higher score is possible please let me know, I’m not too interested in the fact you got 20 points more for the purposes of this guide (although I am very happy for you!), as I said above, they illustrate how to approach the levels and hopefully get a trophy.
Here are my solutions, best of luck, I love feedback, let me know how it goes, thanks: