If you’ve made it here, chances are you’re looking for a less-frustrating way to navigate the labyrinth that is the Moltara Dark Cave. Just in case you have no idea what I’m talking about, or what this page is for, let’s have a recap.
Introduction to Moltara

Discovered Year-11, Moltara is a lava-oozing city of gears, metal, and precious gems. Not to mention the coveted Magma Pool, where, if luck be in your favor, you might just find yourself owning a magma pet.
However, Moltara is also brimming with puzzles, most of which lead to only one thing: the creation of Moltaran Petpets.
Non-Store Moltaran Petpets

Moltaran Petpets are not simply purchased from any petpet store. They first must be assembled at Tangor’s Workshop through a combination of four materials — found only in Moltara by solving five puzzles.
5 Preliminary Puzzles
NOTEFor the purposes of this guide, I will
not be explaining the locations of the
Obsidian Quarry, Miscellaneous Gears, nor the worms of the Moltara Worm Quest. My summaries are for context. Those of you looking for such specifics should go to —

Puzzle 1 – Obsidian Quarry

Shiny Obsidian is a once-daily prize for visiting the Obsidian Quarry in Moltara City; a relatively easy brain-teaser.
Puzzle 2 – Random Scrap

Scrap Stone and Metal is also an easy item to obtain, if only insofar as out of your control — it is awarded through a Random Event alert while visiting Moltara City or the Moltara Caves. Keep refreshing, it does eventually happen.
Puzzle 3 – Gear Locations

Miscellaneous Gears ramp the difficulty up to medium. They can be found in one of eight random locations in Moltara City — these are a rarity. They appear at least four-times less often than the Scrap Stone and Metal Random Event, and are refresh and time sensitive; in other words, be careful if you see them.
Puzzle 4 – Moltara Worm Quest

Red Moltite is our hard case. You must complete two puzzles in order to locate it. First, the Moltara Worm Quest.

To begin obtain the Empty Lantern by simply visiting Lampwyck’s Lights Fantastic in Moltara City. Then, collect ten worms lurking around Moltara City and the Moltara Caves:


All worms are refresh and time sensitive. Blue, Yellow, Red, and Green are the easiest to find; Orange, Pink and Purple are slightly harder and show up less often; White, Black and Rainbow are liable to drive you insane in their unwillingness to appear. Be patient, take breaks, and check back sparringly; longer breaks have shown to yield more worms.

Once you have all 10 worms, you may fill your Empty Lantern with them, causing it to become a Brightly Lit Lantern. Why is this important? Why, you need light to explore the Moltara Dark Cave!
Puzzle 5 – Navigating The Cave

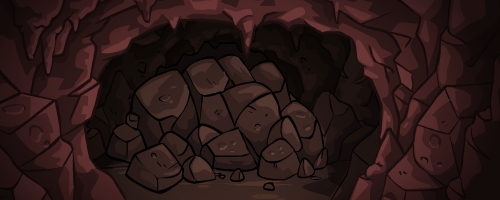
This small, eerie looking cave is the Moltara Dark Cave, which holds Red Moltite somewhere within its many corridors. However, even with your lantern, you still have to find out which corridors lead where.

This is the basic view of the start of the Dark Cave. To proceed, you must choose left or right, and see where you end up.
Some paths get you staring at a dead end—
—most have you fleeing from the dreaded lava monsters—
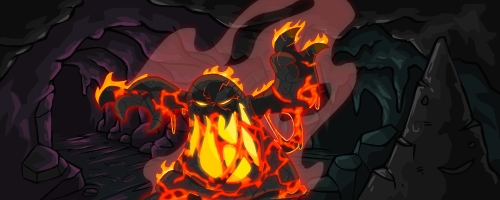
—both of which send you back to the beginning of the cave.

By this point, I found it exhausting to still be flailing about, clicking around blindly to find the Red Moltite, especially after spending so much time and effort to round up the worms.

So I solved the problem.
Discovery of the Solution
As random as it may seem, the Moltara Dark Cave is actually a long system of patterns. And key to the patterns is as clear as day once realized:

Your path to the Red Moltite is comprised of four turns that correspond to whatever bold sentence you encounter at the start of the cave. No two patterns are the same, and they do not change, no matter how many times you revisit the Moltara Dark Cave, and no matter which cave picture you’re shown.
Let’s start with an example. Say upon entering the Moltara Dark Cave, you are presented with this:

For this guide, take note of the first four words of your sentence–
[ Does it smell like… ]
Then, simply locate the start of your sentence, and follow the plotted four turns—
|
Does it smell like…
|
RIGHT
|
LEFT
|
LEFT
|
LEFT
|
|
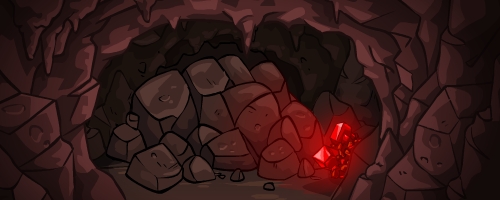
Your Red Moltite will then be at hand!
UPDATE (01/28/12):
While the petpet store in Moltara never closes, collecting worms and Red Moltite is a once daily event. After you find Red Moltite within the Dark Cave, the worms will grow tired and no longer light up the lantern.

To fix this, visit Lampwyck’s Lights Fantastic again, where Lampwyck will take your lantern and promise to nurse your sleeping worms back to health by the next day.
However, upon revisiting Lampwyck, you will discover…

…that Lampwyck has lost your worms!

You will have to collect the worms all over again, and refill your lantern with them, if you want to collect more Red Moltite.
The Pattern Table

[ Completed! ~ 01/04/2010 ]
If you stumble and make an incorrect turn, do not fret. When you restart at the beginning of the cave, you will be given a new sentence; a fresh start. Simply follow your new sentence to find your Red Moltite.
Alphabetical by First Word in Sentence

|
Sentence Start
|
Turn 1
|
Turn 2
|
Turn 3
|
Turn 4
|
|
At least it’s not…
|
RIGHT
|
LEFT
|
RIGHT
|
LEFT
|
|
Does it smell like…
|
RIGHT
|
LEFT
|
LEFT
|
LEFT
|
|
Hello? Is there anyone…
|
LEFT
|
LEFT
|
RIGHT
|
RIGHT
|
|
I hope I can…
|
RIGHT
|
LEFT
|
LEFT
|
RIGHT
|
|
I hope there’s no…
|
LEFT
|
RIGHT
|
RIGHT
|
RIGHT
|
|
I should have studied…
|
RIGHT
|
RIGHT
|
RIGHT
|
LEFT
|
|
I sure wish Roxton…
|
RIGHT
|
RIGHT
|
LEFT
|
LEFT
|
|
I wonder where this…
|
LEFT
|
LEFT
|
LEFT
|
RIGHT
|
|
It’s very hot in…
|
LEFT
|
LEFT
|
RIGHT
|
LEFT
|
|
Jordie would know what…
|
LEFT
|
RIGHT
|
LEFT
|
RIGHT
|
|
Let’s go spelunking!
|
RIGHT
|
RIGHT
|
RIGHT
|
RIGHT
|
|
Look at the shiny…
|
LEFT
|
RIGHT
|
RIGHT
|
LEFT
|
|
This lantern is bright…
|
RIGHT
|
LEFT
|
RIGHT
|
RIGHT
|
|
What a mysterious passage!
|
LEFT
|
LEFT
|
LEFT
|
LEFT
|
|
Where does this cave…
|
LEFT
|
RIGHT
|
LEFT
|
LEFT
|
|
Which way should we…
|
RIGHT
|
RIGHT
|
LEFT
|
RIGHT
|
|
Acknowledgments

Claire [fire_pets_lover]
Iliana [angelic_cow_demon]
Ayme [hisprincess]
Vikki [kounterklockwyze]
Mcshirl [loop_t_doo]
CindyMoss [tinkerbell1948]
Chris [pianomomof4]
Willa Notellya [mommajade]
bee merry [x2c5]
Kate [caiwyn]
Airy Faerie [faerieairygirl]
Helena [winx13]
To all who have assisted me with this part of my guide, or have contacted me with information and support, you have my eternal gratitude! If you would also like to contact me with any information on the Moltara Dark Cave Patterns, please do so via my main account here.
Red Moltite Petpets

Now that you have your Red Moltite, let’s see about putting it to some good use. Below is a list of Moltaran Petpets that can be created using Red Moltite.
NOTE
This is not a complete list of Moltaran Petpets. These are only the Moltaran Petpets that need Red Moltite to be created. This list was made this way on purpose. 🙂
|

[ Val ]
|
=
|
Red Moltite
|
+
|
Shiny Obsidian
|
|

[ Teek ]
|
=
|
Red Moltite
|
+
|
Shiny Obsidian
|
+
|
Miscellaneous Gears
|
|

[ Rav ]
|
=
|
Red Moltite
|
+
|
Miscellaneous Gears
|
|

[ Erge ]
|
=
|
Red Moltite
|
+
|
Miscellaneous Gears
|
+
|
Scrap Metal and Stone
|
|

[ Goy ]
|
=
|
Red Moltite
|
+
|
Scrap Metal and Stone
|
|

[ Albot ]
|
=
|
Red Moltite
|
+
|
Scrap Metal and Stone
|
+
|
Shiny Obsidian
|
|

[ Nik ]
|
=
|
Red Moltite
|
+
|
Scrap Metal and Stone
|
+
|
Shiny Obsidian
|
+
|
Miscellaneous Gears
|
|

[ Goyalbotnik ]
|
=
|
Goy
|
+
|
Albot
|
+
|
Nik
|
|
Magma Pool Connection
UPDATE (06/01/12):

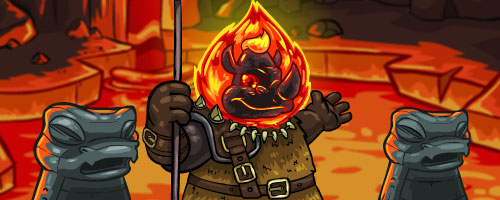
If this refusing face of the Tonu Guard is familiar to you, then you’ve joined the club of Magma Pool rejection. While awake, this Tonu Guard is very selective as to whom may step forward and paint their pet(s) Magma. Does this mean a Magma pet is hopeless for those he turns away?
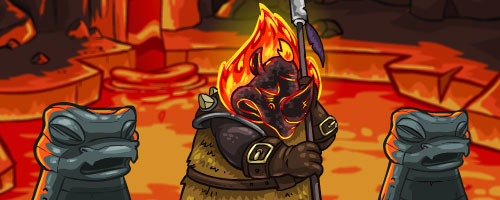
Fear not! This brute of a guard is known to fall asleep, and provide a 5 minute window of opportunity for each and every Neopian visitor. This event is time sensitive, but the time is different for each user. If you are motivated to find out when the guard is asleep for you, spend a day refreshing at the Magma Pool every five minutes or so. The time at which the guard is sleeping will not change once you find it, but you are only allowed to paint one pet per week.
Currently, there is no known consensus as to why certain players are welcomed by the Tonu Guard. There are, however, a couple of small hints – given to us by both The Neopian Times and the research of fellow users – that pertain to being welcomed, such as:
- You can only be welcomed on your main account
- Being welcomed hinges on earning neopoints somehow (Editorial Wk. 433)
- You do not need to have participated in the Moltara site plot to be welcomed
There is also some speculation that the creation of a Moltaran Petpet may be a requirement to be welcomed, but this is not proven. In theory, the petpet should be created with found materials — not second-hand store bought — and the type of petpet seems not to apply.