Neopets Petpet Cannonball

Neopets Petpet Cannonball is a game where you shoot petpets out of a cannon and through a bucket. If you manage to see the angles of your shots well enough to get a high score, Petpet Cannonball will reward you with this shiny trophy.

Petpet Cannonball

How to Play Petpet Cannonball

To move your cannon up or down, press the up or down arrow keys; to fire, press the space bar. If you hold down the space bar, your petpet will be shot out with more power the longer you hold it. The higher your cannon is aimed, the more power you’ll need, and the longer you need to hold down the space bar.

You start with ten lives; with every petpet you shoot that doesn’t make it into the bucket that you’re aiming for, you lose a life. Every time a petpet goes into the bucket, though (sliding down the mast and off the screen), you’ll gain a life. You can’t have more than ten lives at a time, though.

Petpets

There are six different petpets, each weighing a different amount and giving a different amount of points after going into the bucket.

buzzer_pirate-8194512The Buzzer weighs 0.8 kg and awards the least amount of points.

slorg_pirate-1155644The Slorg weighs 0.9 kg and awards slightly more points than the Buzzer.

babaa_pirate-2452282The Babaa weighs 1.0 kg and awards slightly more points than the Slorg.

faellie_pirate-7326580The Faellie weighs 1.2 kg and awards slightly more points than the Babaa.

tenna_pirate-3388557The Tenna weighs 1.3 kg, is the rarest of all the petpets, and awards significantly more points than any of the others.

angelpuss_pirate-1333987The Angelpuss weighs 1.4 kg and awards slightly more points than the Faellie.

petpet_snowbunny_pirate-2235283The Snowbunny weighs 1.5 kg and awards slightly more points than the Angelpuss.

Petpet Cannonball Levels & Points

There are eight different levels in Petpet Cannonball, but the objective in each level is the same: shoot the petpets through the bucket. Unfortunately, this becomes harder each time you move on, because each time, the bucket is higher, your cannon is in a different spot, and the power of your shot increases faster as you hold down the space bar.

You move on from one level to the next by successfully shooting three petpets into the bucket. One shot out of the three is always very easy, because the game will show you a dotted line as you hold the space bar down on your first shot in each level.

Once you make the third successful shot in Level Eight, the game will end; if you make it that far, though, you need to get one last petpet into the bucket as the game is ending to get a high score.

buzzer_pirate-8194512The Buzzer is worth 10 points in the first level, and its points increase by 5 each level afterward. So 7 levels later, in the eighth and final level, it’s worth 45 points.

slorg_pirate-1155644The Slorg is worth 1 point more than the Buzzer in each level. In level 1, it gives 11 points; in the final level, it gives 46.

babaa_pirate-2452282The Babaa is worth 1 point more than the Slorg in each level (and 2 points more than the Buzzer). In the first level, it gives 12 points; in the final level, it gives 47.

faellie_pirate-7326580The Faellie is worth 1 point more than the Babaa in each level. In the first level, it gives 13 points; in the final level, it gives 48.

angelpuss_pirate-1333987The Angelpuss is worth 1 point more than the Faellie in each level. In the first level, it gives 14 points; in the final level, it gives 49.

petpet_snowbunny_pirate-2235283The Snowbunny is worth 1 point more than the Angelpuss in each level. In the first level, it gives 15 points; in the final level, it gives 50.

tenna_pirate-3388557The Tenna (which, as previously mentioned, is the rarest petpet) is worth 20 points more than the Snowbunny in each level. In the first level, it gives 35 points; in the final level, it gives 70. Obviously, this is the most desirable petpet to get.

Petpet Cannonball Tips

There are two things you need to do to get a high score: get high-scoring petpets, and be able to use the right cannon angles and power. To get the angle, you can use something near your cannon as a reference point for aiming, and then just try to measure with your eyes how much power you’ll need to get it into the bucket. Practice will help you with that.

Once you’re pretty good at Petpet Cannonball (able to regularly pass through all eight levels), to get a high score you should purposefully miss all of the shots with petpets with light weights. The more petpets you shoot into the bucket that weigh more, the better your odds are of getting a high score.

Petpet Cannonball

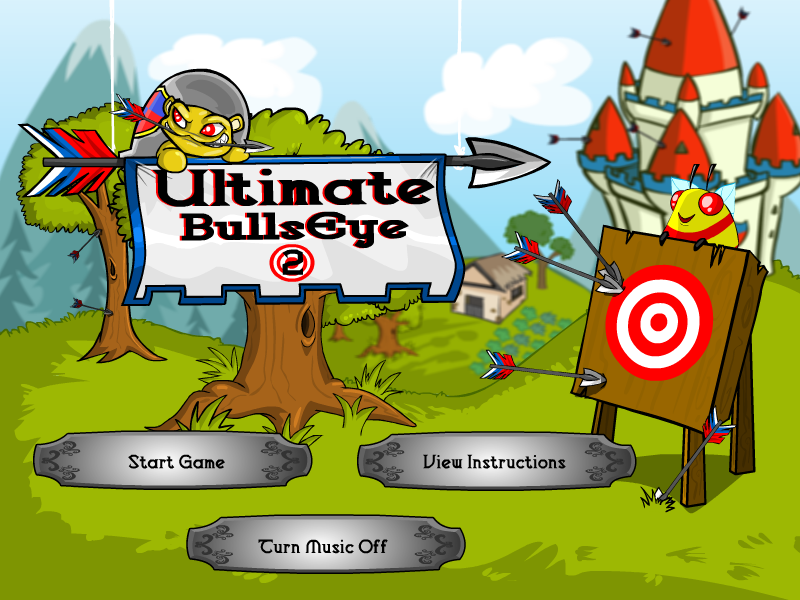
Neopets Ultimate Bullseye II

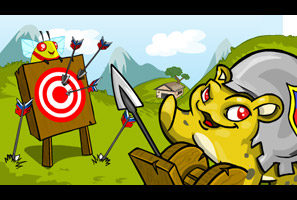
Ultimate Bullseye II follows on from the popular Ultimate Bullseye. The story is based on the infamous Turtum and his ballista, which is used to shoot at targets on the game. In Ultimate Bullseye II, you have just ten shots to get the highest score possible.

Ultimate Bullseye II Controls

In this game, you use three keys – the up key, the down key, and the space bar. The up key is used to direct the arrow up and the down key directs the arrow down. Your aim is to focus the arrow on the target and to hit it. The space bar is used to shoot at the target; holding it down will boost the power of the ballista.

The amount of power you have can be measured using the bullseye picture in the lower left side of the game, labelled ‘Power’. It is shown in yellow; the more yellow that is showing, the more power you have for shooting.

Points are assigned depending on where you shoot on the board:

  • If you miss the board or you only hit the wood around the board, you get 0 points.
  • If you hit the outside red ring, you get one point.
  • If you hit the next white ring in from this, you get two points.
  • If you hit the middle red ring, you get three points.
  • Hitting the white ring around the bullseye gets you 5 points.
  • Finally, the bullseye will get you 10 points.

The ballista can be adjusted by moving the up arrow and down arrow keys appropriately to aim at the bullseye. Once you believe you’re targeted at the right position, hold down the space bar key. The more you hold it down, the further you build up the power of the ballista. You will need to judge this appropriately depending on how near or far the target is. Once you think you’ve held down the space bar for the appropriate length of time, let go of the space bar to release the arrow!

Neopets Ultimate Bullseye II

Ultimate Bullseye II Game Play

In every game of Ultimate Bullseye II, you have ten shots. Within this time, you have to achieve as high a score as possible.

The best way to do this, in terms of aiming the ballista, is to aim slightly higher above the bullseye on the board. By aiming higher, you will be more likely to hit the target.

Once you’ve determined the angle of the shot, it’s time for the harder part: figuring out how much power you need in order to hit the target! Deciding how much power you’re going to use depends on the distance you are from the target. The further you are from the board, the more power you will need in order to hit it (i.e. the longer you’ll need to hold down the space bar). However, don’t hold it down for too long! You can easily miss your target from estimating this wrongly. It will take a lot of practice in order to estimate this correctly. For the most part, unless your ballista is very far from the target, you won’t need to hold down the space bar for more than half of the power meter.

If you hit the bullseye at any point, you will be awarded not only the 10 points, but also a power-up. If your final shot of the game hits the bullseye, you will be awarded an additional three shots (for the first time only).

Neopets Ultimate Bullseye 2

Power-ups

There are a number of power ups you can use to improve your game play and to improve your overall score.

  • The first type of power up is the bouncing bull. This power up will make the target decrease and increase in size over and over again. This can work very well, as it means you have a chance of hitting the bullseye when it’s increased in size. If you hit the rings whilst this happens, you will get a power up.

  • The second type of power up is the fire hoop. This creates a hoop of fire between the ballista and the target board. If you manage to shoot your arrow through this hoop, and successfully hit the board, you’ll get double the points for whatever section you’ve landed your arrow on. For example, the bullseye would be 10 x 2.

  • The third type is the moving target. With this challenge, the board will move right and left, meaning it is difficult to hit the board. Once you’ve mastered this, you’ll get a power up from this.

  • The fourth type is the three shots power up. On this one, when you shoot from the ballista, you’ll have three arrows leave the ballista at once, rather than just one. Although the first and third arrow will hit different places, the one in the middle will hit the target just the way it would if it was the only arrow being shot. This bonus can help to hit other obstacles during the game, such as balloons or hoops.

  • The inverted target will reverse the number of points that each section of the board is worth. For example, the wood around the target is now equivalent to 10 points, instead of 0 points. The bullseye is also worth 0 points now, instead of 10 points. The inside rings are also all inverted as well. This power up is useful because it means that you can aim at a much larger target (the wood), and be more likely to achieve a high amounts of points.

Ultimate Bullseye II Bonus Points

Ultimate Bullseye 2
In Ultimate Bullseye II, as you progress through the game, you’ll quickly find that there are more things that can be hit than just the board! There are three random events that can happen: the red balloon (or the Meridell Balloon), the yellow balloon (or the King Hagan balloon) and the Punchbag Bob. These can happen at different times, or can even on rare occasion happen all at once.

If you hit the red balloon, but not the target, you will get just 5 points. If you hit the red balloon as well as the target, you will win 30 points, added onto whatever amount of points you have won on the board (e.g. if you hit the red ball and the bullseye, you’ll get 30 + 10 = 40). This means that if you hit the balloon as well as the target, you could get anywhere from 30 – 40 points depending on where the arrow lands.

If you hit the yellow balloon with King Hagan on it, you will get 10 points if you hit the balloon but not the target. However, if you manage to hit the balloon plus the target, you will be awarded 35 points – and again, you’ll also win the amount of points for whatever section of the target you land on. This means you can win anywhere between 35 – 45 points if you hit both the balloon and somewhere on the board.

If you’re lucky enough to get both balloons at the same time, and manage to hit them both whilst your arrow lands on the target (rare, but possible!) you could get anywhere from 65 to 75 points just from this alone.

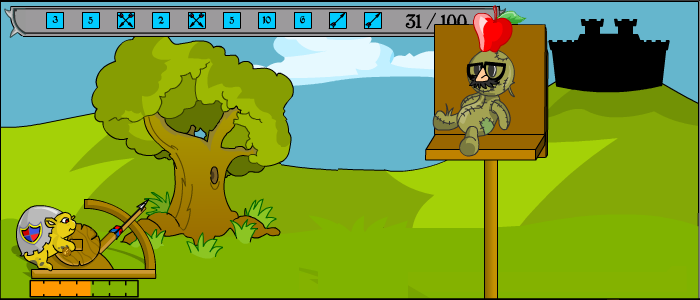
If you hit Punchbag Bob when he appears and replaces the target, you will get only 5 points. The best place to hit is the apple on his head. If you hit this, you’ll win 20 points. So it’s best to try and aim at the apple first if you can, but remember that even hitting Punchbag Bob will get points too. Whilst Punchbag Bob is in play, you can’t use any of your power ups – they will return to your inventory if you try to use them whilst he is on the screen.

Even more lucky, but very rare, is getting both balloons as well as the apple on Punchbag Bob’s head – 85 points for all of this together!

Ultimate Bullseye II Neopets Ultimate Bullseye II Cheats

This section will look at some of the cheat codes you can use on Ultimate Bullseye II, as well as some cheat tips that will help you get through the game.

  • While you are in play during the game, type in ‘catapult’. If you type this, you will be awarded a powerup that is generated randomly. You can only type this code in once per game, so use it wisely!
  • Remember that you don’t have to use the powerup that you receive – if you’re not a fan of a particular powerup or if you don’t think it will benefit your overall score, then you don’t have to use it. This is important!
  • This particularly applies for the Moving Target and the Bouncing Bull power ups, due to them moving side to side which makes them difficult to hit. However, if you think you have a chance at hitting any of the rings, then definitely go for using the power up and chancing the shot – because if you do manage to hit the target in anyway, you can get a second, perhaps better, power up. Keep this in mind when you’re deciding whether to sacrificing your Bouncing Bull or Moving Target power up.
  • The Fire Hoop power up is a particularly useful power up for achieving the avatar. The combination of using fire hoops as well as shooting at bonus balloons is your best opportunity at casually getting the avatar.
  • The use of the Three Shots power up is fantastic to use when there’s a balloon or even two balloons in play, as you’ll have a better chance of hitting the balloon along with the target in the same shot. However, it’s difficult to estimate when the balloon will appear and is down to luck whether this happens at once!
  • When you use the Moving Target power up, you will notice that the power meter grows faster than normal. Therefore, be careful on how much power you’re using when this power up is in play. You may also notice the power meter growing quickly when using a lot of power ups, or when the balloons are on screen.
  • If you use the Inverted Target power up at the same time as the Three Shots power up on your final shot of the game, you’ll have a much better chance at achieving the three extra shots available on the final shot, and therefore at extending your game play!
  • Another tip for the end of the game is to focus on at least getting the inverted bullseye power up for the end. In order to do this, you can keep resetting your game and using the catapult cheat code at the beginning until you have an inverted bullseye power up stored away from the very beginning of the game. This means you’ll definitely have a strong chance at getting those important three extra shots at the end of the game.
  • If you get the Three Shots power up, it is best to fire at a higher angle than normal in order to get the best chance of hitting the board.
  • Depending on your style of game play, you may find it easier to keep the ballista exactly in the same position, and to only move it if there are balloons involved in the game to shoot at.
  • Try to always hit balloons as well as the target, because this will get you the largest amount of points you can score.
  • Keep practicing in order to master this game – it won’t take long to become well adjusted at figuring out how to hit the bullseye and the target board, as well as how to use the amount of powerups involved. It will take several times as well as likely several days in order to get adjusted to the controls and the method.
  • The best way to guarantee a good score from the beginning is not to move the catapult at all and to aim at shooting approximately half power. This should have the strongest chance of hitting the targets on the screen. Once you’ve got the hang of this, decrease or increase your power accordingly based on where on the screen the target is.
  • When there are balloons on screen, use the up arrow carefully, tapping it about 2 to 5 times based on how high or low the balloon is. Keep your power at around half of the meter. If you’re not sure, commonly the best way of hitting both the balloon and the target at the same time is to tape the up arrow key twice to hit the red balloons, or four times to hit the yellow balloons, whilst generally keeping the power meter mid way.
  • If you use one of the power ups that change the size, or one of the power ups that move on the screen, and you hit the target ANYWHERE (except the wood), you’ll get an extra power up. Keep this in mind as it will get you through the game, no matter what power up you’re using!

Ultimate Bullseye II Avatars and Trophies

In order to get the avatar, you need to score at least 100 points. With the tips and cheats above, you’ll be sure to get this score quite easily, given some patience and practice!

Sutek’s Tomb

Sutek’s Tomb is a game where you must swap two adjacent tiles at a time by clicking on them. You can get points by lining up three, four or five tiles in a row at the same time, as well as bonus points for arranging combinations. Sutek’s Tomb is a slow-paced game where it is easy to make a lot of neopoints quickly if done right.

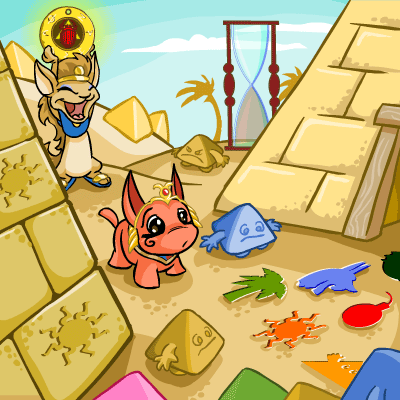
Sutek’s Tomb is based on the story of an ancient Geb named Sutek, who was stronger than any other Geb, and acknowledged for his fitness and wisdom. After he died, a tomb was built (referred to as a Gebmid) which was the same size as him. Sutek was the first ancient Geb to have a Gebmid made for him, although there are many in the Lost Desert now. In order to prevent anyone obtaining Sutek’s riches and treasures, a lock was placed on the tomb. Patterns were decorated on the door, and anyone who could discover the pattern for opening the tomb would win his treasures.
Sutek's Tomb

Sutek’s Tomb How to Play

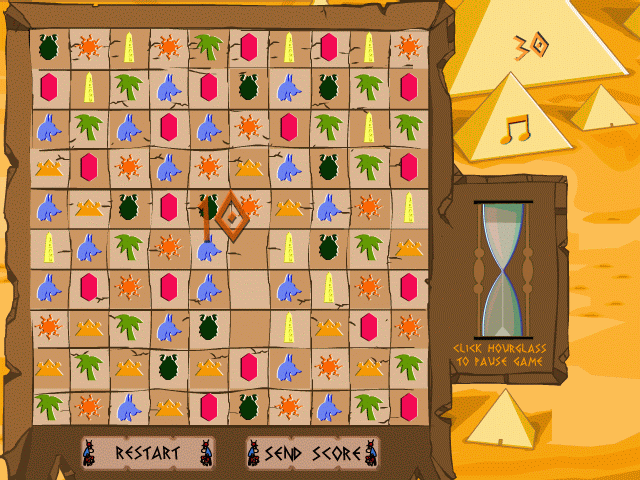
The goal of the game is to switch around blocks two at a time, in order to arrange patterns of the same symbol. The length of the rows can be three, four or five long, with three bringing in the least points and five bringing in the most. The amount of points you can achieve from these combos is based on which mode you’re in.

The controls for this game are very simple! Switch around the blocks by clicking on one of the blocks, and then clicking on the one you want to change it with.

In order for the switch to be successful, they must firstly be adjacent i.e. next to each other. Secondly they must lead to a final row that has three, four or five of the same hieroglyphic/type of block; if not, they will change back to their original places straight away.

Once a combo of three or more has been made, the blocks lined up will disappear. New blocks will fall down from overhead in order to replace the gap.
Sutek's Tomb Neopets

Sutek’s Tomb Game Play

Easy Mode

In the easy mode, you will get the following points for each combination that is formed:

  • Three blocks will give you 3 points.
  • Four blocks will give you 9 points.
  • Five blocks will give you 21 points.

It’s easy to see that lining up more blocks when possible, particularly five, will give you a strong advantage in terms of total points.

In easy mode, there are also five different types of block:

  • Geb
  • Crystal
  • Palm tree
  • Sun
  • Desert
  • Head (of a Desert Blumaroo)

The grid size is 8 x 8, which makes 64 blocks on the screen at any one time.

Hard Mode

In this mode, you get the following number of points for the following line ups:

  • Three blocks will give you 10 points.
  • Four blocks will give you 30 points.
  • Five blocks will give you 70 points.

On this mode there are two extra types of symbol:

  • Scarab
  • Coltzan’s Shrine

This means that there are a total of 7 types of symbols available in hard mode.

The size of the game in this mode is 10 x 10, meaning there is 100 blocks on the screen at a time.

Sutek Tomb

Zen Mode

In Zen Mode, there is no time limit to any level. However, no matter what combo type you make (even a bonus combo), you will only ever get one point.

There are 7 types of symbols (all of those that are found in Hard Mode). The grid is also 10 x 10, like in Hard Mode, with 100 blocks on the screen.

On both the easy mode and the hard mode, the time limit is one minute. Every time that points are gained from a 4 or 5 combo, a small number of seconds can be gained back onto the total time. Therefore, if you play quickly, you can keep playing for a very long time – as long as you don’t ever lose time by looking for the next combination.

Sutek’s Tomb Types of Special Symbols

There are seven types of symbol, as discussed above. Alongside this, there are another five types of symbols that can be found on the blocks. These are as follows:

  • Bomb
  • Hand-painted scarab
  • Lucky coin
  • ‘Good luck’ ankh
  • Face of the Phantom Orange Shirt Guy

Bomb  

The bomb will blow up the entire column above if the symbol falls for more than a single block’s space. Depending on how far the bomb is down the column, points will be won accordingly.

If a bomb reaches the bottom of the screen, it will disappear, but will give you 5 points automatically once it disappears.

Bombs can be lined up with other bombs, just like the other symbols, and will give points accordingly for three or more of them in a line.

Lucky Coin   

The lucky coin is a symbol that can be matched to any other symbol in order to make a combo. For example, it can be joined with the Head, the Sun, the Desert etc. in three, four or five combos. They are therefore the wild card in the game, which can be incredibly useful. These are great for making the larger combos, particularly five in a row. They are also best saved for later on when your time is running out or you’re in trouble.
Hand-Painted Scarab

The hand-painted scarab are another type of bomb symbol. However, these don’t explode in the same way the Bomb does. They only explode once they come to the bottom of the grid. Once this happens, the whole column is blown up. This will automatically give you 100 points to your score.

Good Luck Ankh

The Good Luck Ankh are also another type of Bomb. They work in a similar way to the Hand Painted Scarab in that they explode once they reach the bottom of the screen. However, they not only explode the column above, but they also explode the row. This awards you 200 points to your overall score.

The Phantom Orange Shirt Guy’s Face

This symbol explodes when it reaches the bottom row, like the Hand painted Scarab and the Good Luck Ankh. The Phantom Orange Shirt Guy’s Face explodes the entire grid of blocks, as part of the Magic Face Combo. This will award an entire 500 points to your score.

Frequency of Symbols

The Phantom Orange Shirt Guy’s Face, the Hand Painted Scarabs and the Good Luck Ankh do not appear very often at all in the game; they are very rare. They can give a very large boost to your overall score. However, don’t get distracted when they appear! If you don’t focus on the normal symbols and the overall combinations, you may run out of time.
Multiple Combinations

Multiple Combinations take place if a combination is made during the course of another combination disappearing off the screen i.e. it happens without the tiles being changed around, and just as a result of tiles falling down the screen after a combination being awarded. In the case of multiple combinations, you are given twice the number of points that you would from a normal combination. This can lead to a chain reaction in that you can get multiple combinations that lead to another multiple combination (three times the number of points as usual), and so on.

A good tip is to learn to see where multiple combinations may happen, and therefore create chain reactions on purpose. This comes more easily after a lot of time spent on the game. For example, if you explode the bombs at the bottom, symbols are likely to fall down and create multiple combinations.

Note that multiple combinations do not happen in zen mode however; zen mode is a very different way of playing than easy mode or hard mode.

Running out of Moves

If you run out of moves, don’t worry too much as the board will regenerate and all the pieces will be reshuffled, creating new ways for combinations being made. However, if you reshuffle, any special icons that are on the screen will disappear. This also leads to your current score being lost in Zen mode. So keep an eye on the reshuffles so you don’t lose your icons.
Neopets Suteks Tomb

Neopets Sutek’s Tomb Cheats

– The game can be paused at any point. Just click on the hourglass that is on the right hand side of the screen. However, you can only have three pauses in a game.

– In order to see the game’s suggestion for the next move, type in the word ‘pyramibread’. This can be done as many times as you like.

– If you find that your time is running low and you need more, type ‘plzsutekcanihavemoretime’. This will give you 30 more seconds and can be played at any point in the game. However, it can only be played once. A great way to do this is to pause the game and then to type almost the full code e.g. ‘plzsutekcanihavemoretim’ and then to add the extra ‘e’ once you’ve unpaused the game. This means you don’t have to lose any time at all by typing the game.

– The same rule applies for the word ‘scarabeus’. You can again only use this once a game.

– Either of these cheats can be typed at the start of the game. Then all you need to do is add the last letter when you want to use the code.

– It’s very important to keep your eye on the amount of icons and combinations left if you have special icons on the board. This is because every special icon will be removed once the board reshuffles.

– When the board reshuffles, a little tip is that the timer has a slight pause before the game play continues. This means you have a slight break to look over the board and see how it is laid out before continuing, meaning you can locate possible combinations before starting to form them.

– You’ll realise when you’re playing that a tile can be used in not just one combo, but can also be used in two. So if you have a ‘L’ shape, for example, with five tiles lined up in total, this will be counted as two sets of three. In hard mode, this means you’ll get 20 points (10 x 2).

– You should concentrate on making matches fast, even if they are only 3 at a time. It’s important to stay in the game, rather than spend time thinking about combinations.

– You should also focus on making horizontal matches where possible, rather than vertical, as this leads to more changes on the board (as more columns fall) and therefore more potential for points.

– If you are very close to making a new high score or getting a score for the avatar (2000 points) and starting to get nervous, a great tip is to screenshot the game (using the Print Screen button on the keyboard) and then quickly pause the game. Check the screenshot in something like Paint, and you can see where the best combinations are, and you might even find some 4 or 5 tile combinations to get extra points. As said, because this takes a lot of time, this is only really useful if you’re at a high score and want to keep up your current game, or perhaps if you’re at a part where you want to analyse a screen and look for combinations (or lack of combinations) when you have a special icon up. And remember – you only get three times to pause.

– It helps to make combos near the bottom of the board, as more symbols will fall down the columns meaning more opportunity for new combinations.

-It is best to focus on playing hard mode, rather than easy. This way you can get the most points through special symbols and combinations.

– If you ever happen to get the symbol of the Phantom Orange Shirt Guy, type ‘note’ and the symbol will drop down to the bottom of the screen, earning you the 500 points.

– A little easter egg is to go into the instructions, where you will see four pyramids. There are three small ones and one large one. If you press on the door of the small pyramid that is closest to the mute button, Oliver will pop up again.

– Sometimes pyramibread is too slow to type in. Another way of getting it to show up, depending on your keyboard, is to press the mute button or the home button. This will show the next move in the same way as pyramibread. You can score huge amounts of points in the game from this cheat.

Sutek’s Tomb Avatar and Trophy

Sutek's Tomb Avatar

In order to get the avatar, you must get 2000 points.

Neopets Snow Wars II

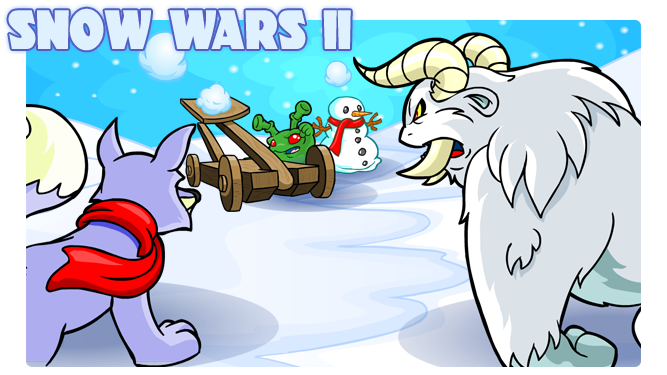
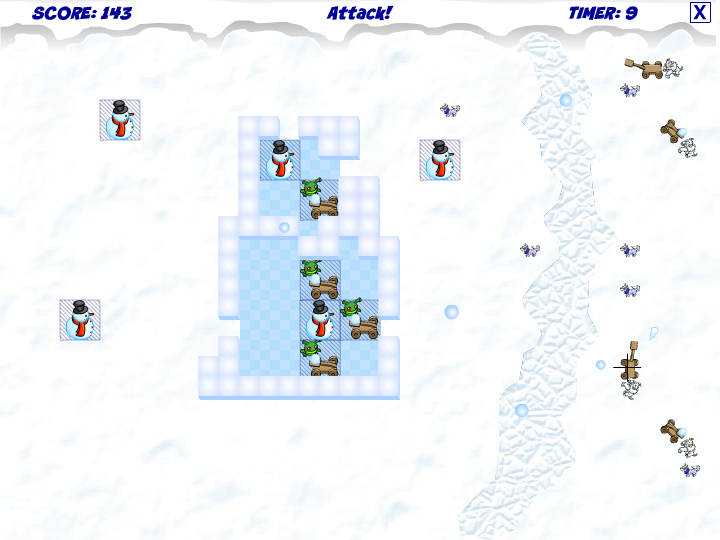
Snow Wars II is a game that involves careful and precise use of the mouse! Speed it important in this game, like in many others, but firstly  you’ll need to get accustomed to understanding how your mouse works in order to fully master Snow Wars II. As well as gaining precise mouse accuracy, you’ll need to rely on strategy in order to get to the end. This flash game version is the follow up from the oldest Snow Wars.

In this game, you’ll be playing as a grundo who’s protecting his snow men from approaching enemies, including Lupes and Snow Beasts. To do this, you need to rely on several tactics.

Neopets Snow Wars II

Snow Wars II Instructions and Controls

icon_55-6452294To start with, in Snow Wars II you’ll  need to protect the snowmen from the invading Lupes and Snow Beasts that want to tear them down. To do this, your best tactic is to place large blocks of ice in the best places possible to stop them. In order to move the blocks of ice, you can use the space bar in order to rotate them into a variety of different arrangements, which we’ll cover through this guide. Therefore, be sure to keep your finger on the keyboard space bar throughout the course of the game!

Defending the snow men with ice blocks is just the first stage! Once you’ve laid down the blocks in the most suitable arrangement, you can start to fire huge snowballs at the Lupes and Snow Beasts. This is where some offensive strategy comes into play: the Lupes don’t have any way of attacking you back, but the Snow Beasts have catapults and can fight back! Therefore, once you’ve built your snow blocks around you, start targeting the Snow Beasts first before aiming at the Lupes.

The game rotates through three different stages. This is measured using a timer in the top right hand of the game.

The first stage is called the ‘Build Walls’ stage. This is where you concentrate on building your fortresses for your snowmen and on making sure your defenses are strong.

The second stage is called the ‘Launch Catapults’ stage. In this stage, you put down a catapult which is used to fire shots at the approaching enemies. This has to be considered strategically, due to the fact it will only fire one snowball at a time.

The third stage is the ‘Attack’ stage. Here you’ll actually get to use your catapault on your enemies! The controls for this are simple; just hover your mouse over your enemy’s location and click to fire at them. You’ll also need some strategy here, as some enemies will be closer than others and this affects how your shot lands and whether your fortress will be attacked.

For every Lupe you hit, you get 5 points. However, you lose 1 point for every block of ice that the Snow Beast hit! When a fortress has been completely built, the amount of points you get is equivalent to double the area size you surrounded. For example, if 10 blocks of area are surrounded and are blue, then you get 20 points.

Snow Wars 2

Snow Wars 2 Blocks

The blocks of ice used to protect your snowmen can have a number of varied shapes, which can stretch from one square to five squares. These types are as follows:

1 square – This is the most simple kind of ice block you can place, and are very important to use in the last levels.

2 squares (placed next to each other) – These are great to plug up the little gaps that can only be filled by the single square or by two squares.

Three squares (in a row) – These are good for filling up larger types of gaps.

Three squares (placed in an ‘L’ shape, for example with two next to each other and one facing left or right out of it) – Brilliant when you’re making corners for your snow fortress.

Four squares (three squares lined in a row next to each other, with one coming out of the middle square like a small ‘T’) – Used in certain special arrangements, as you’ll find when you play

Five squares (three squares in a row as above, but with two coming out of the middle on opposite sides like a ‘+’) – These are particularly useful in the later levels and are great at stopping approaching enemies.

Five squares (three squares in a row as above, but one above the far left and another below the far right, sort of a ‘S’ or ‘Z’ shape) – This is great for a range of tactics throughout the game.

Snow Wars II Strategy

Now you know the controls and types of blocks, let’s get on with playing and getting the best score possible!

At the start, the ‘Build Walls’ phase, the best strategy is to try and build fortresses around each of your five snowmen, making it easy to place catapults effectively. You will have shapes you can rotate, which can be done by using the space key. To put down the ice block in a designated spot, just click on it. If you hear a buzzer noise, that’s because you’ve tried to put a block onto another block, which is not permitted.

Keep aware that the fortress must completely be around at least one of the snowmen, with no spaces in between any of blocks. If there’s spaces, the snowman will not be effectively defended – which means you cannot put down your catapults. The game makes it easy to detect when your walls are finished, because the section within the confines of the walls turns blue once it is completed. This may take some getting used to, particularly in terms of mouse accuracy, but once you’ve practiced this a few times it becomes easier!

You can even build a fortress around an area with no snowmen in it. This will still turn blue and be considered a completed snow fortress.

After you’ve placed down your snow blocks to protect your snowmen, it’s time to place your catapults! This is a really important phase which needs thinking about strategically just like the ice blocks. For example, if your wall is against or close to the river or to the game screen’s boundaries, you should place your catapult so it’s not right against the walls. This way, you have space to put down a big quantity of ice blocks to fill in a gap in the wall if you need to. It’s important to remember here the earlier tip: that you only get one fire from a catapult at a time. You cannot fire again until the shot you’ve fired has hit a target and disappeared off screen.

You’ll now be on the ‘Attack’ stage. Here, you should aim at getting rid of the Snow Beasts before the Lupes, as they are the ones who are actively trying to break down the walls of your snow fortresses. Afterwards, you aim for the Lupes, as they can get into any chinks in your defence and get to your snowmen.

At the very beginning, in the first Attack stage, two Snow Beasts and three Lupes will appear. In each level, the numbers increase. The Snow Beasts will increase by one per level, until they get to five Snow Beasts per stage. The Lupes will also increase by one, and will stop at six Lupes.

Once you’ve got this nailed down, you can focus on doing the same over and over again; building your fortresses, placing catapults, attacking enemies, and then rebuilding again.

Neopets Snow Wars II Cheats

  • If you’re in the Attack section of the game and you notice a chink in your fortresses of one or two blocks that you think would be hard to fill with snow blocks, you can actually use your catapults in order to attack the spot next to it. This way, you can grow the amount of space that you have to rebuild your defenses.
  • Place your catapults near to the enemy to reduce the amount of time waiting for a shot to hit. Otherwise, you can be waiting for a long time for your snow shot to hit a Snow Beast, while they’re attacking you.
  • Once the first stage is over, a good tip is to rebuild any dents and damage to your fortress, and then build extra lines in order to make it bigger and to reinforce your defense. When a fortress has been completely built, the amount of points you get is equivalent to double the area size you surrounded. For example, if 10 blocks of area are surrounded and are blue, then you get 20 points. For example, if your first snow fortress is 10×10, if you build a thin line you could extend it to 15×10 and so on. Even if you don’t finish it in this round, you can connect it up with more walls in the next round. Remember, your points are based on having large fortresses – the more area within your fortress, the higher you can score, and the more catapults that can be put down.
  • In the first stage, you can click your mouse button very fast whilst moving your pointer in a direction, in order to make a large, albeit slightly strangely shaped, fortress. This means you can quickly build a big fortress at the start of the game and grow the size of it from there. From this, you can then rebuild any broken areas as and when they appear – be sure to do this at the end of your building stage so that all the holes are filled up! This is not possible later on in the game due to the different types of block and shapes and how they come out, which need more focus to configure properly.
  • Once you get more used to the basics of the game, you can start to take advantage of the orders in which the catapaults fire. The first catapults you put down are the first ones that fire when the Attack stage begins. For example, you can place 3 catapults in the middle, 3 catapults at the bottom, and 3 catapults at the top of screen. This way, the shots start in the middle, go to the bottom, then round back to the top, shortening the amount of time for each shot to travel and meaning more shots can be fired during the Attack phase.
  • The Lupes will usually walk straight forward. This means it may be beneficial to shoot in the path of the Lupe so that the shot lands on them once they move. Sometimes they may move from side to side, which means it may be best to shoot on one side or the other of the Lupe.
  • The entire game is based on strategy and on experience of what happens at certain points. At times, it will be necessary to focus on making smaller forts, rather than larger. Often, it may be necessary to let catapults be damaged to destroyed in order to get to the next stage.

Neopets Snow Wars

Neopets Neverending Boss Battle

Neopets Neverending Boss Battle is a game where you control a small spaceship, trying to destroy Dr. Sloth’s enormous spaceship by shooting it. True to its name, Neverending Boss Battle never ends unless you lose all of your lives. If you can earn a high score, you can receive this handy trophy.

Neverending Boss Battle

Neverending Boss Battle Gameplay

Basics

You start the game with three lives, and with each life you start with 100% armour integrity. Each time you get hit by one of your enemy’s attacks, you lose 20%. Once you get down to 0%, you move on to your next life (or lose the game, if you were on your last life).

You can move your ship in several ways:

  • To move up, press the Up arrow key or the 8 key on your number pad.
  • To move down, press the Down arrow key or the 2 key on your number pad.
  • To move left, press the Left arrow key or the 4 key on your number pad.
  • To move right, press the Right arrow key or the 6 key on your number pad.
  • Press the space bar or the X key to fire.
  • Press the Z key or the 7 key on your number pad to strafe left (means you move left, but you stay facing the same direction).
  • Press the C key or the 9 key on your number pad to strafe right.

Right, now that you know how to move and attack, we need to look at the more complex stuff.

Power-ups

Every now and then while you’re playing, a power-up will appear and begin to move around the screen. There are six different power-ups, and they only last for a few seconds each – and you can only have one at a time. If you grab a power-up while another one is active, the new one will replace the old one.

Here, I’m going to place them in order from least helpful to most helpful.

neverendingbb_speed-1596053This power-up gives you a temporary speed boost. I don’t think it’s very helpful, because you’re already pretty fast, and there are much more helpful power-ups to get.

Neverending Boss BattleThis power-up allows you to shoot faster while it is active. I don’t like this one because if you’re trying to get a high score, your focus should be to stay alive, and to get points only when you have a good opportunity.

neverendingbb_split-3534974This power-up lets you fire two lasers at a time instead of one. I used to think this was a great one, but like I said earlier, you should be trying to stay alive, not get points quickly.

neverendingbb_warp-4235646This power-up teleports you to a random spot on the screen when one of Sloth’s spaceship’s attacks hits you. While it is very helpful – it’s basically immunity to damage – there are two power-ups that I like better.

neverendingbb_rebound-3747307With this power-up, any of your attacks that don’t hit the spaceship will rebound off the walls of the screen, going back toward your enemy. I really like this one, because you can be facing any which way, and your attacks are likely to hit the spaceship eventually. You can be evading the attacks and still get points.

neverendingbb_shield-1521140But this is the best power-up of them all. It gives you a complete shield for a few seconds. While it is active, any attack that hits you will just disappear, and your armour integrity will stay the same. You can use this time to shoot at the enemy and get at least a hundred points. It’s by far the best power-up to get. (It’s also the power-up you start off with when you lose your first and second lives.)

Sloth’s Attacks

Sloth has five different attacks that he will use to try to kill you. Here, they will be listed from least dangerous to most dangerous, based on experience.

neverendingbb_mainlaser-4905498The least dangerous is Sloth’s death laser. If it touches you, you lose a life, no matter how much armour you had (if you have a shield, though, you’ll be safe). This might make you think it’s more dangerous than all of the others, but this is the easiest to avoid. Just make sure that the ship is never facing you directly, and the laser won’t pose a threat.

neverendingbb_turretlaser-5001335Another very deadly weapon is the turret near the middle of the ship; when it starts to charge, it charges for a few seconds and then fires a laser for a couple more seconds. However, because you’re constantly moving, you won’t be in its range most of the time.

neverendingbb_yellowburst-4785724Sloth will sometimes shoot bursts of small lasers. They travel in a straight line from the front of the ship, and two rows of them are always fired at the same time. However, there’s a space in between them that can keep you safe (although you should be trying not to let the ship face you directly, remember?).

neverendingbb_blueburst-2670291Sloth’s most common weapon is his random blue shots. There’s no rhyme or reason to when they shoot or where they’ll go, so you just need to be on the lookout for them all the time.

neverendingbb_homingmissle-9135014And the most dangerous weapon you’ll face is the homing missle. They always fire two at a time, and they’ll be aiming for you. You need to outrun them, while still avoiding the other attacks on the screen, until they selfdestruct.

Neverending Boss Battle Strategy

Basically, what you’ll want to do is be flying circles around the ship constantly. Whenever Sloth is slowly turning toward you, you can take the opportunity to shoot at him, but once he’s close to facing you, resume flight. Don’t be greedy with your shooting, always be on the lookout for danger. Whenever you see a shield, be sure to get it (but don’t put yourself in danger to get it); spend the next few seconds racking up points, then get away from Sloth before the shield disappears.

Neopets Neverending Boss Battle Cheats

-Type ‘foreverandeverandever’ while playing to get an extra life… but make sure you don’t lose a life while typing it, it’s pretty long.