Neopets Toybox Escape

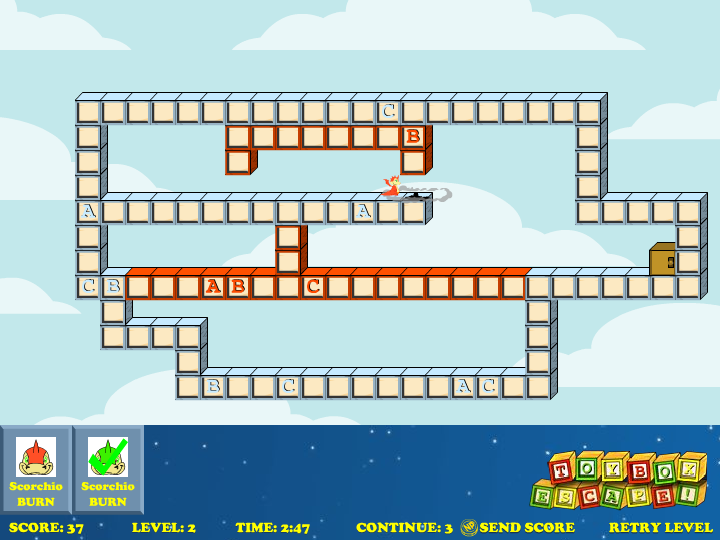
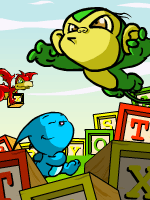
Neopets Toybox Escape is a fairly easy game where the evil Dr. Sloth has tossed his minions in a toybox so that they will never be able to escape. While playing this game, your principal objective will be to control the programming of the robotic Neopets Sloth, created by the evil himself, to let his minions escape without any troube. You will have to use the Neopet’s special skill to be able to help these minions escape the Sloth’s toybox. This game will rely mostly about special abilities.

Neopets Toybox Escape

Toybox Escape Gameplay

During the game, each level will be in a room in which you will have to navigate to be successfully able to get out using the Neopets that are actually trapped in the level. Yup, you will be relying on them and on their special abilities. Each single Neopets will have one special ability that is not the same as the others. In order to successfully use it, you will have to click the picture that is located at the bottom on the screen. Doing that will let you use it without any trouble. In addition, the game is a little harder than it should be because some obstacles such as spikes or lava have been added to the game. For this reason, you will have to dodge them every time they will be on your path. A bonus coin can also be found on the game, on each different level, and it will grant you extra points simply for grabbing it. Your main goal, in each different level will be to move each Neopet that will be seen from the exit door, making them escape the evil. Of course, it wouldn’t be fair if you saved few Neopets and a few others remained there, which is why if you fail to even save one of the trapped ones, the level will have to be restarted. At first, you will find that it is challenging, but you will quickly find it easy after that. A total of three continues are given to you, so you will have to be careful when using these. Also, there is a level code that will be awarded to you as a prize, in the game, every time you finish five total levels. These levels will be able to be entered on the start page at any given time, meaning you can perfect games without having to restart the game from level 1 every time you are looking to play.

Toybox Escape

Neopets Toybox Escape Special Abilities (Bonuses)

Each special ability is different and will be awarded depending of the species of the Neopets that can be found trapped in Sloth’s toybox. There are six different ones. 1) The Uni Ramp, 2) Kacheeck Push, 3) Mynci Climb, 4) Kougra Dig, 5) Scorchio Burn and 6) Shoyru jump.

The first one, the Uni Ramp will make a uni turn into a ramp, allowing other Neopets that are near him to get to higher area, giving them a slight advantage.

The second one, the Kacheeck Push, as its name says, is when a Kacheeck will push blocks so that he can get some free space in the level, making things easier for you.

The third ability, the Mynci Clim is when a Mynci climbs a vertical wall so that it reaches high-up bonus coins.

The fourth ability, the Kougra Dig is when a Kougra digs through a specific part of the ground that is, most of the time orange or red, beneath it so that it reaches lower portions of the level.

The fifth ability, the Scorchio Burn is when a Scorchio breathe fire at certain walls, also of the orange or red color, so that it makes Neopets free from a blocked section of the level. This way, they will be free.

The last ability is the Shoyru Jump. It happens when a Shoyru crosses chasms in a specific level to get access to areas that are unreachable by the other species.

Neopets Toybox Escape Guide for Each level & Cheats

Each level will have a sequence of moves that you will have to take in order to successfully get the coin and exit the round in the fastest way possible. Sometimes, it is hard to do so and for this reason, the section below includes instructions for all the levels that you will face during the game. The guide below will tell you what you will exactly have to do to use the least possible amount of time to successfully finish the levels and get a super high score. If you manage to do what is described below correctly, you will even be awarded with a trophy.

First Level: So basically, during the first level you will be able to finish it within 20 seconds. Click on the green Mynci, then on the purple Mynci whenever it turns around so that you can successfully get the coin. After that, click on it again so that it falls off the ledge and you will be able to get it. Then, immediately exit.

Second Level: During the second level of the game, again, click the character you see, which is now the green Scorchio, then click the red Scorchio  whenever it turns around to get the coin, like in the last level. After that, click again to get the coin then proceed to the exit. On that level, contrary to the first one, you will be able to finish it with more or less 15 seconds.

Third Level: The third level will require a bit more attention. You will also be able to finish it within approximately 15 seconds. Click the yellow Kougra when it hits the orange block to get the coin, jump as soon as possible to the red one, then as soon as possible to the blue Kougra. This way, you will get the maximum amount of possible points.

Fourth Level: During the fourth level, you will be able to complete the level within 10 seconds, but which also means that you will have to act fast. Click on the red Shoyru quickly to jump onto the ledge. After that, just click another time before a little before the edge so that you will be able to jump on the chasm and get the coin. Waste no time, once you got the coin, click on the purple Shoyru to get onto the ledge then exit.

Fifth Level: For the fifth level, you will need approximately need 20 seconds to come over it. At first, click on the Uni and on the Kacheeck once the game starts. After that, click on the kougra after it turns around. Click on the Scorchio when it turns around and then at the Uni whenever the Scorchio is 4 blocks ahead of the Uni.

Sixth Level: This one will also need approximately 20 seconds to complete. In a fraction of second, when the round starts, click all the three Myncies, respectively the purple, green, then blue and then wait for each one to turn forward the final climb. At that time, click at them once again using the same order.

Seventh Level: This level can be done within approximately 10 seconds. Basically, whenever the round starts, click the three Kacheecks right away in order. So respectively the blue, green, then the yellow one. This round will require a bit more accuracy. In other words, if you are not careful and you click on the yellow Kacheeck right away, the block will land on the green one right away. Also, if you’re not enough careful, once again, and that you do not click on the green or blue Kacheeck quickly, there are chances that they will fall into the spikes below, causing you more harm than good.

Eighth Level: The eighth level is achievable within approximately 15 seconds. The first thing you will have to do is to click on the Uni and on the Scorchio quickly, then to wait the Shoyru to scale the Uni ramp. After that, proceed to taking aim for the ledge with the coin on it. This is not that easy and is not always achievable right away. A good tip for this is to hold down your mouse button until it hits the very edge, then erlease. Whenever you have a free second, click on the Uni again and you would have came over the round.

Ninth Level: This level will have a kind of a tricky combination. At the start of the level, click on the Kacheeck quickly, then wait until the Uni is walking to the left side and click on him as well. After that, click on the Scorchio to make him burn the block that is near the exit door. You will have to take into consideration that he will have to actually burn that block only after the Kougra has turned around. This way, it will allow the Scorchio to go to the exit while the Kougra climbs the ramp. Make sure to follow the steps mentioned, otherwise it will not work. Finally, when the Kougra climbs the ramp, release the Uni. Click twice on the Kougra when it is after the coin side of the screen.

Tenth Level: This level will require speed so get ready for that. If you’re speedy enough, it can be done within maximum 15 seconds. It does not matter which Kougra you will use on this one though. All you have to do, is to be fast, which also means thinking and acting fast. Whenever you pick a Kougra, stick with it to the end of the round, always. The other one will follow the path which is why one can be enough to control. The Kougra you will be watching is the one that will wind up on the final level before the exit door with the shortest path to travel the coin. Whenever it will hit the coin, click on it as quickly as possible. If you take time to do that, it will hit the spikes. This is why this round is based on speed. While you’re waiting it to reach the coin, you can click the other so that it can exit and successfully complete its task.

Eleventh Level: This level is actually one of the longest ones, and you will be able to complete it within approximately 35 seconds. As soon as the level starts, click on the Shoyru to make it jump over the block that is located on the top row. After that, click once again to jump over each bulk of spikes. To do that, don’t wait the last second. Click on the block that is before the spikes and you will be fine. After that, click on the Kougra the next time it will hit the red block on the ground, at this time the Shoyru will have reached the button for the spikes at that specific time. Click on it again (on the Shoyru) to make it jump to the red block once again. Click the Kougra another time when it is moving left, and when the Scorchio is also moving left at the same time. Next to that, click on the Shoyru as soon as possible to make it successfully jump over the newly formed chasm. You can click again to jump over the block and again for the last chasm. When this is done, click on it the last time to be awarded with the coin, then you will be able to finish the current round.

Twelfth Level: If the instructions for this particular level are followed accurately and precisely, it can be done within approximately 25 seconds. Start by clicking on the yellow Kacheeck when it starts going left in order to push the block off the ledge. After that, click on the Kougra to get both, itself and the Scorchio off the ledge so that you will be able to click the green Kacheeck when it is going right to push the last block. When this is done, click back on the Scorchio and then on the Kougra whenever it turns rightward. When this is completed, the round will also be successfully completed.

Thirteenth Level: The thirteenth level is achievable within roughly 30 seconds. First of all, start by clicking on the Kacheeck immediately so that you can push the green block. Then click on the Scorchio whenever it is turned left. This will let you get the coin in a quickly manner. After that, click on the Kacheek once again in order to push the green block and get it off the ledge it lands on. Finally, click on the Scorchio two times to burn through every red block and accomplish the current round.

Fourteenth Level: That level can be completed within less than 30 seconds. Start by clicking on all the three Neopets right away. The order does not really matter for this level. Whenever the Kacheeck falls to the right of the block, you will have to click it again. Click on it a third time whenever the block reaches the space to the right of the right-hand block of the ledge containing the coin. After that, you will click the nearest Mynci to climb the latest new wall. By clicking the Kacheeck a last time, you will be able to complete the level.

Fifteenth Level: This level will require a lot of speed from you when it will start. So when it does, instantly click on the Kacheeck. Do it in the fastest humanly possible way for your advantage. After that, click on the Kougra three times so that you will be able to bring it to the exit. Remember that when you click it for the third time, you will have to dig through the leftmost block on the ledge in order to make it turn off the spikes for the Scorchio, later. Click on the Kacheeck when it is on the last red ledge in order to get the coin. You will then have to make sure that its face is looking to the right when you will click, for the last time, the Kougra. Finally, click on the Scorchio so that it can leave with the exit and thus, ending your current level. 20 seconds will be more than enough to finish off that level.

Sixteenth Level: On that level, you will have a lot of things to do so be ready. There are four Kougras and a good tip will be to do one section of Kougras at a time. You can start with the red Kougra. For this one, dig one time then dig through the second block that is located on the next level. If you dig throught the first, third or on the fourth block you will get trapped. Avoid doing that at any cost. Once this is done, dig three more times. Now it is the green Kougras turn. Start by digging it through one of the left two blocks, then dig it again when it falls to the right. When this is done, dig on the second one that is near the last one to the right so that you will be successfully able to grab the coin. Then, once more in the orange region to get to the exit door. For now, you would have completed the first half of the game (and the easiest). The blue Kougra and the yellow ones are hard. For the first part, dig on the second from the right with the other Kougra as far away as you can, then dig on the C block again instantly on the block below it. Make sure to note that it is actually very important to be speedy for that one because you will only get one chance before you are able to hit the spikes. There is also only one right answer so there is no other possible way to do it. This level can be completed within 25 seconds if you follow the instructions carefully.

Seventeenth Level: After all what you’ve previously encountered, this level will make your life easier because it is much more simple than what you have seen before. First of all, start by having the Kougra to dig to get inside the open space you will see on the screen, then dig it two more time. Note that when you dig it two more times, it must be on the rightmost column of blocks, otherwise you will not be able to make the correct Neopets number to cross the button to disarm the spikes, thus resulting in your failure. When this is successfully done, get the Shoyru to jump over the block. If everyone are faced to the right, it will be easier but it is not always achievable from the first try. A maximum of 20 seconds will be needed for this level.

Eighteenth Level: When the level starts, click on the purple Mynci before you go and click on the green Scorchio and then, at last, click on the green Mynci. When this is done, go ahead and click on the red Scorchio when it has turned off the green spikes in order to make it grab the coin. When the coin has successfully been taken, click the green Mynci once again to turn off the spikes for the Scorchios to pass. Whenever it has been done, click on one Scorchio and the other will follow. This will mark the end of the level. This level can be done within less than 25 seconds.

Nineteenth Level: Possibly the longest level out there, start by clicking on the purple Shoyru many times in order to get it acriss the first row of blocks in a safe way. When this is done, click on any Shoyru to get it onto the double blocks two times, the second to get it to the row of coins. After that, click on the other Shoyru to get it onto the double blocks so that it can leave with the exit door. Remember to jump, on the coin row, then to let the Shoyru fall off the edge and continue toward the exit. This level can be done within 35 seconds.

Twentieth Level: Ah! The Final level. 35 seconds is the maximum amount of time you will require if you follow the last instructions carefully. Start off by clicking the Kougra two times to dig itself and the Scorchio through their ledge. When this is done, click on the Scorchio when it is facing left (it has to be facing left) to burn the passage through for itself, the Mynci, and the Kougra. After that, proceed to click on the Mynci to make it climb to the newly accessible ledge then click it again whenever it has reached the top. It will then turn off the spikes to make the coin reachable. When it is near the button, click on the Kacheeck. Finally, click on the Scorchio a last time when it is facing leftward. This will successfully result in game completion.

Toybox Codes

Whenever you complete five different levels, you will be awarded with a code to skip to the next one from the start page so that you will not have to complete it every time. And it will also take forever if you’re trying to get better at the game by training. If you’re trying to get a trophy or a super high score, never skip the first level or you’ll end up losing points. You will only be given a code upon successful completion of a level. Remember to keep the codes written on a piece of paper on somewhere saved on your computer to make sure that you do not lose them.
screenshot_fullsize_367_1_v1-2584076

Neopets Trouble at the National Neopian

Neopets Trouble at the National Neopian is a relatively easy game that is based mostly on speed. You are the guardian of National Neopian and you will have to get ahead any robbery of theft. Neopets Trouble at the National Neopian is not what you want to play when you are very sleepy at night, so it is better to start playing it, for example, to obtain a high score on the morning. Otherwise you will be slow that you will just not be in the game itself. Trouble at the National Neopian

Trouble at the National Neopian Gameplay & Controls

Neopets Trouble at the National Neopian contain six total doors that are made for the customers. Unfortunately, thieves will also be able to penetrate them to go inside the bank and that is what your objective is mostly pointed at: you will have to avoid any theft or robbery, and that by punishing the thieves and being really careful.

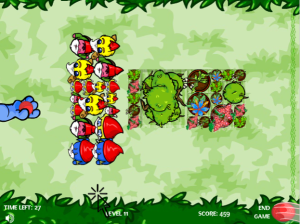
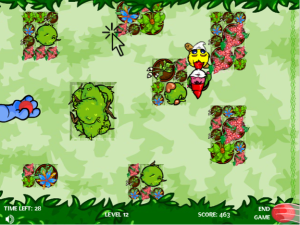
Each door has a key that you will be able to press in order to block the thieves for stealing money, from the bank. The keys are respectively, S, D, F, J, K, and L, which are the home keys. They are near each others and your hands are able to easily get to them. They are also really easy to memorize, so you will be able to find them without having to pay attention to your keyboard, giving you an extra boost during the game play. When customers will enter the National Neopian, they will be there to make a deposit. The money they will deposit will be quickly seen on the top of the screen. When thieves enter the door, they will be there to steal that money. You will be able and you will have to thwart them by pressing the key that is connected to the respective door they’re entering. Meaning if they are entering the first door, you will be pressing S, if they are entering the third door, you will be pressing F and so on. When you have successfully thwarted them, they will not be able to steal any money. However, if the thieves are successfully able to get in, they will steal half of the deposited money and also take one of your three lives. You do not want that, this is why you will have to thwart them. Of course, they will steal half of the money and the game will get boring if, for example, you reach 5,000 points and a thief is able to penetrate, because you will lose 2,500 points. Fortunately, this is not the case. Every time you will that the amount of on hand Neopoints is 100 NP or more, you will be able to press the spacebar so that you can transform your current money into a bar of gold. This bar of gold is immunized to thieves, thus meaning they will not be able to steal it. Make sure that you do not press the space bar randomly because you will be losing points if you start doing so. Below you will see a detailed description of the thieves you will be encountering during the game. Fortunately, there is not that many and most of them are evil-looking types so you will not be having a hard time memorizing them if you’re on of those people who doesn’t like “memorizing stuff”.
Trouble at the National Neopian Thieves

The first thief that you will encounter are the Meerca Brothers. The Meerca Brothers are Merouladen and Heermeedjet and they are a single thief. These evils always steal and were never “good” to the Neopian society. It is not important to know which is who but if you’re really interested to get this type of information, then Meerouladen is the Meerca that has a sock cap and Heermeedjet is the Meerca wearing googles. Again, you will not have to know them perfectly, your job will be to lock them before they reach the National Neopian center.

The second thief is the Usul. The Usul will be also a threat to the National Bank and it will be wearing a green suit. It’s eyes are blue.

The third thief is the Red Scorchio. This Red Scorchio is also a thief and he will be wearing a mask along with a white and black colored shirt.

The last thief is a Techo. The Techo is colored like the Scorchio, meaning red and he will be wearing a grey sweater and a darker grey sweats. He is a thief criminal. If you would like to see their pictures, you will be able to do so in the game instructions.

Finally, Neopets Trouble at the National Neopian is a relatively easy game that is only based about speed. You will not have to memorize the keyboard keys, and not even the thieves because they are so few that you will not have any problem. If you’re good at getting  a high score, let’s say, of 1,000, then you will also have no trouble getting a score of 4,000. Play carefully and don’t lock the innocent neopians, otherwise you will lose precious points. Have fun.

 Trouble at the National Neopian

Neopets Tubular Kiko Racing

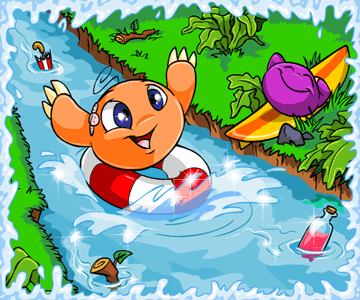
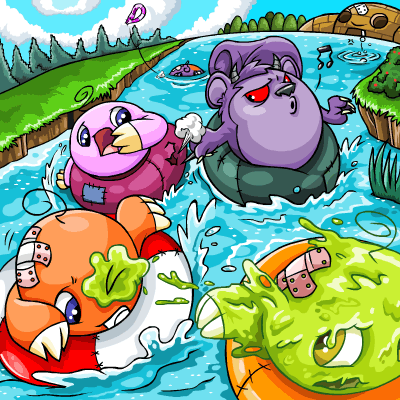
Neopets Tubular Kiko Racing is an extremely funny game to play where you will be a Kiko with the name of Kavi and you will be able to shoot rings. You will be on the river and you will have to race to the end in order to get the first place. It is a race, so may the best win!

Tubular Kiko Racing

Tubular Kiko Racing Game Control

The controls for this game are somewhat, hard. You will be able to move your inner tube to the right, left and you will also be able to move it backward or forward simultaneously without having to worry about anything. You will be also able to set your controls differently if it is done to the direction you’re looking for by going to the control menu. If you would like to move back and to the left, you will be able to use your arrow keys. If you would like to move back and to the left, press the down arrow key along with the up arrow key to move back and to the right. If you would like to move forward then to the right, you will have to use the left key and then the right key in order to move forward and to the left. A small click on the game menu will be of a great help. It is very useful if you manage to shoot on your enemies when you travel down the river, while pressing the space bar for every shot, because you will then be able to reduce the amount of arrows you will actually need to dodge. Yes, your enemies will be shooting at you and will prevent you from doing it with ease by throwing arrows on you. Don’t forget yourself when you’re pressing the space bar though, because the ammo is limited.

Tubular Kiko Racing

Tubular Kiko Racing Items

During your race, you will find items which every one has few effects that can be acquired when you get them. Below is a list of objects you will find along with their effects to help you get a better idea of the global game.
There is four objects that will have the same effect. Those are a small yellow circle, a small brown circle, a bottle of pink sand and a green fruit that looks like a pear. Whenever you find these bonus floating in the river, grab them whenever it is possible. Every time you pick one of these, they will grant you a total bonus of 1 – 10 points, added to your total count. That means they will increase by one point every time an additional bonus is collected, and that they will not go over granting you 10 points.

The big yellow ring is a bullet for you to use. They will come in a pack of three and they will allow you to shoot your enemies that will be throwing arrows at you. If you find these, do not risk your life to get them as they are useless. Focus on the race and on other bonuses

Sometimes, you will find umbrellas on the water and these are great because they let you be shielded from two arrows. That means if you’re fairly good at dodging arrows and you get one of these, you will almost be invincible because you will not be worrying about doing a mistake. Whenever you see an umbrella, it will be a great opportunity to go and grab it.

The waterfall is not always useful because sometimes it will throw you somewhere you don’t want, but know that it will boost your speed and help you escape the arrows that are thrown on you by your enemies easily.

The last bonus is a checkpoint that will grant you a total of 30 bonus points added to your total count. These points will stay with you. When you encounter them, make sure that you do not hit them from their side because they will then start shrinking. Instead, go straight to the middle of them and you will be perfect.

Tubular Kiko Racing Obstacles

Of course, the game itself contain obstacles because the enemies shooting arrows on you were judged as “not enough of a challenge” for the game. The first obstacle is every time you will encounter a blue mossy unknown strange thing. It can take six different forms. Those will not, fortunately, make you lose a precious life but they will instead slow you down so that you become vulnerable to arrows thrown by your enemies. Be careful and dodge them carefully without dropping onto a whirlpool that will be explained later.

The whirlpools are very deadly and if you touch them, you will lose a precious life directly. Even if you hit it by the side of your inner tube, you will also lose a life, which is why it should be avoided at any cost. If you see the first obstacle mentioned above, and this on the side, you should rather get the other even if it will harm you because it won’t take a life from you.

The last obstacle are the arrows, which are shot by your Kiko enemies. If one of these touches you, your inner tube will get popped and you will lose a life. Try to avoid going near the enemies because it will then be easier for them to pop your inner tube. Whenever they shoot an arrow at you, you will be hit. For that reason, stay as far from them as possible.

Neopets Tubular Kiko Racing Cheats

Neopets Tubular Kiko Racing has a total of three levels that will, obviously, increase in difficulty the more you progress. You will not be able to pause the game during the current round, so make sure you are ready before each one. If you would like to escape an obstacle, you can always hold down the left and right arrow keys at the same time to make Kavi, the Kiko go into the overload and zoom out of the obstacle. You will also be able to paddle backwards by holding the up and down arrow keys at the same time. You should never pay attention to your score, instead, go straight to the checkpoints and after bonus items. Remember that the bullets are useless and you do not need them. Take the Umbrella whenever you see it to decrease your chance of losing the game, because your enemies arrows have a great chance to hit you. Do not waste ammo on your enemies if you’re not sure about whether it will hit them or not. If you’re a hundred percent sure that it will hit them, then go ahead and shoot because you will then be awarded with ten bonus points.
Finally, the game is not that easy so you will have to try it a few times before you start getting into it. It is a very fun game if you’re going after Neopoints because it grants a lot of those.

Tubular Kiko Racing

Word Pyramid Neopets

Well this could have gone better. Your Lost Desert expedition did not go as planned in Word Pyramid Neopets. Trapped inside one of the ancient pyramids, you were forced to rearrange stone tiles to find a way out of the building as the hot sand was slowly flooding the chamber around, just waiting to bury you alive. After labourous hours of hard work and puzzle solving, you finally make it out alive. Your friends and loved ones, are so enrapt with your tale of adventure, you decide to recreate the same torture that you went through, for them!

Word Pyramid is a triangular treat designed for those with an eye for pattern recognition and those very adept with words. No two games will ever exactly be the same. So pull up a chair (and a water bottle) and get ready for your challenge.

For every 2.50 points you earn in Word Pyramid, you will earn 1 neopoints.word pyramid neopets

Word Pyramid Basic Instructions

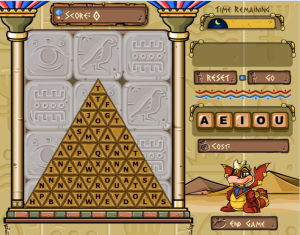
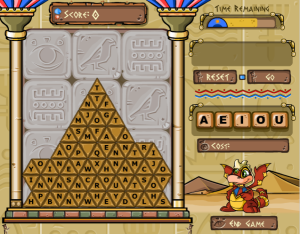
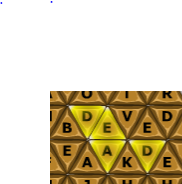
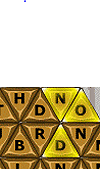
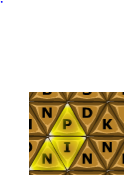
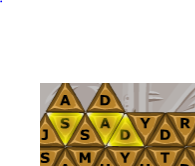
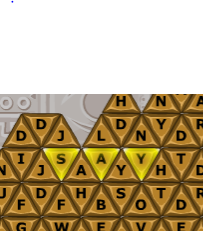
In Word Pyramid the game starts off by showing you a carefully constructed pyramid of triangle shaped tiles, each labeled with a letter of the alphabet. Your job is to click a tile and connect it to another tile until you are able to form a word. Over time new blocks will begin to fall, whether or not you using tiles quickly or slowly. If you combine a word in the middle of the pyramid, or any other part that is dependent on structure, the tiles will collapse inwards to fill the gap in (see “Phases of the Pyramid” below). The tiles you use in order to make the words MUST be touching each other in order to be added to the word. Since it can be confusing what Word Pyramid considers “touching”, I’ve included multiple examples of acceptable patterns located below in the table titled “Letters ‘Touching’ to Make Words.

The word you enter will be spelt on the right hand side of the screen, once complete click the “Go” button. If it is an acceptable word, Amarna (the explorer who was trapped in the pyramid) will rub his hands together and the tiles you selected will disappear and the pyramid will correct itself. If the word is not acceptable, Amarna will wag his finger at you and the tiles will be deselected. Using consonants will earn you more points than vowels and the longer the word the more points you will earn!

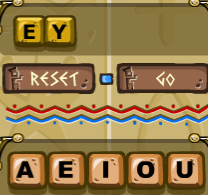
Almost have that perfect word, but you’re missing just one vowel? Well don’t worry, you can have that vowel…for a price. At the beginning of the game you can buy each vowel for 10 points each, simply click on the vowel you want and it will be added in the first immediate spot open. (You can start the word with vowel, just make sure you have no other letters selected yet.) Be sure you can spell the word correctly before you purchase the vowel, if you mess up and have to clear, your vowel will disappear and you will have to buy it again. Each time you buy a vowel, the cost will be increased for the next purchase. Every once and awhile you might be lucky enough to discover a “blank” tile. You can click on this tile and then select which vowel you want it to be, once this is done, it cannot be undone so pick wisely.

Just to add to the level of fun, you have to play against the clock! In the top-right corner there will be a clock gradually counting down your remaining time. For every word you complete, you will earn extra time. Shorter words such as “at” will earn you less time than you would for the word”attic”. Once you run out of time, the game ends.

Keep in mind that each word can only be 8 letters each and has to be words recognized by the neopian dictionary; no abbreviations, no proper nouns, and no foreign words!

Phases of the Pyramid

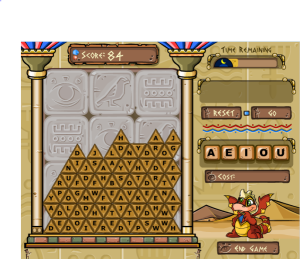
 Beginning of the Game  When Tiles Fall  After Clearing a Few Words
  Word Pyramid Neopets  Word Pyramid Neopets Word Pyramid

Letters “Touching” to Make Words

Below are screen captures of each game (sorry for the off center pictures) along with each word that is spelled out.

deadDead nodNod payPay pinPin sadSad
saySay setSet shiverShiver sumSum ey-eBuy an e to spell “Eye

Word Pyramid Controls

In Word Pyramid you use your mouse to select the different tiles in order to make words. You can tell when a tile is selected when it lights up golden. You can deselect a tile by clicking on it again and the golden light will disappear.

Word Pyramid Cheats

  • New tiles have to be touching one of the previous letters in the word in order for it to count (see pictures above for examples)
  • No words longer than 8 letters
  • Words must be in the Neopian Dictionary
  • Awards bonus points for spelling certain Neopets words (such as “Negg” or “Pound”). Some words that appear perfectly correct will be rejected (simply because the game was written before they existed!) For instance “Ruki” is not an accepted word. Try to keep a list of words that seem okay, but were rejected.
  • You can buy vowels, but they will become more expensive with each buy
  • “Blank” tiles will award you a “free” vowel

Neopets Wingoball

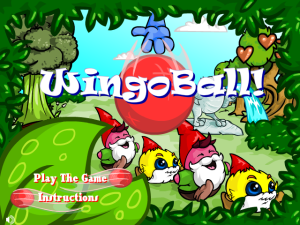
Everyone one has a favourite hobby they love to do. Some neopets read books, or collect plushies, some even try their hand at fighting in the battledome. But some others prefer to spend their spare time rolling red bouncy balls between potted plants and landing trick shots off of garden gnomes. In Wingoball, you become that Neopet with the quirky pastime.

For every 2.04 points you earn in Wingoball, you will earn 1 neopoint.

wingoballWingoball Basic Instructions

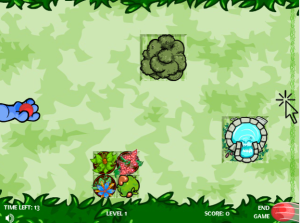
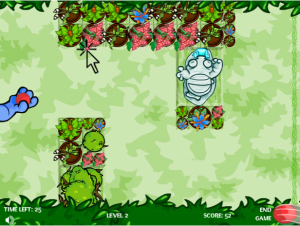
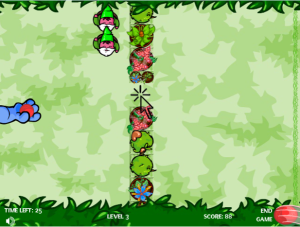
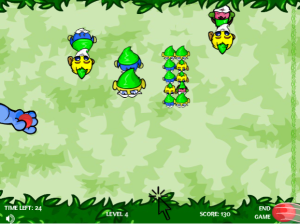
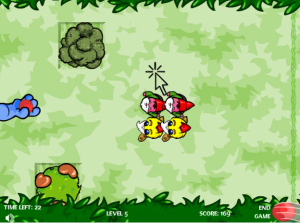
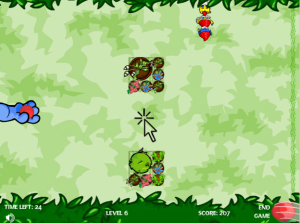
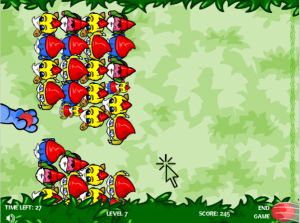
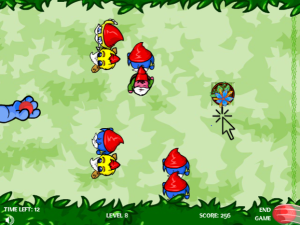
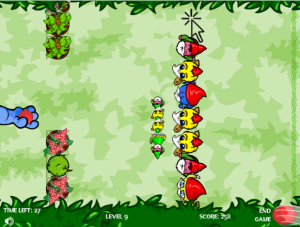
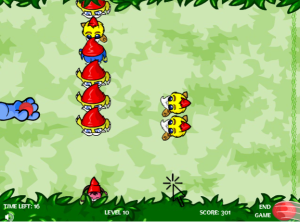
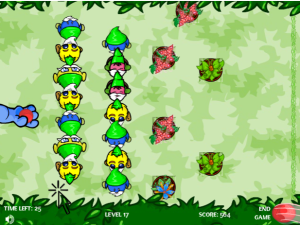
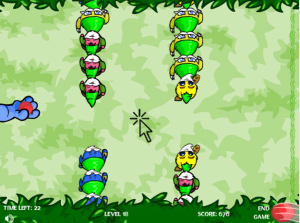
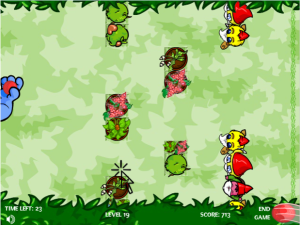
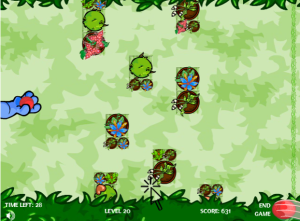
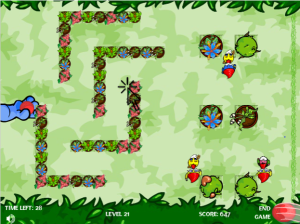
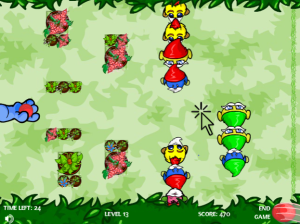
In Wingoball you are playing as arm of a blue mynci, holding a red ball. The object of the game is get the red ball to pass the green line on the right side of the screen. Sounds simple right? Well it would be if there wasn’t a bit more to the game. To get to that side of the line you will have to perform various trick shots like bouncing the ball off walls, plants,  and green-hatted gnomes, all the while avoiding red-hatted gnomes you will steal your ball, making you start over. Oh and did I mention there was a time limit of 30 seconds per level? The good news is you have an unlimited amount of throws each round for those 30 seconds. But, if you run out of time on a level, the game will end. If you complete the level by rolling the red ball over the line, you will move onto the next. There are a total of 25 levels in Wingoball, and each level will have a varying degree of difficulty.

Wingoball Controls

The controls in this game consists of the mouse. You move the mouse up and down inside the playing area to angle the position of your shot. Once you find your desired angle, simply left click to shoot the ball, and watch it go! (hopefully to the finish line.)

Wingoball Scoring

There are two ways to earn points in Wingoball. The first is a time bonus for finishing each level in a timely manner. For every second left on the clock at the end of each level, you will earn one points (15 seconds left=15 in-game points). However, this does not mean you should just try blowing through all the levels in hopes of finishing quickly, because the second way to earn points is by throwing only one ball per level. If your first ball crosses the line, you will earn an additional 25 points, plus your time bonus, for that level.

To achieve the highest score possible, speed and extreme accuracy are necessary. Knowing EXACTLY where to shoot and when to shoot are vital in this game. See the “Wingoball Level Solutions” portion of this guide to learn where to aim your cursor in order to solve each level.

Wingoball Cheats

  • Red-hatted gnomes will steal your ball-best to avoid them
  • Green-hatted gnomes, plants, and the sides of the map will cause your ball to bounce off them
  • You earn 25 points for completing a level with only one ball
  • You will be able to reference this guide on where to position your cursor before starting each level
  • Position your cursor on the map before starting the level to save precious time
  • Do not be scared if the potted plants on the level solutions look different from yours, the imagery will change, but aim will not!

Wingoball Level Solutions

Below is a table of all 25 levels, that shows you an approximation of WHERE to click (shown in the circle of the black mouse cursor on each picture). Please note these pictures are not guaranteed to show exactly WHEN to click, and slight variation of where the actual “sweet spot” is may occur. It may take some time to get used to exactly where you should click, just remember, practice makes perfect!

OneStraight and true, get to clicking! 1
TwoThis is where bouncing off the walls comes into play. 2
ThreeHere gnomes are introduced, just wait until they are not walking in front of you, and fire away. 3
FourWait until the path is clear of gnomes, and then click! 4
FiveHere are those dreaded red-hatted gnomes. Best to avoid them. 5
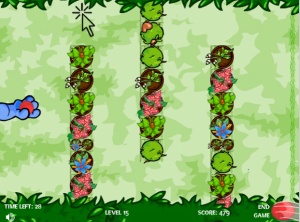
SixWait until the red gnomes are either firmly at the top or the bottom and then click. 6
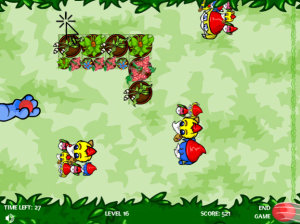
SevenThis level is difficult, you are unlikely to clear it using only 1 ball. Your aim is key here. 7
EightWait until a clear shot appears and then click. 8
NineWait until the green gnomes begin walking downward, and then fire. 9
TenWait until a gap appears in the column of gnomes, and then fire. 10
ElevenAim low, with your cursor a bit to the right of the center of gnomes. 11
TwelveSlight variation of your cursor can cause your ball to bounce differently.

Wait until the gnomes are walking upwards from the bottom of the screen to throw.

12
ThirteenThis is a timing level. The red-hatted gnomes will form a “gate” when the two lines come together.

Throw the ball when the gate it closed, and by the time it gets there the gate will be open.

13
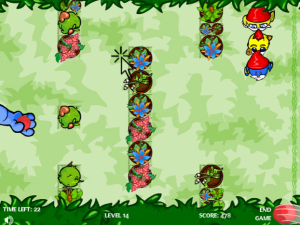
FourteenThrow the ball when the gnomes are halfway to the top of the screen. 14
FifteenNo gnomes, but if your aim is off, the ball will reverse directions and cost you precious time! 15
SixteenThe gnomes are stationary, as long as your aim isn’t too low, you should have no trouble! 16
SeventeenA tricky level, all based on timing and luck of how the gnomes will move. Good luck! 17
EighteenLuck and timing once again! If you’re good, you can aim the ball straight through the two lines. 18
NineteenQuite simple, just bounce the ball off the corner of the pot. Variation will occur based on aim. 19
TwentySlight variation will occur depending on how your shot is aimed. 20
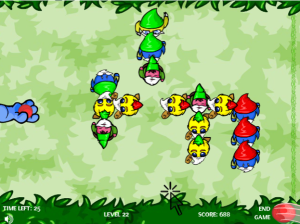
Twenty-oneWait to throw until the gnomes are in the lower half of the screen. 21
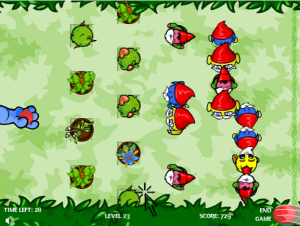
Twenty-twoPurely timing! Wait until the gnomes are all on one side of the screen until you throw. 22
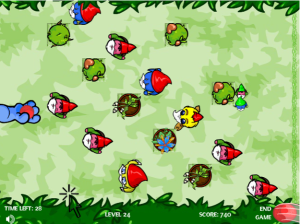
Twenty-threeThis level seems difficult, but is rather fairly simple. Align your cursor with the top of the plant.

Wait until the left column of gnomes starts to move upwards, and then throw.

23
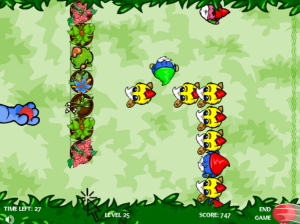
Twenty-fourAll about aim. Wait until the green-hatted gnomes have moved from the top of the screen and throw. 24
Twenty-fiveHardest level yet. Wait until the green gnome is in just the right position, and then click.

If done properly, the ball will bounce off him and go around the red gnomes.

If you can do this level in one ball, then your a true Wingoball champ!

25