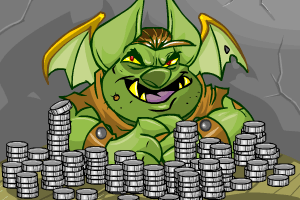
Neopets Godori

Neopets Godori is a nice game where you will be found in the mountains of Shenkuu, with the ability to wander on the bridges, and from there you will be able to find the exotic architecture. Neopets Godori will give you the ability to show off your cards and gaming skills, so that you can smash your opponents in no time.

Godori

Know your Cards in Godori

During the game of Neopets Godori, you will have to know your deck of cards, so that you will know where you will be going and what exactly you will be aiming at. A total of 48 cards will be found in the deck of Godori, and each single one of them will represent one Neopian from the Neopia world. A total of four cards will represent each one of the 12 worlds, which are respectively Altador, Tyrannia, Virtupets Space Station, Terror Mountain, Haunted Woods, Krawk Island, Meridell, Lost Desert, Mystery Island, Roo Island, Faerieland, Roo Island and Shenkuu.

There will also be cards which will have a star on them, and these will mean that those you are currently holding are very valuable. You will want to get them, atleast, if you are not able to obtain them all, then aim to get a total of three of them. You will be given extra points if you have three of them, but remember that the set must not have the Haunted Woods card in them. If it is there, then no extra points will be awarded to you simply because the card is too good.

There will be also, during the game of Neopets Godori, petpets cards which are not very valuable because they don’t do much. In the contrary of what has been previously said, the flying petpets cards are valuable and you will have to get them in order to fulfill a large proportion of the game. The petpets cards in order are Mystery Island, Roo Island, Haunted Woods, Tyrannia, Krawk Island, Altador, Space Station, and Faeriland whereas the three last ones are those who regroup the flying petpets. These are what you should be aiming for so that you can get a slight advantage during the game.

The Altador Cup cards are the same are the petpets cards, but these aren’t really of value when it comes to be in a group. Each of the three subsets you will find will give you a total of five additional points to your additional count. Each one of them will be able to do that. These cards are usually hard to remember.

Godori Gameplay

During the game, you will have to play against your active Neopet. That is sad to have to play against him or her, but your goal will also be to win the game. Your main objective will be to have 50 points before him. If he manages to get 50 points before you, then the game is over and you will have to restart to game for a second chance to win against him. The good thing about this game is that even if you’re behind your opponent, it will be possible to catch up from there, so that even if you’re not just slightly, but a lot behind your opponent, you will still be able to be victorious. To do that simply make sure that your Neopet do not get the valuable cards, and from there your advantage will start to slightly rise with the game.

Once you click on the button that says Play Godori, you will be granted with greets, which is not really important for this game. You will be able to have a look at your Neopet’s cards, and that by simply looking at the top of yours, which can be located at the bottom of the screen. These cards that you will have to collect will be displayed on the left side of the screen, all the way to the right so you can see them on your hand. The respective order that will show you the cards is the Neopets one, then the petpets cards, after that comes the Altador Cup cards and lastly, the Neopia World cards comes in last.

You will also notice that you are able to change the game speed so that you can make it in a way to suit your needs.

Neopets Godori will allow the game play to be different than other card games, because this one will be organized by the hands, and from there a total of twenty plays will be available for you and from there, ten of them can be played by you. The other ten will be played by your Neopet. When it is your time to play (in other words, your turn), simply choose a card from your hand, which should have been taken directly from your deck, then start playing. The card will have to be on a stack, or on the table, but you will have to choose wisely. You will be able to put them in the stack by the world associated to them. In other words, you will be able to choose a world, let’s say, Faerieland, and you will have to start a different stack on the table, so that you can respect the rules of the game.

In order to capture the cards, you will have to match 2 or 4 of them. During the game, almost always you will be only able to make pairs of cards, but from there if you get one, or three of them on rare occasions when you start the game, or even if the deck is procuding a card of the same world of the one you are trying to produce, then you will be able to be given a really nice opportunity, which consists of having all of the four cards in one world at the same time for each different card.

Whenever you have successfully played your current card from your hand, the top one that is the first one on your deck will then be placed on the table for you to see and to use. Every one of these cards that you will be choosing is the key so that you can finish the game the way you want, and from there many tips can be used to make it work. You will be able, from there to follow a strategy that will be given to you later from our experience of the game, or to set up your own so that you can dominate with your own tactics.

The main goal of the game will be to get as many cards as you can from your opponent. You will want to grab the most you can if you want to finish the game and beat your opponent that is your own Neopet. You will be able to play as many times as you want though, so even if you lose, your opponent will be able to fight you again to give you a chance to win. If you win, you can also decide to play more to try and beat your opponent again, and continue having fun with him.

When you start playing, it will be at first a little bit not evident to play, and it will cause you some trouble. It is not a problem though, because the more you play, the easier the game will get and from there you will be able to play in “relax mode”. It is recommended that you start by putting the speed of the game on slow so that you can see what is happening the slow way. This apply for all people who haven’t played for a long period of time, to help them reintroduce the game. You will want to set the game to medium, after that, so that things will get slightly faster because you already have a good knowledge of the game. If, later, you have played a bunch of times and you think that the medium speed is slow, simply put it to faster so that you can set up your own strategy and try to win the game, without worrying about what you can not understand, because everything is easy for you.

Godori Score & Points

The scoring is very complicated for this game because it always depends on the set of cards, of what you play, of the cards you have grabbed, etc. You will be able to click on your Neopet’s score to see it, so that you know who is leading and just remember that you will have to play in the best and most successful way. You will know by yourself who is leading, without looking at your score. For that reason, if you see, after clicking on your Neopet’s score that you are losing, then it will be no surprise to you. The game is logic in that way.

Neopets Godori Strategy & Cheats

During Neopets Godori, it is recommended that you set your own strategy because every set of cards is different, but we will be able to provide few tips for you to use, so that you know what to do. We will also provide a strategy for you to use, that works most of the time.

Start off by knowing which cards are associated for which worlds, so that you can get familiar with them and not ask yourself a thousand questions. From there, you will be able to analyze your hand that contain these cards before the game begins, so that you can get a head start. When the Neopets card is on there, you will have to grab it as soon as possible, simply because your Neopet will do so before you if you don’t. Also, remember that these cards have a star on them, which makes them unique and these are very very powerful, so you can turn your game into your favor when you have them. It is also recommended to try and accumulate a total of three of them, without getting the Haunted Woods one because then you will be able to receive more points that will be added to your additional count.

Any card that is Neopet related should be grabbed ASAP, and any that is associated with the world of Neopia should also be grabbed to get an advantage over your opponent. Note that if your Neopet has cards that contain Neopets on his / her hands, they are not going to be able to play it. That won’t guarantee you will be able to take the card at the end phase, however, but it will give you a chance to do so in two different methods. The first one is if your Neopet do not have a card at all, whereas the second one is when he is forced to play it. From there you can rely on luck to get the card from the deck.

The first player that will have to make the first move is not always the same, but it is better when your Neopet decides to go first because from there you will be able to receive the final card placed directly in the deck. This is an advantage for you and that explains what has been previously said. You will maybe think that having the last card in the deck is little to no important at all, but know that it will be of a great help when a Neopet card is in your hand (that has a star on it).

If you manage to get a Neopet card in your hands and the second one from the world then you will be able to match the current cards. You will not be able, from there, to be robbed off your cards. When the first pair of X world has been successfully matched, you will be able to play one of the cards at any given time. In other words, it does not matter if you have a good play or not as long as you have a stack and that you capture Neopets cards before your opponents, because those will be fundamental for the victory of the game.

On rare occasions, the Neopets cards will not be worth a lot if you have, like previously said, less than three of them in your hands. If you can get three of them in a single hand, then you will have to be sure that your Neopet gets the Haunted Woods one, other wise one point will be deducted from the set.

If you are not able to get all of the three Neopets cards, then try to break them in a way so that your opponent is not able to get them. If they are worthless for you, for now, then your opponent will be maybe waiting to get X number of missing Neopets cards, and if you friendly hand them to him, then he will smash you in the later game. For that reason, you will prefer breaking them so that if you can not get an advantage from them, you will know that your opponent, your Neopet will also not be able to get benefit from them. Good luck.
icon_779-2960345

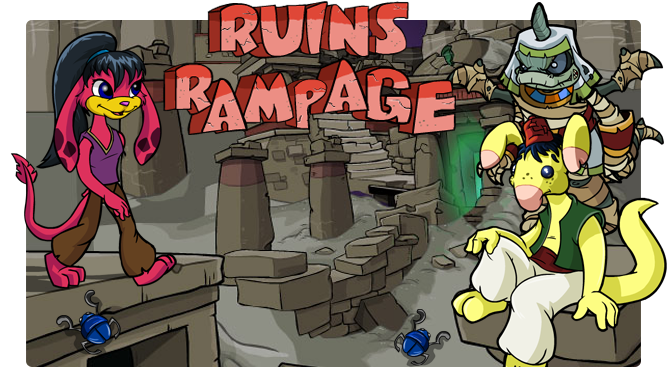
Neopets Ruins Rampage

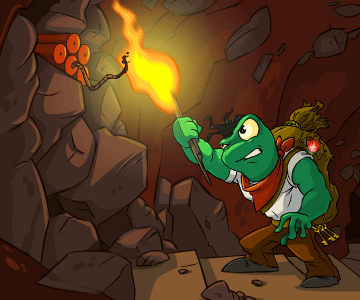
Neopets Ruins Rampage is a game that is in the Lost Desert which is overtaken by the sand. Neopets Ruins Rampage will give you the opportunity to play on the Desert by controlling two thieves, and to rob the place in the most effective way possible.

Ruins Rampage

Ruins Rampage Gameplay

If you’ve already played Grand Theft Ummagine, than Neopets Ruins Rampage should be no different for you. There, you will be able to control the thieves by pressing the arrow keys that are located on your keyboard.

Your main objective will consist of finding the Golden Scorchstone that is hidden somewhere, but for that you will have to escape the ruins with it and to leave back home. However, it is not that easy. If you’re also looking to get the maximum score possible, you will have to collect all the coins, that can be made in gold or in silver that can be found in the ruins. There will be also traps to be found, which can take some of your health, or even to the point of taking away a life from you. These traps are often really annoying, so you will have to be patient there. For example, during Neopets Ruins Rampage, there are also spikes that have to be dodged.

Items

During the game, there are items that will grant you points. Below is a short description of them along with how many points they will award you to help you get a better idea about the game.

The Silver coins will be worth 25 points and the golden coins are worth 50 points. These can be grabbed in the game, while you play. The more you grab them, the more your chance and the better your score.

Mummified Neggs are what comes next. They will give you a total of 50 points added to your health, which means half of your health bar will be restored because you will usually start at 100 points.

There is a trap that is grey, which will do 25 damage to you if it hits you. This one will launch arrow keys and you will have to escape them.

The flame trap will do 25 damage to you, which can be also dodged by walking over it when the flames are off.

There are also bouncing fireballs that will come your way. They are easy to avoid, but if they touch you, you will lose a total of 50 health points.

The Scarabugs are what will walk on the street. If they damage you, you will be losing a total of 25 HP.

Lastly, there are Scorchio Mummies that will be walking back and forth in straight lines. If they are able to hit you, a total of 50 HP will be taken from you.

Ruins Rampage

Ruins Rampage Score & Points

During the game of Neopets Ruins Rampage, you will have to collect treasures and coins that can give you extra points. Once you get the Golden Scorchstone, which will grant you a total of 150 points, your total will then become 850. Note that 850 points is the maximum possible score, which can not be beaten. If you’re going after the golden trophy, you will be able to be one of the 100 top on the high score table, and you will be awarded with one if your score is 850.

Neopets Ruins Rampage Strategy & Cheats

As a good strategy, you will want to press the arrow keys to the direction that your already going to, in order to stop. Always watch out for traps to make sure you don’t lose a lot of your health, and make sure that you collect the Mummified Neggs that can be found on the game to earn an HP heal. Below we have provided a short guide for each level, so that you can earn the maximum amount of points once you complete them all, which means 850.

For the first step, simply try to go away from the switch, then go back to the last one so that you can dodge the arrows and finish the level.

For the second step, it is exactly the same as the first one.

For the third step, collect the gold coin you will see there if you haven’t done that before on the previous levels, then go all the way through the door you will see that is located on the bottom of the screen. Always dodge the Scarabug.

For the fourth step, you will have to escape the bouncing fireballs that will be intimidating. You should be able to finish the round without too much trouble though, by simply grabbing the Negg to get extra points and by leaving through the door at the right of the screen.

Step 5: On that level, you will have to wait a bit until the fire you see there goes down. After that, you will notice that there is a Mummified Negg that is near the door from where you first entered the level. This one will have its spikes shown up, so you will have to avoid it at any cost. Come back close to the door and at the right of the screen and from there you will be able to successfully exit.

Step 6: Start the level by having a step to the left so that you can lower some spikes after. After that go back to the door you first entered from and it should end the current step.

Step 7: Once you’ve completed step 6, go back to the room and avoid traps that will be encountered on the way. After that leave through the door that is located at the bottom of the screen.

Step 8: For the eighth step, simply start by crossing the fires and by collecting the coin you will find to boost up your point count. After that, go to the door on the left side of the map to complete it.

Step 9: Start off by crossing the second first so that you can grab the coin, then walk to the lower spikes so that you don’t lose a life. Once this is done, go through the door that is next to the switch quickly, so that the spikes won’t raise and hurt you, thus removing a life from your total count.

Step 10: You will have to step on the two switches you will find there. They are easy to locate, though, as there will be smiley faces on them. Once this is done, quickly grab the golden coin to get 50 points, then leave by the door that is at the bottom of the screen. You will need some speed there, as you will have to leave quickly to enter the next room.

Step 11: On that part, you will notice that there is a door room but that there is an arrow trap. Dodge them as fast as you can, dodge the mummy, grab the coin and go on the smiley switch all the way to the door that is located on the right side of the screen.

Step 12: Start off by stepping on the smiley switch, and after that leave through the door that was used by you to enter the room.

Step 13: You will have to return back to the room by avoiding the traps so that you don’t lose of your HP. On your path, you will find health boosters that you should be grabbing in order to fulfill your health, if you need it. Then, go to the door that is on the bottom of the map and when the spikes are on the ground, so that you don’t get hurt.

Step 14: Notice that on that room there will be many hidden spikes and hidden traps. For that reason, you will have to be very cautious and to move slowly in case anything has to happen. Go to the door at the bottom of the screen to finish the current step.

Step 15: Of course, you will find a Golden Scorchstone that you will want to grab. However, it will not be possible from the place you are. Take a step that can be on the switches in order to return back to the last room and then it will be easier to cross than the last time.

Step 16: Whenever you see that the blocking spikes are lowered, you will have to go on the green path so that you can leave the room by the door located at the top of the screen.

Step 17: Go on the door that is on the top of the screen, but make sure that you avoid the traps that can be hard to come across.

Step 18: On that part of the game, there will be many arrows. Your objective will be to leave from the door at the right of the screen. Dodge the arrows so that you don’t get hurt and don’t lose a life, then leave from the right, from the door.

Step 19: Start off by crossing the fire vents that are located between the door you’ve came through. From there, you will be able to leave through the other door located next to it by making sure an arrow doesn’t hit you.

Step 20: Start by collecting the three coins you will find there, to raise your current count and always avoid the skull market switches, because they will prevent you from grabbing additional coins. You do not want to fall back in points. After that, step on the smiley switch you will find there and continue your pass through the door that is located at the right of the screen. Be fast though, because there will be fireballs that are coming your way and you don’t want to lose lives.

Step 21: There, you will have to be a little careful because directly after you, you will be able to notice that there is a switch. Your objective there will be to go through the door that is on the left side on the screen. It can be tricky, though, so you will have to be careful.

Step 22: From there, you will be able to continue to the next door you will encounter. However, there will be some dodgings to do as there will be flying arrows coming your way. Dodge them, then leave.

Step 23: Just like in the other room, you will have to go to the next room but some cautions will have to be done for the next one.

Step 24: Once you’re there, quickly move to the smiley switch by dodging the arrow trap. From there you will be able to go all the way to the door that is located at the left side of the screen.

Step 25: There, you will find a switch along with a Negg if your health is under 100 points. You will have to take a total of 50 damage, but good news is that you won’t be coming back from there afterward. Go back to the door you came from so that you can head to the Golden Scorchstone.

Step 26: Go through the first room, then go to the next ones. On the fifth one, there will be a path with many fireballs coming from it. Dodge them and leave the room. Make sure that you collect a Mummified Negg there because there will be damage being done. Go from the door that is located at the top of the room, and get ready because there will be more arrows. Dodge them when you can.

Step 27: For the first room, you will have to stand on the path that has an arrow near it. For that reason, you will have to quickly move to the left side of the screen. Once this is done, go through the door that is on the left, then from there you will have to go to the lower left. There will be a third room from which you will have to switch in your path. After that, follow the path you will see there and go to the next room to earn the Golden Scorchstone for a total of 150 points added to your total count.

Step 28: There, you will have to make a step on switch that has the spikes blocking the Scorchstone. You will not be able to grab it from there, though, so you will have to keep moving.

Step 29: On that part, you will have to follow the path you will see there to go to the compelte right of the current room. Then, go on the door that is on the top, then the one that leads to the third. From there, you will have to leave from the bottom door.

Step 30: Start by stepping on the switch you will see there if it wasn’t already done, then continue to the bottom left of the screen to exit through the door you will encounter and find there.

Step 31: Start by collecting the golden coins you will see there, and ten the Golden Scorchstone. You will have to prepare there.

Step 32: For the first room, you will have to wait for the path to be empty of the passing fireballs (you will have to dodge them), after that  you will have to leave through the door that is located on the right side of the map. Then, for the next 2 rooms, keep going to the left doors but there will be traps that you will have to avoid. For the last room you will see, go through the door you will find there.

Step 33: Just like in the previous room, making sure the coming arrow doesn’t hurt you and then navigate on the traps so that you are able to leave from the door that is on the bottom of the screen.

Step 34: You will have to dodge the switches and go to the right side of the screen, so that you can leave from the door you will encounter there.

Step 35: Collect the coin you will find there, then proceed to leave from the door that is close to it.

Step 36: There, you will be able to find a room that is somewhat dangerous, so you will have to be careful. Start by collecting the coin that will be present, then by proceeding to dodge the arrows. Keep going to the switch that is located on the top of the room. Once you step on it, leave through the door that is located on the right of the screen to proceed to the last part of the game.

Step 37: Finally, there will be flying arrows and traps. There will also be wandering Scarabug. It is not a reason to let every thing down as this is officially the last step you will have to take. Go grab the coin and keep in mind that there are many traps. Go to the last door and exit so that you can successfully finish the game. You should have 850 then, and be eligible for the golden trophy. Have fun.

ctp_600-9851098

Neopets Faerie Caves II

Neopets Faerie Caves II is a nice and funny game where you will have to setup your own strategy to win all 18 levels of the caves. This game is located in Faerieland and you will be controlling a character and you will be left with no the game itself to finish. Neopets Faerie Caves II will give you the opportunity to boost up your brain memory by focusing on the game, and on asking yourself how it is possible for you to complete it without losing a life and while earned the maximum amount of possible points.

Faerie Caves II

How to Play Faerie Caves 2

During the game of Neopets Faerie Caves II, you will be given a mission on each round, and it is about going through all the map to unlock the locked door, from where you will be able to exit the cave and to go to the next one. You will have to use the arrow keys that are located on your keyboard to move through the map and you will have to earn points while grabbing stuff that boost your total score. You will have to look for the purple key that is essential and a requirement to unlock the door that brings you to the next cave. Many things will be obstacles through the game and you will have to encounter them in order to succeed.

Below is a list to tells you what are obstacles and what are their effects to help you get a better idea of the game itself.

The Blue Ballon: This ballon will on the game and you will be able to move it by pushing it around. You will have to be careful though, because if you push through the fake direction, there is no turning back and you can fail the level just because of that. Same thing applies for the grey balloon.

Solid Tiles: these coloured tiles that are found in almost any round can be destroyed by using dynamite that will be described shortly after. Non-solid tiles will be rainbow coloured with many dots on them and from there you will be able to go through.

The Red Dynamite is what you can make explode by bringing a wood of fire and it will do a lot of splash damage, so you will have to go far from it once you hit it.

The Green Dynamite is activated by the same way but it will be less brutal, meaning the splash damage will be less so even if you stand next to it, but not too close, it won’t hurt you.

The Keys are what you will need in order to open up treasure chests and the doors. The key for the door is not the same key that is needed to open up the chest, though, and they will be different.

The Pad is another thing that is found in the game. It is a circle that is purple and green coloured. You will be able to open gates with it and from there you will be able to achieve the levels by being able to pass through freshly opened gates.

There will be traps that are there to kill you, which you will have to avoid if you don’t want to lose lives, and therefore the game.

Faerie Caves II Score & Points

For the scoring, all you will have to do is to grab the gems and from there you will be able to earn up points. There is no timer, meaning you can take your time to think. At the end we will provide a guide for each level so that you can have an easier time completing them. A maximum score of 1520 points can be obtained if you master all of the levels and grab all the obtainable gems through the levels (at one point there will be a gem locked that you will not be able to take).

Below you will find a small text describing what is the maximum score you will be able to obtain and what is the total score that will be yours upon successful completion of the level.

Level 1: For this level, the maximum points you will be able to take from the game is a total of 75, and your total score will become 75.

Level 2: For this level, the maximum points you will be able to take from the game is a total of 100, and your total score will become 175.

Level 3: For this level, the maximum points you will be able to take from the game is a total of 70, and your total score will become 245.

Level 4: For this level, the maximum points you will be able to take from the game is a total of 80, and your total score will become 325.

Level 5: For this level, the maximum points you will be able to take from the game is a total of 45, and your total score will become 370.

Level 6: For this level, the maximum points you will be able to take from the game is a total of 70, and your total score will become 440.

Level 7: For this level, the maximum points you will be able to take from the game is a total of 65, and your total score will become 505.

Level 8: For this level, the maximum points you will be able to take from the game is a total of 70, and your total score will become 575.

Level 9: For this level, the maximum points you will be able to take from the game is a total of 90, and your total score will become 665.

Level 10: For this level, the maximum points you will be able to take from the game is a total of 60, and your total score will become 725.

Level 11: For this level, the maximum points you will be able to take from the game is a total of 70, and your total score will become 795.

Level 12: For this level, the maximum points you will be able to take from the game is a total of 55, and your total score will become 850.

Level 13: For this level, the maximum points you will be able to take from the game is a total of 105, and your total score will become 955.

Level 14: For this level, the maximum points you will be able to take from the game is a total of 40, and your total score will become 995.

Level 15: For this level, the maximum points you will be able to take from the game is a total of 55, and your total score will become 1050.

Level 16: For this level, the maximum points you will be able to take from the game is a total of 120, and your total score will become 1170.

Level 17: For this level, the maximum points you will be able to take from the game is a total of 220, and your total score will become 1390.

Level 18: For this level, the maximum points you will be able to take from the game is a total of 35, and your total score will become 1425

Level 19: For this level, the maximum points you will be able to take from the game is a total of 95, and your total score will become 1520.

lg_fyoras_quests_2004-3570133

Neopets Faerie Caves II Strategy & Cheats

Fortunately, even though this game will require a lot of strategy, we have done every level and we will be able to provide tips on how to finish every level with the maximum amount of possible points. Below is the guide and if you read it carefully, you should be able to get 1520 to get the golden trophy. Note that a score of 1520 is the maximum possible, and if you manage to get it and to appear on the top 100 people on the High Score Table, you will be rewarded with a golden trophy for Neopets Faerie Caves II.

Level 1: For the first first level, you will start in the middle. From there you should get out and go all the way down to grab the key. After that go at the top and take the flaming wood and push the white rock on the round so that it will open the door. When this is done go set the Red Dynamite on the middle of the screen on far and go away from it. When it explodes, grab the other key but do not exit the door. Go take the two treasure chests then go to the top left where the fire stick is located then go get the gems. Get the other gems because you can then exit the game by the door.

Level 2: During this level, you will start up just behind a treasure chest that is located near the exit door. go to the left, then up and up again after you grab the red gem. After that go to the right and push the rock to the red circle. Once it is done, go grab the key and the fire stick but be careful there. There is a red balloon that if it touches you, will take you a life. Directly go down then to the left so that the balloon can go to the top of the screen. Now don’t touch the red dynamite near the gems yet, otherwise you will fail the level. Touch the lower dynamite on the bottom of the screen to make all of them explode. Get the key and the second fire stick. From there you can go back to touch the Red Dynamite and from there you will be able to grab the gems once it explodes. Make sure that you stay far from it because it will take a life from you. Go to the left again and grab the treasure chest, second key, the two remaining treasure chest and you can return to the middle to exit the level.

Level 3: When you will start this level, you will be on the top right. Don’t go down yet or push the green balloon. Instead, go to the bottom at your left and then go grab the fire stick and the key. Be careful because there is a trap. You will have to be quick otherwise you will lose a life. When you get them, go back down and go take the key that is on the red dynamite from the top. If you don’t go from the top, you will be locked. When the dynamite is about to explode, stay far from it and it will open the path. After that, go all the way up and push the green balloon, take the treasure chest, and go down to get the stuff. From there you can go all the way to the green dynamite and once it explodes, you will be able to grab the green gem and exit the door while grabbing the treasure chest that is on your path.

Level 4: This level is a little tricky, so you will have to be careful. You will start at the top left of the screen. From there, push one time the right arrow key, go up to grab the green gem, back down with the DOWN arrow key and so on until the last one. When you’ve done these but there is the last one remaining, simply push the grey balloon once you grab the gem and don’t go down again for later. Go down to the middle and pass through the path above the yellow balloons. From there you will be able to grab the key on the top, then to go down to grab the green gem. After that, head to the fire stick and put the Green Dynamite on flame. Once it explodes go grab the treasure chest and go get the green gems on the middle of the screen. Go all the way down to grab the last remaining fire stick and go put the Red Dynamite on fire to make it explode. Be careful to not put the Green Dynamite on fire, because you will have to restart the level then. After that you can exit (you should have the last key by then).

Level 5: Start the level by grabbing the two blue gems and then go down (don’t grab the treasure chest because you should not have grabbed the key) and then head to the left. From there, go grab the key at the bottom left of the screen and go back up again. Make sure that the blue rock falls on the key to open up the door, then from there you will be able to go back and take the first path to grab the key and then to exit by entering the door.

Level 6: Go to the left then head down to grab the blue gem. From there you will be able to continue your path and then start walking diagonally. Go to the top and grab the blue gem, go past the two balloons can take the three keys. Go back down to take the treasure chests and the flame stick. Grab the last gems and then the last key. When the green Dynamite is about to explode, stay a square far from it. Then, enter the door to exit the current level.

Level 7: On this game, you will spawn on the bottom right side of the screen. Grab the flame stick and make sure to put on flame the dynamite on the right side. When it explodes, go grab the gem, the key and the flame stick. Make sure to not put on fire the Green Dynamite that you will find there. Instead go back, then to the top. Grab the second fire stick and put on fire the second Dynamite. Grab the gem while you’re heading to the top, grab the second flame stick and go put on fire the green dynamite you will encounter. When it explodes, grab the gem and keep going down to take the other flame stick. Make sure to not touch the green dynamite that is near it. Instead, head to the right, grab the gem, make sure that the dynamite explodes, grab the gem on the bottom mid of the screen then go get the last two gems at the top and exit by entering the door.

Level 8: You will start this level in the middle. Go all the way to the right, then go to the top to grab the three red gems. Head back down and go to the left, then to the top, then all the way down. Put on fire the green dynamite and take the other stick. Put on fire the other green dynamite to grab the last key. While going back to the absolute left, then to the absolute top, before going to the top make sure you push the red boulder on the red circle and to grab the red gem. From there you will be able to take the two treasure chest and exit through the door.

Level 9: This level is fun because you have a lot of space. Start off by going to the absolute left to grab the gem, then head to the top to take the fire stick and then the key. After that , go put the green gem that is near the door on fire to successfully grab the gems. Go to the right and take the flame stick plus the key, and then you will be able to grab the two treasure chests on the ground and the last key. After that, exit through the door and the level will be done.

Level 10: Start the level by going  to the right to grab the key, go back, go further down and grab the flame stick along with the green gem. Go up and grab all the remaining gems. After that you will want to put the red dynamite that is located on the top of the screen on fire. Once this is done, take the chest and push the rock so that you can head down and grab the last treasure chest, along with the door key. From there you will be able to finish the current round.

Level 11: This round is quite difficult. You will spawn in the middle. Go to the absolute right, put the lower red dynamite on fire and go away until it explodes. After that, go and grab the key that is on the balloon, down the screen. Go and grab the blue gem, the second blue gem, the third blue gem then go top the top left of the screen. There is a hidden button. After it is discovered, push the blue balloon on it to make it open and go grab the key. Then, go back down and grab the three treasure chests plus the key. When this is done, you will be able to complete the current round by exiting the door.

Level 12: Start by going all the way down and by taking the flaming stick on your path. Go to the absolute left then go to the absolute top to grab the key. When you have it, return forward until you’re on the level of the Red Dynamite. Go put it on fire and run away until it explodes. Take the treasure chest, but don’t grab the key yet. Instead go grab the two blue gems and the fire stick and make sure you don’t get trapped (otherwise you’ll lose a life). Now it is time to grab the last key, to grab the treasure chest and the key behind it. From there you will be able to complete the level by going through the exit door.

Level 13: This level is complicated because there is a lot of turning back that has to be done. Start off by going diagonally to the bottom left to grab the gem. After that go get the set of gems that are on the other side of the “wall” then go put the green dynamite on fire. Go backward, down then grab the other flaming stick. From there you will be able to go put on fire the green dynamite that is on the absolute left of the mid screen. When this is done, move quickly so that the boulder will be on the circle to open up the door for you. Go grab the remaining flame sticks and the gem. Go to the right and take the treasure chest plus the key, then head all the way down to take the blue gem. Once this is done, all what will be left is to exit through the door.

Level 14: When you spawn, you will notice that there is a red rock at your left. Push it and then go to the top to grab the flame stick. Head to the left, put the green dynamite on fire and go push the balloon that is on the top right. After that, head to the absolute left, go down to take the flaming stick and put the green dynamite on fire. Head down to grab the other red gem. You should be still heading down by then, push the red rock to the red circle and go backward to the absolute bottom of the map. Go to the right, then all the way up to take the other red gem. When this is done, go to the absolute bottom, and go to the right to push the rock and to grab the flame stick. Before you exit, go to the right and grab the remaining stuff and then you will be able to complete the current level.

Level 15: You will start the level on the top left of the screen. Go to the right, go down and then go push the rock until it falls down. Put the green dynamite on fire and head to the second one that is located on the left. After that go down and push the rock. You should then be able to grab the gem and the key that you will found there. Go grab the flame stick that is on the absolute right, then go backward to the mid top and go to the right. Be careful because there are traps in the wall. After that, go down to grab the other flame stick, the second one, then grab the treasure chest and go to the top to grab the remaining key and by setting the green dynamite on fire. When this is done, grab the other treasure chest that is near the red dynamite and put that dynamite on fire. Move because you will have to let the balloon to go to the top. Go on the other side and finish the game by exiting through the door.

Level 16: You will be able to start the game by going to the right and grabbing the game key you will find there. After that go take the flaming stick and the green gem, and then the second one. Put the dynamites, both at the same time on fire, then once they explode go take the other key after making sure that the other red dynamite explodes. Head down and go grab the green gem on the center of the screen. After successfully grabbing the flame stick and setting the red dynamite on fire, get the other key and put the red dynamite on the absolute left on fire, so that you are able to take the gem you will find there. Go down and take the key that leads to the treasure chest. Go backward, upward, to the left and take the second chest then finish the green by grabbing the last gem and by exiting.

Level 17: Start off the level by grabbing the key on your right and by going down to get the treasure chest. After that, go back and take the blue gem. Go to the top, go to the right and take all of the blue gems but don’t grab the flaming stick yet. Go to the absolute right, grab the key, the treasure chest then the second key that is under it, then go get the third and fourth key along with the blue gem. Keep going down and take the other key and the blue gem then keep advancing. Once you’re at the bottom of the map, go to the left to grab the two gems, then head to the left and then get the last remaining gem on this spot. Get the key, go to the left to grab the other keys and the treasure chests. From there you will be able to finish up by grabbing the remaining chest on the absolute left, then go backward to the exit door.

Level 18: This level is very easy. Go to the right, past the open door to grab the flaming stick next to the treasure chest. Go back and put the first green dynamite you will find (bottom). Go away, once it explodes go down and head to the right to grab the key. Go to the top and get the key, then return to exit the door.

Level 19: For the last level, you will have to know that every time you moves, you will not be able to go backward. Go grab the key, a little down, then go to the right, go down, then go left and then down to grab the key on the absolute bottom. Go to the right, up past the two traps and grab the flaming stick. Go push to white rock TO THE LEFT (not to the right), then go down until you are able to “touch the boulder”, then go to the right all the way up to grab the purple gem, the two treasure chests and the key. Go to the absolute right to grab the flaming stick, then head down to grab the key and the three gems. Grab the treasure chest while going to the absolute bottom, then head to the right to grab the purple gem. Go get the last key on the top and then the treasure chest. Finish the game by taking the last purple gem and by exiting through the exit door. Congratulations, you have finished the game and if you’ve done is well, then you should have 1520 points and you should be eligible for the golden trophy if you’re on the top 100 on the high score table.

ctp_469-5414404

Neopets Eye of the Storm

Neopets Eye of the Storm is a game that will require some of your brain strength to determine the specific tile you’re looking for. Do not think that it is a hard game, because once it is successfully understood, you will be able to complete levels in no time. Neopets Eye of the Storm will also give you the opportunity to have lots of fun by playing a puzzle game that is one of the best of all Neopets.

Eye of the Storm

Eye of the Storm Tiles

During the game of Neopets Eye of the Storm, a total of 240 tile will be available for you to find the main treasure from. You may think it is a lot, but you should not worry because every time you will click on a fake tile, you will be given advice and tips on where the treasure will found on. Below is a list of tiles that you will come across during the game, and it is recommended that you read it to get a clear and better idea of the game.

The blue tile with a boat on it is one of the tiles you will be encountering during the game. If you happen to find it, you will be able to be victorious and this is the “treasure” that you are looking for. In the first levels, you will be able to find this tile quite easily, but as the game progress, it will get harder and harder.

Another tiles is the desert one with a desert Neopet on it. It is the lost soul that everyone was searching for. It will be pointing down.

There is a tile with a green Scorchio, Shumi that will be holding the position on the Cyodrakes Gaze. He will indicate the position of the boat with his small finger. He will be pointing towards the left side of the screen.

Linae is the pink Kougra that can be found on the game of Kou-Jong, she will point out to the top and from there you will have an easier time finding the ship.

Bonju in the chef who shoved Hoban, he will be directing you to the right side of the screen with his little finger.

The Cannon means that you will be able to blow up a total of four adjacent tiles that will not be flipped back over, for your own advantage.

If you find a treasure loot tile, you will be extremely lucky because it will give you a total of 20 extra points added to your total count. However, you will not be able to infinitely click on it to earn points. It will then flip back to become a normal tile.

The Blue tile with a storm on it is similar to the cannon tile but this time it will flip four adjacent tiles, and then it will flip back to become a normal tile just like the other one.

The blue background and the brown background are normal tiles and will not do anything.

screenshot_fullsize_720_2_v1-7210563

Eye of the Storm Modes

During the game of Neopets Eye of the Storm, a total of three modes will be presented to you for you to play on. The first one is the Normal mode, the second is timed mode, the third is Zen mode. The Zen mode will give you the opportunity to play and learn more about the game, however it will not give you points. The Normal Mode will contain a total of 20 levels where you will have a total of 20 seconds, also, in each one of them. There if you are not able to find the Gaze for the 20 levels, the game will not be completed. What you want to do is to spend the less amount of time possible. As for the timed mode, you will have a total of 200 seconds, which are about 3 minutes and 20 seconds to complete the most levels you can. This is perfect for people who are confident, and are looking for a trophy simply because if it takes them 10 seconds to complete a level, then it will be reduced from the 3 minutes 20 seconds and they will be able to get as many points as they want.

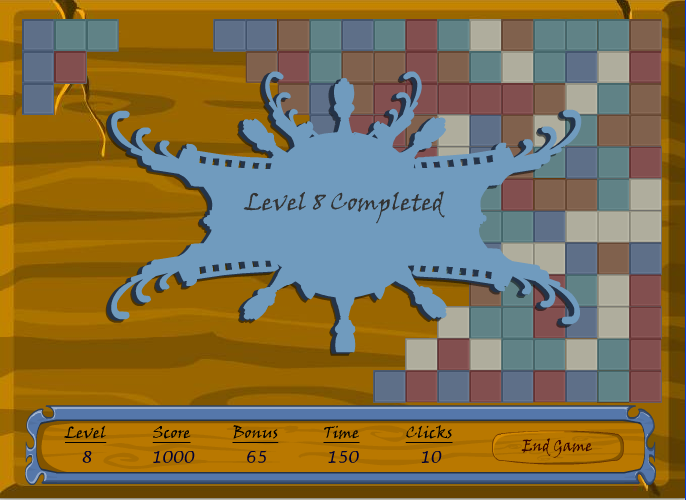
If you start a game in Normal Mode, of course, as previously said, you will be facing a total of 20 levels. At the start of them, there will be a bonus on the bottom of the map that will be starting at 105. Each time you will click on a crew member, the tile will make that the bonus will go down by 6. In other words, you will want to click on the least amount of tiles possible.

If you clicked on Extended View, then your bonus will be taken down by 10 points every time you click on a tile. Brief Mode is the best because you will waste the minimum amount of points during that level.

Each level compelted will award you with 50 bonus points, and the regular bonus that will match the remaining points of the timer.

Your speed and the number of times you click on tiles will determine your score. If you’re going after a super high score or after a trophy, it is recommended the you click, by using your brain, on the least amount of tiles possible. Also, note that you will have to go in the quickest possible way because you will want to spend the minimum amount of time, to earn extra bonus.

If you score from zero to 800 points, you will earn the rank of Meagre. Having a score of 801 to 1600 will earn you the title of Good. Great will be given to you if you score between 1601 points and 3200 points and, lastly, Excellent ranking is awarded upon achieving a score of 3201 or more.

Neopets Eye of the Storm Strategy & Cheats

When you are playing Neopets Eye of the Storm, you will have to setup a strategy to spend the minimum amount of time, and to click on the least possible tiles. Always keep Brief View in normal mode because you will waste 7 points per tile click instead of 10 if it is extended view.

When you click on a tile, be careful to look clearly at the symbols you are given. The tiles previously mentioned will appear and you will have to consider them to find the boat (that is your main objective). You will want to click on four different spots then to analyses the screen to know where it is. Some tiles will obviously not contain the boat because of the previous tips given by the tiles. If people managed to be on the high score table, you will be able to do it too. All you will have to do is play for a while and you will see that your skills have raised. Good luck and don’t forget to have fun.

Eye of the Storm

Neopets Double or Nothing – Win Big or Lose it All!

Neopets’ Double or Nothing is an exciting and suspenseful game located within the walls of Meridell Castle, where players have the chance to test their luck against the notorious Snargan. This game is unique because it relies entirely on chance, making it an adrenaline-pumping experience for players who are brave enough to take on the challenge.

Double or Nothing

What Is Neopets Double or Nothing?

Double or Nothing is a game centered on one simple concept: luck. The game allows you to play against Snargan, a character known for his tricky nature, with the potential to either double your bet or lose it all. The game’s premise is straightforward—Snargan offers you the chance to wager an amount of Neopoints, and in return, you must correctly guess the outcome of a simple game of luck. The stakes are high, and the thrill of winning or losing is what keeps players coming back for more.

The Location: Meridell Castle

This high-stakes game is found within Meridell Castle, a picturesque and historic site on Neopia. Meridell is known for its knights, grand feasts, and colorful landscapes, and it has become a destination for those looking for both adventure and risk. Hidden within its castle walls, Double or Nothing offers a gambling experience unlike any other in Neopia. It’s the perfect setting for this game of chance, where the lush surroundings contrast sharply with the high stakes you’ll face when you take on Snargan.

How Do You Play Neopets Double or Nothing?

The mechanics of Double or Nothing are relatively simple but carry a significant amount of risk. Here’s how it works:

coin_tails-8638812

  1. Placing Your Bet: You start by selecting the amount of Neopoints you wish to wager. Snargan will accept bets of various sizes, from modest amounts to larger sums. Once your bet is placed, you’re ready to begin the game.
  2. Making Your Guess: The core of the game involves making a guess about whether the outcome of a random event will be heads or tails. The outcome is determined by a virtual coin flip, and the result is completely random, making it all about luck.
  3. The Outcome: If you guess correctly, your bet is doubled, and you are rewarded with double the amount of Neopoints you wagered. However, if you guess incorrectly, you lose your wager entirely, with no Neopoints returned.
  4. Deciding Whether to Continue: After each round, you are faced with a decision. You can choose to continue playing, doubling your bet again and risking the Neopoints you have accumulated so far, or you can walk away and take your winnings (if any) with you.

The Role of Snargan

Snargan is the character who oversees the Double or Nothing game. Known for his sly and cunning nature, Snargan is a master of trickery, which is fitting for a game that revolves entirely around luck. His role is not just to facilitate the game but also to add an extra layer of excitement and tension. While he may seem like a straightforward character on the surface, players quickly learn that Snargan’s smug demeanor hints at the unpredictable nature of his game. You can never be entirely sure what will happen when you wager your Neopoints against him.

Risk vs. Reward: The Appeal of Double or Nothing

What makes Double or Nothing so exciting for players is the inherent risk involved. It’s a game that attracts those who enjoy the thrill of uncertainty and the possibility of big rewards. You may come in with a small wager and leave with a massive prize, or you could lose it all in an instant. The gamble is what makes the game so captivating, and it’s easy to understand why players are drawn to it despite the clear risks.

Some players approach Double or Nothing as a quick way to accumulate Neopoints, while others view it as a test of their luck and nerve. For those who enjoy the adrenaline rush of risk, there are few games in Neopia that offer a comparable experience.

Gameplay – Strategy & Cheats

You will have to play against Snargan, that is an ugly Green Skeith in Meridell. If you decide to play with him at Neopets Double or Nothing, you will begin the game by clicking on a coin after betting 10 NP. It will cost you 10 NP to flip that coin. Once it lands on the Heads side, you will receive double of the Neopoints you currently have, meaning 20, and so on. The other side, meaning Tails, of the coin will result in all of your coins being taken from you. You will be able to leave with your current winnings if you do decide that you don’t want to go further in the game (because you’re too worried or because you’ve got enough).

Double or Nothing neopets

Double or Nothing Avatar

An Avatar called Skeith – Snargan will be awarded to you upon successfully reaching 320 NP. As for the strategy and cheats, there is actually no way to cheat or to setup your own strategy as this game is simply based on luck. Below there will be a guide telling you the number of NP you will be able to win, along with the probability chance for x successful flips.

Double or Nothing Statistics and Odds

If you successfully make one flip (the first one), you will be awarded with 10 NP. The chance to win that round is currently set at 50%.

If you successfully make two flips, you will be awarded with 20 NP. The chance to win that round is currently set at 25%.

If you successfully make 3 flips, you will be awarded with 40 NP. The chance to win that round is currently set at 12.5%.

If you successfully make 4 flips, you will be awarded with 80 NP. The chance to win that round is currently set at 6.25%.

If you successfully make 5 flips, you will be awarded with 160 NP. The chance to win that round is currently set at 3.13%.

If you successfully make 6 flips, you will be awarded with 320 NP. The chance to win that round is currently set at 1.56%.

If you successfully make 7 flips, you will be awarded with 640 NP. The chance to win that round is currently set at 0.78%.

If you successfully make 8 flips, you will be awarded with 1280 NP. The chance to win that round is currently set at 0.39%.

If you successfully make 9 flips, you will be awarded with 2560 NP. The chance to win that round is currently set at 0.20%.

If you successfully make 10 flips, you will be awarded with 5120 NP. The chance to win that round is currently set at 0.10%.

If you successfully make 11 flips, you will be awarded with 10240 NP. The chance to win that round is currently set at 0.05%.

If you successfully make 12 flips, you will be awarded with 20480 NP. The chance to win that round is currently set at 0.02%.

If you successfully make 13 flips, you will be awarded with 40960 NP. The chance to win that round is currently set at 0.01%.

If you successfully make 14 flips, you will be awarded with 81920 NP. The chance to win that round is currently set at 0.006%.

If you successfully make 15 flips, you will be awarded with 163.840 NP. The chance to win that round is currently set at 0.003%.

Usually, people on the high score table will be it to 10 or to 11 flips. It is very rare to see them doing 12 flips. We almost never see 14 or 15 flips. Good luck taking Snargans money!