The Neopets Battledome is, obviously, a dome where you will be able to fight against other challengers to see if you’re strong enough to win, or not. One player challenges can be fought against, which are opponents that are controlled by the computer. Alternatively, you can decide to go fight against real pets owned by real player in the 2 player mode that is also offered to you. The Neopets Battledome can also give you a site trophy, for example, after beating the Punchbag Bob, and it will grant you themes after plots. It all start with misinformation, then it comes to anger, then to bloody battles where there will be only one victorious. If you’re really curious about knowing who the predator is, and who the prey is, then the Neopets Battledome is where you must go.
 Neopets Battling Basics
Your pet has a stats that are not a waste of space, but they rather describe the skills of your current pet(s). Any pet will have HP, which are health points and are the most fundamental points, simply because no HP = loss. What comes next is the strength of your pet, which determines how many total damage can be done to your opponent, depending of your weapons. Another factor is your defence, which is what keeps you standing in the battle for x amount of time. Agility, which is let down by many BD players, is not as crucial as strength and defence, but all of these factors will have a more detailed description below.
You may also want to equip your pet with weapons, otherwise how would it be possible to battle? To do that, it will all depend of the amount of NP you have. The more you play games, the more NP you will get and the better BD weapons will be available to you, simply because your budget will be greater then. Of course, some of the best BD weapons will cost millions, but this should not be a problem for you as there is a big variety of highly rated weapons for new BD starters. To equip a weapon to your pet, simply go to your inventory, click on the desired item and choose the “Equip to (Name of Pet)”. Note: Make sure that if you have a ferocious pet, for example, like a Grarrl, to not feed it to him as there will be no refund given to you.
Many weapons can also be obtained through events and plots that come to Neopets once in a while, and where you will be able to participate to get some of better weapons. Note that even if the awarded weapon(s) don’t suit your needs, you will be able to sell a big amount of your prizes and receive a lot of NP, raising your budget and leading you to get better NP weapons, slowly but surely.
 Training your Neopet
Training your pet will give you more success in the Battledome. To train your pet, there are various ways. For example, you can purchase the Secret Laboratory, which can be accessed once a day after you purchase all 9 maps that will cost you approximately 1.5 million NP. Expensive you say? Not quite. The Secret Laboratory Maps are very important when you play Neopets because of their ability to boost or to damage your pet. The lab will not only change the color of your pet to almost any, or change your pet’s specie / gender, but it will also give or take points to / from your strength, defence, agility and HP. Note that it will not be able to take maximum hit points.
If you’re not the type of person who likes to take gambles, alternatively, you can decide to train at the Swashbuckling Academy that is located in Krawk Island, and take courses from a Pirate that will ask you to pay him with dubloons, which will cost you approximately 2,000 NP. You will have to start by raising up its level first, then you will be able to increase his / her strength, defence, agility and HP. Every course will take time, depending on its level and the more he will progress, the pricier the courses will get. Though, you should note that even if the Swashbuckling Academy is cheap enough, your pet will not be able to achieve a higher level than 40. Because of that, you should consider the Mystery Island Training School, which is obviously located at the Mystery Island and which will be a little more pricey but faster, and there you will be able to train your pet up to level 250.
 Attack
Of course, you will want to do damage in the Battledome, unless you’re just in there to look at your opponent. You literally have no chance of winning if you’re not going to do some damage. You should know that the damage done is calculated by the number of the icons that the specific weapon does. The possibly icons that can be done through a battle are:
Air, Earth, Dark, Light, Fire, Water and Physical damage.
Weapons have attack icons they can inflict to your opponent. You guessed right, the more icons you do, the more damage you deal to your opponent. For that reason, the weapons with massive icons will be able to deal the more damage. To know the amount of damage you are going to deal, you will have to consider the strength of your pet. Below is a little explanation that will describe the number of damage done per icon to your opponent, out of him maximum HP, depending on your strength.
Damage done per icon depending of your pet’s strength:
Having 7 or less strength points will do a total of 0.5 damage to your opponent per icon. For example, if you have a sword that does 6 icons, and you have less than 7 strength, you will do a total of 6 x 0.5 = 3 icons. Having from 8 to 12 strength point will do 0.75 damage to your opponent. When the damage done is below 1 for the lower strength points, it is not really in your advantage to start battles. Wait to reach from 13 to 19 strength points, atleast, because then you will be able to start doing 1 damage per icon. From 20 to 34 strength points, you will be able to deal 1.25 damage per icon and from 35 to 54 points, a total of 1.5 damage per icons. 55-84 strength points will get you 2 damage per icon and 85-124 strength points, 2.5 damage per icon. Once you reach the 125 point mark, you will be able to do 3 damage per icon and it will take longer, with more effort to do more damage. Once you reach 200 strength point, a total of 0.5 damage per 49 points will be added. For example, from 200 to 249, you can do 4.5 damage per icon, from 250 to 299, you will be able to do 5 damage per icon, etc. However, from 450 strength points to 499, you be able to do 1.25 more damage, then every 49 points will start awarding you with 1 damage per icon. The reason behind that is once you reach the 400 strength points, it will become really pricey and hard to train up, because of the amount of NP and because of the time it will take you to get there. You should note that there are also items that are able to give you some extra strength points. Finally, when you reach level 750, you will be able to deal 16 damage per icon, which is a lot and it is not possible to do more damage than that. For example, a pet with 750 strength points will do the exact same damage per icon (16) to a pet that is level 10,000. At this point, strength doesn’t matter anymore.
If you’re wondering how many damage you will be doing to your opponent, before the battle even starts, you should look at your strength points and refer to the guide above to calculate. For example, if your pet has 31 strength points, and from the guide above, you can find that from 20-34 strength points you will be able to deal 1.25 damage per icon. For that reason, you can look at the amount of icons your weapon does and multiply that number by 1.25, and you should get the maximum amount of damage you will be able to do with that specific weapon. Since, during a battle, you will also be able to use another equipped item at the same time, if you’re planning on going pure attack, you should also calculate the other weapon’s amount of damage, then do Weapon 1 damage + Weapon 2 damage. This way, you will get a good idea about what you can deal.
Defense
Defense works like the attack, meaning that you will be able to defend yourself of icons depending of the number of defense points you have. Note that you will have to own the weapon that defends you from the icons of your opponent to be successfully able to block it. For example, if your opponent is attacking you with Sword of Reif, which is a combination of physical and fire damage, and that you only have a shield that will block water, then you will receive full damage. You can’t just rely on your defense to minimize the damage. It doesn’t work like that: you will have to block the icons of your opponent in order to avoid damage. The guide below will give you an idea about the amount of damage you will be able to block per icon, depending on your defense points. The damage means the number of HP that will be taken from you, when attacked.
Having 7 or less defense points will do a total of 0.5 damage to your opponent per icon. For example, if you have a shield that blocks 6 icons, and you have less than 7 defense, you will be able to avoid a total of 6 x 0.5 = 3 icons. Having from 8 to 12 defense point will avoid 0.75 damage that are done by your opponent. When the damage done to you is below 1 for the lower defense points, it is not really in your advantage to start battles. Wait to reach from 13 to 19 defense points, at least, because then you will be able to start blocking 1 damage per icon, if you have a shield, of course. From 20 to 34 defense points, you will be able to block 1.25 damage per icon and from 35 to 54 points, a total of 1.5 damage per icons can be blocked. 55-84 defense points will get you 2 damage block per icon and 85-124 defense points, 2.5 resistance per icon. Once you reach the 125 point mark, you will be able to avoid a total of 3 damage per icon and it will take longer, with more effort to do avoid more damage. Once you reach 200 defense point, a total of 0.5 damage per 49 points will be blocked. For example, from 200 to 249, you can avoid 4.5 damage per icon, from 250 to 299, you will be able to avoid 5 damage per icon, etc. However, from 450 defense points to 499, you will be able to block 1.25 more damage, then every 49 points will start awarding you with 1 defense per icon. The reason behind that is once you reach the 400 defense points, it will become really pricey and hard to train up, because of the amount of NP and because of the time it will take you to get there. You should note that there are also items that are able to give you some extra defense points. Finally, when you reach level 750, you will be able to fully block 16 damage per icon, which is a lot and it is not possible to block more damage than that. For example, a pet with 750 defense points will block the exact same damage per icon (16) to a pet that is level 10,000. At this point, defense doesn’t matter anymore.
If you have 750 defense points and your opponent has 750 strength points, you will be able to avoid the damage done by your opponent only if you can block all of his icons. Let’s say your opponent has a weapon that can do 10 water icons to you along with 2 light icons. As for you, the only thing you have is a Sponge Shield that can block all of his water icons. You will not be able to block his light icons, though, which means that he will be able to do 2 more icons to you that you will not be able to block. That means a total of 2 x 16 = 32 damage will be done to you by your opponent. This is why shields in the game are important: because even if you have enough defense points, but don’t necessarily have the shields that will be able to block a large amount of icons that are done by your opponent, you will then lose a lot of HP. For that reason, you should also make sure that you only fight against a pet after a logic estimation of whether it will be a fair battle for you or not. Some people tend to think that they’ve trained their pet hard enough and they think they can’t lose a single battle. This is not true. If you go up against someone who has more strength/defense points than you, you will be putting yourself in a luck-based battle, which is something you don’t want. If you’re attempting to send a battle challenge or someone sends one to you, always view his pet to make sure that his/her HP, strength, and defense points are relatively similar to yours, or worse.
Lastly, you should consider the defense points of your opponent depending of your strength, and the other way around to calculate the amount of damage you would like to block. If you have a total of 102 strength points, and your opponent has a total of 95 defense points, the amount of icons he will not be able to block from you will add a total of 0.5 damage to him, because it is like if he has 7 defense points (102-95 = 7, and at 7 points a total of 0.5 damage can be done).
Agility
Agility is only important if you’re looking to steal weapons from your opponent, for the battle time. The Heavy Robe of Thievery is currently what can steal stuff from your opponent’s BD equipment, and the chances will vary depending of the amount of agility points you have, and the amount of intelligence points you have. Agility is not really an important factor in battle, therefore it is not important for many of the players and this is why many pets have agility not trained up. People will focus on strength and defense points, which are essential in battle and will save NP / time from raising their agility points. This is a good option for those who do not want to steal items from their opponents. However, you should note that if you decide not to train it at the same time as your strength and defense points, and that you change your mind later, it will cost you more NP and time to do so simply because your level will be higher then, and courses will get more expensive.
Healing
During a battle, your vital points are measured depending on the total amount of HP your pet has. Once you have 0 of them left, you will then lose the current battle and your opponent will be victorious. In the contrary, if you defeat your weapon, it will mean that he has 0 HP left and he will lose the battle. Let’s say you lose a battle with your pet, he will be at 0 HP and you will have to raise his HP back again. Several Healing Potions can be found in the shop wizard that can help the process of recovery. Most people, however, prefer to use the Healing Springs located in Faerieland. A faerie will raise your points depending of the amount of magic she currently have. If you have a lot of strength points to recover, you can, alternatively, use a Super Strength Healing Potion that can give you back your maximum HP for roughly 2,000 NP.
During a battle, you will sometimes face circumstances where your HP will be very low and you’re about to lose the battle. Some potions, also called Elixirs will be able to be in your BD equipment set during the battle, and will help you to recover your HP whenever needed. Note that only one healing potion / item can be equipped to your pet during the battle. You can not equip more than one. Full healers like the Leaded Elemental Vial and the Jade Scorchstone also exists, which are fundamental for the higher battles and they will cost millions of NP simply because the demand is so high, and there are very few of them.
It is also possible to overheal. For example, if you use a Blue Scorchstone (an overhealer), you will be able to get more hit points than your maximum. For example, if you have 100/100 HP, you will be then at 115/100 and this can be used to your advantage. Extra hit points will only last for the rest of the turn, meaning that you they will get back at 100/100 if your opponent doesn’t attack you. If your opponent attacks you and do 20 damage to you, you will then be left with 95 HP.
Reflectors
During a battle, you will have the opportunity to use items that will reflect the damage done to you by your opponent. A Shovel Plus and some Lens items will be able to reflect some damage, depending of their current effect. Reflection is good because not only it will defend you from your opponent’s attacks, but it will also be able to deal the damage that your opponent tried attacking you with.
Freezings
Not actual account freezing, but you may want to learn that you can also freeze your opponent during a battle. You will have the chance to add a freezing weapon into your BD set to freeze your opponent and be able to take some advantage over him. This will prevent your opponent from attack during a turn and you will be able to attack him / deal with him the amount of damage you can possibly do. You will also not be able to take any damage during that specific turn.
Freezers will have a freeze rating and it will depend of the freezer itself. You can find a freezer with low to average chance of freezing, and you will also be able to find 100% and multi freezers, which are better.
The less than 100% freezer will freeze your opponent, for example if you use a Red Frost Canon against him. However, you will not be guaranteed to successfully freeze him and once you’ve tried to and have succeeded or failed, you will not be able to be able to use your weapon again during the same battle. Only one freezing attempt can be tried per battle.
The 100% freezers will be able to freeze your opponent once you use the freezing item you have. On many occasions, people will use 100% at the beginning of a 2-player battle so that they can start with a large advantage over their opponent and this will increase their chance of being victorious, simply because the way a battle starts will, most of the time, determine who will win and who will not.
The multi freezers are good for higher leveled pets, simply because they have more HP and will be able to stay in a battle for a longer period of time. Because multi freezers have usually a low chance of freezing, at approximately 15%, you will not be always able to freeze your opponent. These weapons are multi use, though, and if you’re lucky enough with them, you will be able to freeze your opponent a lot of times, leading you to victory.
Item Types
Not all items can be used the same way. Some will stay, and some will go afterward. For that reason, you should know the item types and learn what can be used many times, and what can only be used once. Their description will tell you the item type they are, so that you can make sure you don’t waste your NP because you didn’t know x weapon was that type.
The first item type is when a weapon has the Multiple Use tag. The multiple use means that you can attack with that specific weapon the amount of time you’re looking for, and it will never unavailable, unless your opponent steals it from you. With multiple use items, you can do damage with that item as many times as you wish during the battle, simply because they can be used, theoretically, an infinite amount of times.
The other item type that a weapon can have is the once-per-battle, and their type gives your the perfect idea of their use: one once per battle. Items such as healers and freezers. Also, bombs like the Ghostkerbomb, for example, will only be able to be used once per turn. Just like in real life: when you have a bomb and throw it away you will not be able to throw it again because it will be exploded then. Usually, bombs will do a massive amount of damage and this is the reason they can not be used more than once, otherwise it will be unfair. Same thing for healers and freezers: imagine you were able to freeze your opponent with a 100% freezer during all the turns and heal yourself with a 100% healer for all the turns, then how will your opponent stand a chance?
After that, comes the one-use item types which can only be used once and will vanish forever afterward, meaning that you should know what you’re doing and not waste your NP. Many items that are worth millions of NP are also one-use only. For example, the Eraser of the Dark Faerie, which almost no one has and costs 200 million NP is a one use item, but it will allow you to erase the petpet of your opponent permanently. Evil, eh? Try not wasting a lot of NP on one use items unless you know you will need them. For example, if you can not afford the Leaded Elemental Vial. you can purchase a Jade Elixir for 10,000 NP and use it to fully heal yourself. Make sure that you only use these for very important and serious battles.
Another item type is the fragile. Fragile items will have some chance of breaking through the battle and you will not be able to use them again. A fragile item will stay fragile and you will not be able to unfragilise it. When you have one during a combat, even if you don’t actually use it, it can break and it will not be recovered after the battle.
Semi-Fragile items are the last item types you will have to know about. These items are breakable just like the fragile categorized ones, but when they break, even if you will not be able to use them for the rest of the battle, they will remain in your inventory when it is done just like one-used items, but you will not have to actually use it for it to break.
Lastly, most strategies are based on a combination of multi-use and one-use items, which is what you should look forward if you’re planning on crushing all of your opponents.
Abilities
Faerie abilities will grant you an ability that you will be able to use during a battle. A box near your weapons will be available for you to use, but for that you will have to actually train abilities. For that, you will have to purchase Faerie Bottles and use them on your pet. Depending on the Faerie type, you will be given earth, water, air, fire, physical, light or dark abilities by number (usually 1-2 per use). From that, you will be able to go to the Battledome and view your abilities so that you can “purchase” them with your points. Three abilities will be offered for you to learn, per range of levels, and you will only be able to learn of them at the cost of tokens that you got from the faeries. If you change your mind later, you can change the ability but it will cost you more tokens. The higher your level, the more abilities you will be able to learn, and the better they will get. Level 1, 5, 10, 25, 50, 100, 200, 300, 400 and 500 are the levels that will offer you an opportunity to learn a new ability.
Now that you have acquired that many information, go battle someone.

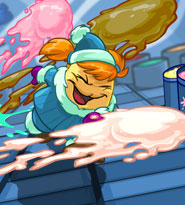 Ice Cream Machine is a fast-paced game where you play as a cute chia named Adee. Yes, “Cute Chia” is generally an oxymoron, but I like to think that Adee is the one exception. Basically, the premise of Ice Cream Machine is that you are Adee, and having some crazy dreams about killer ice cream! And by “killer” I don’t mean delicious. If Adee gets hit by these ice cream scoops she eventually dies. Who knew Neopets could be so morbid? Anyway, the goal is to move Adee around the screen and avoid hitting the melty gobs of dairy goodness. There are, however, scoops that you can hit. These ones won’t kill Adee. In fact, they’ll give her a power up! Ice Cream Machine Neopets is a very popular game that offers three different trophies and an avatar!
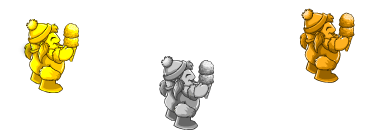
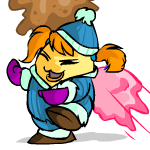 So my lofty introduction didn’t scare you away? Great! Guess you’re taking this seriously enough to learn the basics. First things first: in each level you will face a different flavour of ice cream. As each level progresses, they begin to increase in speed, and quantity. It’s your job to dodge them any way you can. When you successfully dodge a scoop, it will exit through the top of the screen and be added to your final score. You start out with 3 lives. Hitting an ice cream scoop will take one away. But don’t fret! You can earn lives back, along with many other power-ups. This will be explained more in depth later on in the guide. Lastly, to control Adee, all you have to do is move your mouse around the screen.
 Below are helpful guides that will tell you everything you need to know about the different scoops that you encounter in the game! Learn these before playing, so you can be prepared.
 In addition, some of the power-ups stack, and some cancel each other out. A good example is the speed increasers and speed decreasers. The more increasers/decreasers you pick up, the faster/slower the ice cream scoops will go. Of course, they do eventually wear off, so don’t expect the power-ups to last forever. Typically, they will last a few seconds.
 Strawberry Bomb
 Force field
 Extra Life
 Increase
 Decrease
 Size Up
 Size Down
 Cherry Scoop
 Fish Scoop
 TPOSG Scoop
 Chocolate Sauce
 Caramel Sauce
 Strawberry Sauce


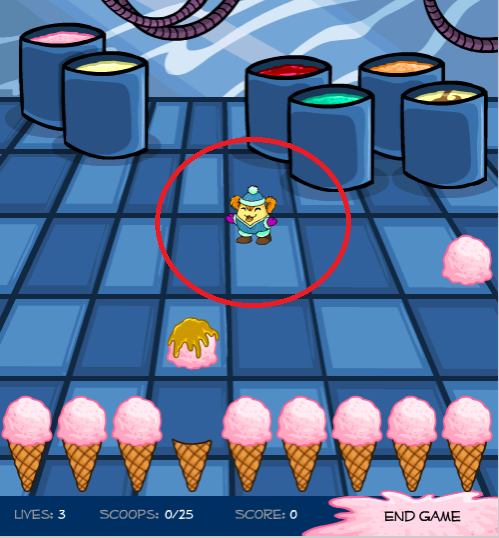 If you want to score a lot of points, you will need to perfect your positioning. That is the most important skill to learn while playing this game. The best place to have Adee is in the dead center of the page, anywhere in the red circle that I’ve put around Adee. This position gives you the maximum space to move freely and dodge. In the middle you are far away from the ice creams, but not too close to the top of the screen, and also won’t get boxed in by the right and left edges. If you do happen to get yourself cornered, there is a solution that occasionally works, but not always. Use this technique only if you will lose a life otherwise. First, move your cursor off of the game screen. Then, bring it back on the screen, into a safe spot away from ice creams. It’s possible that Adee will jump from her prior location to that one. As was said before, this doesn’t work all the time. But sometime’s it’s a better bet than facing some incoming scoops.



 125 NC


 Dyeworks Brown: Butterfly Dress


 Dyeworks Blue: Shimmery Rose Top


 Dyeworks Green: Dainty Faerie Wing Skirt


 Dyeworks Blue: Baby Tuxedo


 Dyeworks Blue: Black Ruffled Dress


 Dyeworks Blue: Dark Battle Armour


 Dyeworks Brown: Purple Plaid Shirt and Waistcoat


 Dyeworks Blue: Elegant Mutant Cape


 Dyeworks Blue: Isca Wig


 Dyeworks Blue: Multicolor Wig


 Dyeworks Blue: Glass Rose Staff


 Dyeworks Black: Sparkling Faerie Wings


 Dyeworks Black: Silver Star Bracers


 Dyeworks Blue: Dark Enchanted Cape


 Dyeworks Black: Philosophers Wig


 Dyeworks Blue: Magical Golden Markings


 Dyeworks Blue: Faerie Dust Shower


 Dyeworks Blue: Butterfly Shower


 Dyeworks Dark Nova: Shooting Novas


 Dyeworks Pink: Peaceful Tree Garland
 It offered a festive design when used at the Dyeworks studio.