Neopets Alien Aisha Vending Machine Guide

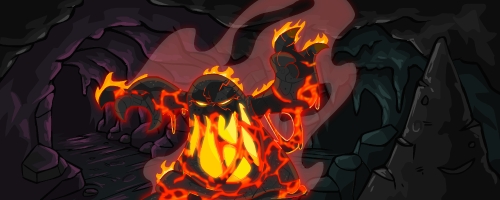
The Alien Aisha Vending Machine is a fun gambling game, located either at its home in the Neopian Plaza, or found under the Luck and Chance section of the Games Room. Like many games, the Alien Aisha Vending Machine gives you the opportunity to earn Neopoints, an avatar, trophies, and items for your account! However, unlike most games in the Games Room, the Alien Aisha Vending Machine requires an sort of entrance fee for each activation. In order to test your luck at the Vending Machine, you will need to come prepared with one of the twenty kinds of Nerkmids that can be found across Neopia.

Alien Aisha Vending Machine Nerkmids

Nerkmids are small, star-shaped tokens made of various materials. There are twenty different types of Nerkmids, of varying rarity. These tokens can be found in a few places within Neopia: they can be found through random events, earned as prizes from Battledome combat, or won from the Wheel of Extravagance.

In addition to obtaining Nerkmids by your own luck of the draw, they can be purchased and bartered for through user-owned Shops and the Trading Post, and bid on in Auctions. Prices can fluctuate depending on how many Nerkmids are entering the market, but expect to spend anywhere from 55,000 to 65,000 Neopoints per Nerkmid.

There is a wide range of rarities across the twenty different types of Nerkmids. Although the Alien Aisha Vending Machine states that higher rarities of Nerkmid will produce better prizes, there is no data to corroborate this. It seems that any Nerkmid of any rarity will produce similar results. As such, use the cheapest Nerkmids you can find in order to play!

For your convenience, what follows is a chart of the twenty existing Nerkmids, in order of rarity:

alien aisha vending machine Average Nerkmid (r100) nerkmid_good-5794513 Good Nerkmid (r100)
nerkmid_lesser-4051620 Lesser Nerkmid (r100) nerkmid_super-2387578 Super Nerkmid (r100)
nerkmid_ultimate-2652178 Ultimate Nerkmid (r100) nerkmid_ultra-2462187 Ultra Nerkmid (r100)
nerkmid_aluminum-5533461 Aluminium Nerkmid (r101) nerk1-9085540 Basic Golden Nerkmid (Rr101)
nerkmid_copper-3058441 Copper Nerkmid (r101) nerk3-5748087 Magical Golden Nerkmid (r101)
nerk2-5408563 Normal Golden Nerkmid (r101) nerk4-3905688 Ultra Golden Nerkmid (r101)
nerk5-7013213 Golden Nerkmid X (r103) nerk6-4990697 Golden Nerkmid XX (r104)
nerk_plat_3-1986640 Basic Platinum Nerkmid (r105) nerk_plat_2-2295080 Normal Platinum Nerkmid (r105)
nerk_plat_1-4384891 Ultra Platinum Nerkmid (r105) nerk_plat_5-3509233 Platinum Nerkmid X (r105)
nerk_plat_4-3703945 Platinum Nerkmid XX (r105) nerk_plat_6-1698406 Magical Platinum Nerkmid (r115)

Alien Aisha Vending Machine Buttons & How to Play

The Alien Aisha Vending Machine takes one Nerkmid per activation. Once you’ve obtained a Nerkmid, simply visit the machine and click the ‘Press me to Continue!’ button. If for some reason you are out of Nerkmids when you click this button, you will receive an error message prompting you to get more.

Select the Nerkmid you wish to use from the menu, and then try your hand at some lucky guessing! Each of the remaining drop-down menus gives you several ways to influence how the vending machine will operate after you insert your Nerkmid. The choices you make here appear to have no direct bearing on the prize you will get, but the options are as follows:

Which large button do you press? 1, 2, or 3
Which small button do you press? left green, left red, left pink, right red, right blue, or right purple
How many times do you press it? 1, 2, 3, or 4
How many levers do you pull? 0, 1, 2, 3, 4, 5, or 6

Make your selections, then hit go!

Alien Aisha Vending Machine Prizes

Each activation of the Alien Aisha Vending Machine will award you with a token amount of Neopoints (ranging from 1 to 50,000+), and one random item. The item prizes are roughly divided into four groups:

grf_aisha_splurgles-6661397GROSS FOOD

The most common prize you will receive is a random ‘gross’ food item. These are essentially booby-prizes, but every once and a while you will instead receive a ‘gourmet’ food (easily identified by their R89+ rarity) that is worth significantly more.

bottlefaerie_earth-7979999FADING BOTTLED FAERIES

A remnant of the old Battledome abilities system, these Fading Bottled Faeries can be used at the Cooking Pot to upgrade them into the newer Weak Bottled Faeries for buying abilities at Aethia’s Shop.

nerkmid_lesser-4051620 NERKMIDS

Essentially a free spin, sometimes you will get a Nerkmid as a reward!

alien aisha vending machine PAINTBRUSHES

The real reason we all play Alien Aisha Vending Machine! The machine has the ability to dispense any paintbrush in the game as a rare prize, including starter paintbrushes.

Trophies

As a game, the Alien Aisha Vending Machine has a high-score table. Points are awarded based on the value of the highest amount of Neopoints you earn in a given activation of the machine for that month. For example, if you play the Vending Machine three times and receive 4,873, 15,278, and 23,459 NP as your rewards, 23,4599 will be your entry on the high-score tables until you get an even bigger payout. Trophies are awarded in Gold, Silver, and Bronze categories depending on your placement in the top-scoring tables. Best of luck!

Aisha Vending Machine Avatar

alien aisha vending machine avatarThis avatar is awarded when you use a Nerkmid in the Alien Aisha Vending Machine for the first time.

Notes

  • Although the Battledome awards Aluminium Nerkmids and Super Nerkmids as prizes in the Central Arena and Neocola Centre, respectively, they do so at a very low chance. The majority of Battledome Nerkmids are awarded as prizes for victories in the Cosmic Dome, which is available only to Premium-account holders. Happy Hunting!
Last updated: 12/13/2024

Moltara Dark Cave Guide

Welcome to the ultimate guide for navigating the Moltara Dark Cave! If you’ve stumbled upon this article, chances are you’re searching for a less stressful way to make your way through the complex and often confusing labyrinth that lies within Moltara. Whether you’re a seasoned explorer or new to the world of Neopets, the Moltara Dark Cave can be a challenge for anyone. The maze is full of twists and turns, and without the right strategies, you may find yourself lost and frustrated.

But don’t worry, you’re not alone in this. In this guide, we’ll provide you with everything you need to know about the Moltara Dark Cave: from understanding its layout and the dangers you might encounter, to the best tips and tricks for making your way through without losing your way. If you’re unfamiliar with what the Moltara Dark Cave is, don’t worry—we’ll walk you through all the details so you’ll be fully prepared for your journey.

So, if you’re ready to conquer this tricky maze and make your way through the Moltara Dark Cave with ease, keep reading! We’ve got everything you need to succeed.

Introduction to Moltara

Discovered Year-11, Moltara is a lava-oozing city of gearsmetal, and precious gems. Not to mention the coveted Magma Pool, where, if luck be in your favor, you might just find yourself owning a magma pet.However, Moltara is also brimming with puzzles, most of which lead to only one thing: the creation of Moltaran Petpets.

Non-Store Moltaran Petpets

Moltaran Petpets are not simply purchased from any petpet store. They first must be assembled at Tangor’s Workshop through a combination of four materials — found only in Moltara by solving five puzzles.

5 Preliminary Puzzles

Puzzle 1 – Obsidian Quarry

Shiny Obsidian is a once-daily prize for visiting the Obsidian Quarry in Moltara City; a relatively easy brain-teaser.

Puzzle 2 – Random Scrap

Scrap Stone and Metal is also an easy item to obtain, if only insofar as out of your control — it is awarded through a Random Event alert while visiting Moltara City or the Moltara Caves. Keep refreshing, it does eventually happen.

Puzzle 3 – Gear Locations

Miscellaneous Gears ramp the difficulty up to medium. They can be found in one of eight random locations in Moltara City — these are a rarity. They appear at least four-times less often than the Scrap Stone and Metal Random Event, and are refresh and time sensitive; in other words, be careful if you see them.

Puzzle 4 – Moltara Worm Quest

Red Moltite is our hard case. You must complete two puzzles in order to locate it. First, the Moltara Worm Quest.

To begin obtain the Empty Lantern by simply visiting Lampwyck’s Lights Fantastic in Moltara City. Then, collect ten worms lurking around Moltara City and the Moltara Caves:


All worms are refresh and time sensitive. Blue, Yellow, Red, and Green are the easiest to find; Orange, Pink and Purple are slightly harder and show up less often; White, Black and Rainbow are liable to drive you insane in their unwillingness to appear. Be patient, take breaks, and check back sparringly; longer breaks have shown to yield more worms.

Once you have all 10 worms, you may fill your Empty Lantern with them, causing it to become a Brightly Lit Lantern. Why is this important? Why, you need light to explore the Moltara Dark Cave!

Puzzle 5 – Navigating The Cave

This small, eerie looking cave is the Moltara Dark Cave, which holds Red Moltite somewhere within its many corridors. However, even with your lantern, you still have to find out which corridors lead where.

This is the basic view of the start of the Dark Cave. To proceed, you must choose left or right, and see where you end up.

Some paths get you staring at a dead end

most have you fleeing from the dreaded lava monsters

both of which send you back to the beginning of the cave.

By this point, I found it exhausting to still be flailing about, clicking around blindly to find the Red Moltite, especially after spending so much time and effort to round up the worms.

So I solved the problem.

Discovery of the Solution

As random as it may seem, the Moltara Dark Cave is actually a long system of patterns. And key to the patterns is as clear as day once realized:

Your path to the Red Moltite is comprised of four turns that correspond to whatever bold sentence you encounter at the start of the cave. No two patterns are the same, and they do not change, no matter how many times you revisit the Moltara Dark Cave, and no matter which cave picture you’re shown.

Let’s start with an example. Say upon entering the Moltara Dark Cave, you are presented with this:

For this guide, take note of the first four words of your sentence–

Does it smell like… ]

Then, simply locate the start of your sentence, and follow the plotted four turns

Does it smell like

RIGHT

LEFT

LEFT

LEFT

Your Red Moltite will then be at hand!

While the petpet store in Moltara never closes, collecting worms and Red Moltite is a once daily event. After you find Red Moltite within the Dark Cave, the worms will grow tired and no longer light up the lantern.

To fix this, visit Lampwyck’s Lights Fantastic again, where Lampwyck will take your lantern and promise to nurse your sleeping worms back to health by the next day.

However, upon revisiting Lampwyck, you will discover

…that Lampwyck has lost your worms!

You will have to collect the worms all over again, and refill your lantern with them, if you want to collect more Red Moltite.

The Pattern Table

If you stumble and make an incorrect turn, do not fret. When you restart at the beginning of the cave, you will be given a new sentence; a fresh start. Simply follow your new sentence to find your Red Moltite.

Alphabetical by First Word in Sentence

Sentence Start

Turn 1

Turn 2

Turn 3

Turn 4

At least it’s not…

RIGHT

LEFT

RIGHT

LEFT

Does it smell like…

RIGHT

LEFT

LEFT

LEFT

Hello? Is there anyone…

LEFT

LEFT

RIGHT

RIGHT

I hope I can…

RIGHT

LEFT

LEFT

RIGHT

I hope there’s no…

LEFT

RIGHT

RIGHT

RIGHT

I should have studied…

RIGHT

RIGHT

RIGHT

LEFT

I sure wish Roxton…

RIGHT

RIGHT

LEFT

LEFT

I wonder where this…

LEFT

LEFT

LEFT

RIGHT

It’s very hot in…

LEFT

LEFT

RIGHT

LEFT

Jordie would know what…

LEFT

RIGHT

LEFT

RIGHT

Let’s go spelunking!

RIGHT

RIGHT

RIGHT

RIGHT

Look at the shiny…

LEFT

RIGHT

RIGHT

LEFT

This lantern is bright…

RIGHT

LEFT

RIGHT

RIGHT

What a mysterious passage!

LEFT

LEFT

LEFT

LEFT

Where does this cave…

LEFT

RIGHT

LEFT

LEFT

Which way should we…

RIGHT

RIGHT

LEFT

RIGHT

Red Moltite Petpets

Now that you have your Red Moltite, let’s see about putting it to some good use. Below is a list of Moltaran Petpets that can be created using Red Moltite.

NOTE: This is not a complete list of Moltaran Petpets. These are only the Moltaran Petpets that need Red Moltite to be created. This list was made this way on purpose.


[ Val ]

=


Red Moltite

+


Shiny Obsidian


[ Teek ]

=


Red Moltite

+


Shiny Obsidian

+


Miscellaneous Gears


[ Valteek ]

=


Val

+


Teek


[ Rav ]

=


Red Moltite

+


Miscellaneous Gears


[ Erge ]

=


Red Moltite

+


Miscellaneous Gears

+


Scrap Metal and Stone


[ Raverge ]

=


Rav

+


Erge


[ Goy ]

=


Red Moltite

+


Scrap Metal and Stone


[ Albot ]

=


Red Moltite

+


Scrap Metal and Stone

+


Shiny Obsidian


[ Nik ]

=


Red Moltite

+


Scrap Metal and Stone

+


Shiny Obsidian

+


Miscellaneous Gears


[ Goyalbotnik ]

=


Goy

+


Albot

+


Nik

Magma Pool Connection

If this refusing face of the Tonu Guard is familiar to you, then you’ve joined the club of Magma Pool rejection. While awake, this Tonu Guard is very selective as to whom may step forward and paint their pet(s) Magma. Does this mean a Magma pet is hopeless for those he turns away?

Fear not! This brute of a guard is known to fall asleep, and provide a 5 minute window of opportunity for each and every Neopian visitor. This event is time sensitive, but the time is different for each user. If you are motivated to find out when the guard is asleep for you, spend a day refreshing at the Magma Pool every five minutes or so. The time at which the guard is sleeping will not change once you find it, but you are only allowed to paint one pet per week.

Currently, there is no known consensus as to why certain players are welcomed by the Tonu Guard. There are, however, a couple of small hints – given to us by both The Neopian Times and the research of fellow users – that pertain to being welcomed, such as:

  • You can only be welcomed on your main account
  • Being welcomed hinges on earning neopoints somehow (Editorial Wk. 433)
  • You do not need to have participated in the Moltara site plot to be welcomed

There is also some speculation that the creation of a Moltaran Petpet may be a requirement to be welcomed, but this is not proven. In theory, the petpet should be created with found materials — not second-hand store bought — and the type of petpet seems not to apply. According to rightofthemiddle, making Moltaran Petpets has no bearing on being welcomed by the Tonu Guard. Please check out the Getting Into the Magma Pool page listed below for more information!

Last updated: 11/12/2024

Neopets Stock Market

The Neopets Stock Market is an excellent investment to hold in your portfolio. Don’t expect to purchase stocks at the Neopian Stock Market, than try to make a quick buck. That’s now how the stock market works unfortunately. If you’re patient, than the Neopets Stock Market is excellent for you as a long term investment. To start, click here. You can get to the stock market by going to Neopets homepage first and scrolling down to this yellow Chia with a cellphone. Click him, and you’re there! Now that you’re here, you need neopoints to invest. How do you get those neopoints? Earn them of course! Once you have about 50,000 neopoints come back to the NeoDaq. You see those links on the top? We’re going to guide you through them, step by step, and give you some hints along the way! Also, before we start, please note the scrolling bunches of letters at the top (also known as ticker symbols) are known as stocks and how they have been progressing throughout the day, these are on every page! We’re going to skip around in the links a bit to make it easier for you to follow.

Neopets Stock Market
Choosing Stocks at the Neopets Stock Market

Now, you’re brought to a page with a happy looking green Quiggle on it and a search box for you to find stocks. Personally, I don’t use that box. It doesn’t help. Click instead above that box the blue word that says ‘here’, which will lead you to a full list. There ya go, a full list of all stocks in Neopia. Still confused about what each thing is? Well, that’s what we’re here for, eh? xD Now, on the table you will see on a list across saying ‘Logo’, ‘Ticker’, ‘Company’, ‘Volume’, ‘Open’, ‘Curr’, ‘Change’.

1. Logo – The logo is the trademark of the company and helps you identify the companies in your portfolio. We will get to your portfolio later.
2. Ticker – This is the acronym of the company, and easier way of talking about a company, rather than saying out the whole company name!
3. Company – This is more of an elaborate meaning of the ticker symbol. Meaning, the actual company name. This isn’t exactly too important, more like a reference tool.
4. Volume – Volume is how many shares have been sold into Neopia so far that day.
5. Open – Open is what the stock started at at midnight NST.
6. Curr – This is what the current price of the stock is.
7. Change – Change is how much the company has lost or gained so far in the day.

Neopets Stock Market Glitch

You can click the ticker symbol to tell you more information about the stock. The finding stocks page is your reference page. You will need it to search for other stocks to buy later on. But we’ll get to the ‘buy’ link later.

Best Stocks to Invest into for Long Term Hold

Historically, some stocks in the Neopets stock market have performed consistently well, often favored for their long-term growth and relatively stable returns. Here’s a list of some of the top-performing stocks over the years in the Neopian Stock Market (NEODAQ):

  1. BOOM (Boom Boxes) – Known for its steady growth, BOOM is a classic choice among Neopian investors. It tends to fluctuate but has shown solid returns over time.
  2. KAUF (Kau Food Industries) – KAUF is popular for its high peaks, making it a favorite among players who buy at the minimum price of 15 NP per share and hold for substantial gains.
  3. TNAH (The Neopian Auction House) – TNAH has had a history of stable growth, making it a dependable choice for gradual returns. It’s less volatile, appealing to long-term investors.
  4. MPC (Mega Power Chips) – Another strong performer, MPC experiences cyclical highs and lows, but overall, it’s regarded as a valuable long-term stock. Players have reported high yields by waiting for peaks.
  5. FAER (Faerie Clothing) – FAER is known for its occasional spikes, which can offer profitable selling opportunities. Although volatile, it has shown a pattern of recurring highs.
  6. SKEI (Skeith Bodyguards) – This is a consistent performer in the market, with gradual, reliable increases over time. SKEI is popular among players seeking long-term gains without high risk.
  7. YIPP (Yippee! Party Supplies) – YIPP often fluctuates, but its trend over the years has proven favorable. It’s common among players who like to buy low and sell during brief spikes.
  8. EWWW (Evil Things In A Box) – Despite its name, EWWW has been a solid performer and is appreciated for its unique price spikes. It can sometimes be a bit unpredictable, but overall, it’s reliable for strategic gains.
  9. TAG (Techo Architectural Guild) – TAG has provided excellent returns historically and is favored for its steady rises. This stock is appealing for long-term players who are patient with market dips.
  10. CHIA (Chia Steel Holdings) – Known for its sporadic high returns, CHIA is more volatile than some others but has yielded large gains to players who buy low and sell at opportune moments.

The best-performing stocks can change over time due to market updates, so keeping an eye on current trends and tracking your portfolio is essential for maximizing profits in the Neopian Stock Market!

Neopets Stock Market Profile

This is where the ticker symbol comes in from the ‘Find Stocks’ page. You can search up here for any ticker symbol, and find the full information about the company. A lot like on the ‘find stocks page,’ if you click the ticker symbol you will find full information about the company and it’s competitors. Search up any stock here, and you will get the logo, company name, the price of a current stock, and information about it. If you click the company name it leads you to a page where you can buy the stock, and how many of the stocks you want to buy. Please note, that the current stock price they give is the price of only one share of the stock. But we’ll get to the buying part later!

Neopets Stock Market Guide

Then there are also competitors. By clicking the competing companies’ ticker symbols you get that companies full information. Let’s move on to the buying part. The part you’ve been waiting for, eh?

Buying Stocks at the Neopets Stock Market

Okay, so now we’re going to skip over to the ‘buy’ link. You want to buy stocks! Well, you use the ticker symbols to choose a stock! To your convenience on the ‘buy’ page underneath ‘Ticker Symbol’ it says ‘click to list’, and it will list all the stocks (from the find stocks, scroll up to see) and you can choose the ticker symbol of the company you wish to buy. Underneath the ticker symbol it says ‘Number of Shares’. Now, on the find stocks page, the current price of the stock is the price of ONLY ONE STOCK. Okay, confused about which stocks to buy? I’m here to help you! Well, we’re restricted which is annoying when buying stocks, here are the restrictions which are, so, so evil. xP But there are only two… I think. 😀

  • Restriction 1: You can only buy 1000 shares a day.
  • Restriction 2: You have to buy stocks that are 15 NP or over.
  • I like to buy the stocks at the lowest price we can possibly get them. The lowest price is 15 NP. So on the find stocks page find all stocks that are currently (CURR) 15 NP. If there are none of those try 16 NP stocks. I’ve said this before and I’ll say it again. Buying stocks that are super expensive (like 50 NP per share) is risky, because if the company goes bankrupt, you will lose more money than if you had bought a stock for 15 NP to share. There’s more at risk, be smart on this one! THIS IS THE PRICE OF ONLY ONE STOCK. IF YOU BUY MULTIPLE SHARES THE PRICE WILL BE HIGHER.
  • I like to check if the stock is going higher or lower (look at the CHANGE). Stocks that I have done well with are NATN, PEOP, and SHRX, BUT, I cannot guarantee your profit. Only buy those stocks if they are at 15 NP. It is best to buy the stock that is going up, but if you choose the stock that’s going down, you may make a profit too, but it will take more time.
  • Don’t just choose only one stock. Diversify your portfolio, make many different options. Say if a company in your portfolio goes bankrupt (this barely ever happens), then you have 4 other stocks left! You can still earn the neopoints you lost back.
  • Once you’ve chosen the stock, look at the ticker symbol and go back to the ‘buy’ page, and put in that ticker symbol. Now, you have to choose how many number of stocks to buy. I like to buy 1000 because it’s easy to follow. The only annoying part is you can’t buy anymore stocks ’til the next day! But, buy in large masses, because when you sell, your stock broker (Chia with the cellphone) charges you 25 NP.

Your Neopets Stock Market Portfolio

Your portfolio is where your stocks are listed and organized to show how they are currently doing in the stock market. You really can’t do without it! We’re going to explain to you everything in your portfolio. There are three columns: Today, Holdings, and Overall. Then there are subcategories. We’re going to explain those as well! The blank column lists the logos of the companies you bought from, the next column lists those companies’ ticker symbols and profiles.

Today – Today explains how your stock is doing in the current day.

  • Open – Open is the price the stock (Only ONE share of that stock) started at 12 AM NST.
  • Current – Current is the price of the stock (Only ONE share of that stock) at the moment.
  • Chg – How much the stock has gained in the day. (-1, it has lost one neopoints, -2, it has lost 2 neopoints, +1 it has gained one neopoints, +2 neopoints it has gained 2 neopoints, and so on)

Holdings – Holdings lists how many of the stocks you have have and how much you paid for it.

  • QTY – Qty is quantity, how many shares of the stock you have.
  • Paid – How much you paid for one share.

Overall – What your overall sums and gains are.

  • MKT Value – This is your Qty x Current Price. It equals how much the stock is worth at the moment.
  • % Change – How much (in percentage) you have gained from the stock.

Now on the portfolio next to the icon is an arrow. Click on the arrow and you get more information on the stock and below it…What you all have been waiting for: the selling part! When to sell your stocks, etc., etc.! On this part there is a table… we’re going to explain the table. If you bought two of this stock when it was at different prices there will be two rows. If you bought three then there will be three rows, etc.When you’re on this table there are 7 columns. Shares, Paid NP, Total NP, Current, Mkt Value, and % Change Sell. Here’s what they all mean:

  • Shares: The amount of shares of the stock you bought.
  • Paid Neopoints: How much neopoints you paid for one share.
  • Total Neopoints: Shares x paid neopoints.
  • Current: How much the stock per share is worth now.
  • Mkt Value: Shares x Current.
  • Change: Tells you wheater you gained or lost neopoints.
  • Sell: Put the amount of shares you want to sell here… BUT WAIT! First read below our tips for selling! (When you’ve think you’ve made your choice press the ‘Sell’ option near the bottom)

Neopets Stock Market Cheats

  • Tip #1 Have patience. Patience is the key word in the stock market. And you have to be able to take a risk. When gambling in the stock market, there are small chances you will not earn profit. And it would normally take a long time for you to earn a profit, so you need patience. Remember, keyword: PATIENCE.
  • Tip #2: Set a goal limit of when you want to sell your stock. There’s no point of selling a stock where you will gain nothing from it. I like to sell my stocks when I gain at least a 100% profit. So, the stock has risen double of when I bought it from. You can set different goals if you wish, whatever appeals to you.
  • Tip #3: Many people say, stick to your goals, well… that doesn’t quite work for me. I know, NEVER sell your stocks if they are below your goal. Never. If you have a 99.6% profit ad your goal is 100%, DON’T SELL. No matter what. Never, never, never. But, if you have a stock that is shooting through the roof and reaches your goal, wait, and watch it. It might go up more. The stockmarket is very random, and changes every 30 minutes. If your stock is going up now, it might go up more later. So wait, and watch it. If it starts a dramatic drop, or doesn’t change for another 2-3 hours, then sell it (if the dramtic drop doesn’t go under your 100% profit). Here’s a personal experience. I once bought 1000 shares of [insert stock here] and it went up 100%. I sold it. The next day, it was up by 500% from my original purchase! See what I mean? I was so disappointed, for I could’ve earned quite a bit of money from that!

Neopets Stock Market Trends

Last updated: 05/14/2025

Top Neopets BD Weapons

The big question; what weapons should I get? This of course depends on how much NP you are willing to spend. A basic set will typically consist of two multiple use weapons, and one healing item. This could run you less than 500 NP. A top of the line hidden tower or smugglers cove weapon set could run you hundreds of millions, if not billions of NP. An offensive weapon is any that only attacks, and can attack multiple times during a match. Every Battledome set will likely consist of at least two offensive or dual duty weapons, and will act as your main weapons.

Building a Battledome Set – Offensive

An offensive weapon is any that only attacks, and can attack multiple times during a match. Every Battledome set will likely consist of at least two offensive or dual duty weapons, and will act as your main weapons.
Scroll of Ultranova
SoU
x4 x4 x3 (9.8 total)
Multiple Use
[Ultra Rare – r96]
Rating: 5 / 5
Scroll of the Fool
SotF
x3 x3 x2 x2 (10 total)
Multiple Use
[Very Rare – r93]
Rating: 4 / 5
Scroll of the Wise
SotW
x2 x3 x3 x2 (10 total)
Multiple Use
[Ultra Rare – r96]
Rating: 4 / 5
Scroll of the Scholar
SotS
x2 x2 x2 x2 x2 (10 total)
Multiple Use
[Ultra Rare – r95]
Rating: 4 / 5
Scroll of Knowledge
SoK
x2 x2 x2 x3 x2 (11 total)
Multiple Use
[Very Rare – r94]
Rating: 5 / 5
Scroll of Ultranova deals about 9.8 icons of damage due to fractional icons. You can get two of them for less than 50 NP. It’s honestly unbelieveable to me, just a few NP for 9.8 icons! This is the part where I tell you that back in my day, a 10-iconer would have cost many millions of NP…

Scroll of the Fool, Scroll of the Wise, and Scroll of the Scholar should all likely be skipped to be honest. You’re paying about 5-10k for 0.2 more icons. Go straight to Scroll of Knowledge if you can afford it. If you’re looking for more cheap weapons, take a look at some of the newbie dual duty items, or upgrade to something like Hanso Charisma Charm before continuing down. Things get a lot more expensive from here. Welcome to the world of the Battledome.

Yanas Blaster
YB, Y-Blaster, YBlaster
x2 x2.67 x5 x3 (12.67 total)
Multiple Use
[Special – r101]
Rating: 5 / 5
Brynns Legendary Sword of Wraith Smiting
BLSoWS
x3 x3 x1.75 x5 (12.75 total)
Multiple Use
[Special – r101]
Rating: 4 / 5
The blaster was a prize in the Return of Dr. Sloth plot back in 2008, while the sword was a prize in the Faeries Ruin plot back in 2010 / 2011. Get whichever is cheapest. There’s only a difference of 0.08 icons and any price difference because of that isn’t justified. There’s also a big jump in price when moving up to 13 iconers, so this might be a good stage to level off at for a bit, train, save up more NP, etc. There are some good dual duty weapons at this level too. In 2P, watch out for Royal Blue Cape and Sophies Magic Hat.
Altador Cup Throwing Star
ACTS
x5 x3 x5 (13 total)
Multiple Use
[Special – r101]
Rating: 1 / 5
Bow of Destiny
BoD
x5 x5 x3 (13 total)
Multiple Use
[Special – r101]
Rating: 3 / 5
Wand of Reality
WoR
x5 x5 x3 (13 total)
Multiple Use
[Special – r101]
Rating: 3 / 5
If you want to pay just a little bit more than a Ylanas Blaster or Brynns Legendary Sword of Wraith Smiting, you can upgrade to a thirteen iconer. The price is fair I think. The throwing star was a prize in the 2012 Altador Cup while the bow and wand are both prizes for completing NeoQuest II on InSaNe mode. It looks like you can get the wand or bow for a much cheaper price than the star, so go with whichever you can get the cheapest. Dr. Sloths Personal Bath Buddy and Stone Foam Finger are both next in terms of upgrades, and you’ll have to pay nearly double the price of the 13 iconers just to have one extra icon. Or you could look towards some of these dual duty weapons.
Flask of Liquid Fire
FoLF
x6-10 x2-4 (8-14 total)
Multiple Use
[Very Rare – r94]
Rating: 4 / 5
Dr. Sloths Personal Bath Buddy
DSPBB
x2 x2 x10 (14 total)
Multiple Use
[Artifact – r200]
Rating: 4 / 5
Stone Foam Finger
SFF
x5 x10 (15 total)
Multiple Use
[Special – r101]
Rating: 4 / 5
In 1P, the Flask of Liquid Fire will always do 8 icons. In 2P, if your opponent has an intelligence level greater than 25, it will do 14 icons. I’d say this is one of the better weapons to use in 2P. The intelligence required to hit for the full 14 icons isn’t too much, and the price is a steal. The massive amount of fire icons is harder to block when compared to other icon types. Flask of Liquid Light is a light based version of this. If you want another weapon with a lot of fire icons, Portable Kiln is costly for what it does, and Sword of Reif would be good, but it’s a big jump in cost as well.

14 or 15 icons for a little under 2 million is really good. Compare that to Kelpbeards Trident or the anagram swords where you’re getting 1.25 to 9 more icons but paying 7 million more. The bath buddy stocks in the Hidden Tower, so its price will remain fairly consistent until it decides to retire. The foam finger was a prize in the 2013 Altador Cup. If you use the foam finger in 2P, look out for Altadorian Swordbreaker.

Glittery Faerie Dust
GFD
x15 or x15 or x15 or x15 or
Multiple Use
x15 or x15 or x15 (15 total)
[Artifact – r200]
Rating: 3 / 5
This will always do 15 icons, but it’s random which icon type it uses each turn. This weapon is intended to keep your opponent on their toes in 2P battles because it’s rather difficult to block. I think the best bet against this would be to use a weapon that defends a wide range of icons, such as Ghostkershield, Faerie Tabard, or Hubrid Nox Memorial Shield and hope you get lucky and end up defending a chunk of it. Another option would be to simply overpower your opponent with something along the line of the anagram swords and hope they lose before you do. All of the anagram swords will do a minimum of 15 icons of each of these types, except a pure physical sword, but you’re getting physical with all of the swords anyway.
Ultra Bubble Gun
UBG
x5-10 x0-5 x5 (10-20 total)
Multiple Use
[Artifact – r200]
Rating: 1 / 5
Skarls Hasty Mace
SHM
x5-11 x8-18 (13-29 total)
Multiple Use
[Artifact – r200]
Rating: 4 / 5
Kelpbeards Trident
KT, KBT
x5 x11.25-19 (16.25-24 total)
Multiple Use
[Artifact – r200]
Rating: 5 / 5
These are the last few items before you get to the anagram swords. I don’t think too many people use an Ultra Bubble Gun nowadays. It’s the same price as Skarls Hasty Mace, but the mace performs much better. Get the mace and skip the bubble gun if you can help it.

Kelpbeards Trident is a real stepping stone in the Battledome. It does the same amount of icons as the aforementioned anagram swords and I feel like it signifies that you’ve come a long way and are serious about battling. Obviously because of all the water icons, Faerie Tabard is the biggest threat to the trident, and as a result this isn’t the best option for 2P. Any of the water reflectors are also a good choice against this. This is cheaper than any of the anagram swords and is an excellent choice for 1P.

Sword of Ari
SoA, SoAri, Sword of Air
x15 x1.25-9 (16.25-24 total)
Multiple Use
[Artifact – r200]
Rating: 5 / 5
Sword of Skardsen
SoS, SoSkardsen, Sword of Darkness
x15 x1.25-9 (16.25-24 total)
Multiple Use
[Artifact – r200]
Rating: 3 / 5
Sword of Thare
SoT, SoThare, Sword of Earth
x15 x1.25-9 (16.25-24 total)
Multiple Use
[Artifact – r200]
Rating: 4 / 5
Sword of Reif
SoR, SoReif, Sword of Fire
x15 x1.25-9 (16.25-24 total)
Multiple Use
[Artifact – r200]
Rating: 5 / 5
Sword of Thigl
SoT, SoThigl, Sword of Light
x15 x1.25-9 (16.25-24 total)
Multiple Use
[Artifact – r200]
Rating: 2 / 5
Sword of Tawre
SoT, SoTawre, Sword of Water
x1.25-9 x15 (16.25-24 total)
Multiple Use
[Artifact – r200]
Rating: 1 / 5
The anagram swords are a staple of the Battledome. All of these swords can be purchased from the Hidden Tower, or possibly on the Mystery Island Trading Post and Neopian Auction House for a little cheaper.

Ari / Air: This is essentially for use in 2P battles mainly, as air is generally harder to block. Look out for these full air blockers and air reflectors though. Alien Aisha Scrambler and Jhudoras Wand, although rare, are both possible threats as well. The other big shields will take a small amount out of this too. Ghostkersword would be an upgrade to this.

Skardsen / Darkness: I believe this is the cheapest of the anagram swords because it’s the one that’s been out for the longest. A lot of people got rid of these after weapons like Ghostkershield and Hanso Charisma Charm became the norm for people’s sets. Believe me, there’s nothing worse than using two of these and getting most all of it blocked from a Ghostkershield. Still, if you can find one for cheap then it’s right up there with Kelpbeards Trident for 1P. Go with Ari or Reif if you’re interested in 2P.

Thare / Earth: Earth isn’t necessarily a rare icon to see, but it is rare to see so much of it in a multi-use weapon. The attack pea family has quite a lot of earth in it. Look out for Illusens Silver Shield, Shield of Pion Troect, Pirate Captains Hat, Greater Staff of the Earth Faerie, and any of the earth reflectors and Kings Lens.

Reif / Fire: Much like the Sword of Ari, this is primarily for use in 2P battles since the fire is generally harder to block when compared to other icons. Take a look at the Frozen Cyodrake Shield or these fire reflectors for help with countering it. Faerie Tabard takes a slight amount out of this too. Rod of Dark Nova is another option, although it’s ridiculously expensive. Additionally, I can’t think of any other weapons that attacks with as much fire as this. If I had to choose one anagram sword to use, it would probably be this one.

Thigl / Light: This isn’t something you would likely use in 2P, as there are a number of full light blockers. You should also be on the lookout for light reflectors, especially Superior Reflection Shield. Although less common, Skarls Sword, Jhudoras Bewitched Ring, Jhudoras Wand, and Kings Lens would hurt this too. Sword of White Lies would be the upgrade of this.

Tawre / Water: I’m sorry, but, I just can’t stand this weapon. Compare this to Kelpbeards Trident… This does very similar icons, but you’re paying two million NP more? It’s a trap! Uh, anyway, check out the Faerie Tabard and these water reflectors for ways to counter this and the trident.

Then there is all that physical. If you think your opponent is going to be using some anagram swords, might I suggest using something like an Altadorian Swordbreaker. It can be a good way to feel out your opponent’s attack if you’re not sure which swords they are going to be using.

I must talk about the Fan of Swords as well. It’s a newly released Hidden Tower weapon that will usually, but not always, beat any of these swords head to head. It’s on par with the anagram swords and is another option if you’re more into dual duty weapons, or just don’t like any of these swords.

Pirate Captains Cutlass
PCC
x6.25-14 x5 x5 (16.25-24 total)
Multiple Use
[Artifact – r200]
Rating: 2 / 5
The Pirate Captains Cutlass does the same amount of icons as any of the anagram swords, but costs many millions more. Why consider this then? It’s for 2P battles. This is slightly harder to defend against because it has a little more icon diversity. Hubrid Nox Memorial Shield, Shield of Faerieland, and Ghostkershield all take a good chunk out of this still, but perhaps not as much as they would a Sword of Ari or Sword of Thigl.
Ghostkersword
G-Sword, GSword
x8-23 x3 x5 (16-31 total)
Multiple Use
[Retired – r180]
Rating: 3 / 5
Sword of White Lies
SoWL
x3 x8-23 x5 (16-31 total)
Multiple Use
[Special – r101]
Rating: 3 / 5
It can be difficult to find an upgrade to an anagram sword, especially one that doesn’t cost hundreds of millions of NP. There aren’t too many items that fit right in between the anagram swords and the attack pea family gap, but fortunately these two swords do.

An upgraded version of Sword of Ari, the Ghostkersword is one of the few weapons that is a little better than the anagram swords. I would say Shield of Faerieland, Triple Turbo Dryer, Jhudoras Wand, and Alien Aisha Scrambler are the biggest threats to this weapon.

An upgraded version of Sword of Thigl, the Sword of White Lies is one of the other few weapons better than the anagram swords. There are many, many ways to block light in Neopia, including this list of full light blockers, Skarls Sword, Jhudoras Bewitched Ring, Superior Reflection Shield, and to lesser degrees the Combo Battle Mirror, Kings Lens, and Wand of the Dark Faerie.

I feel like both of these items are slightly overrated. Ghostkersword has risen to astronomical heights because it is retired, and Sword of White Lies is sort of in the same boat being a Smugglers Cove item, but because there aren’t many other options for weapons to fill in the gap between the anagram swords and the attack pea family, there’s not much you can do. After this point, if you want better weapons you’re going to have to pay hundreds of millions for stuff like the peas, Faerie Slingshot, Ilusens Staff, etc.

Gr apes of Wrath
GoW
x15 x9 (24 total)
Multiple Use
[Special – r101]
Rating: 4 / 5
This was released from the Smugglers Cove in 2009. Both Illusens Silver Shield and Shield of Pion Troect would take a good chunk out of this, especially the Pirate Captains Hat in particular. To a lesser degree, some of the earth reflectors would hurt this too. This is very similar to the attack pea family of weapons.
Attack Pea
AP
x24
Multiple Use
[Special – r101]
Rating: 4 / 5
Seasonal Attack Pea
SAP
x20 x8 (28 total)
Multiple Use
[Special – r101]
Rating: 4 / 5
Super Attack Pea
SuAP
x12 x20 (32 total)
Multiple Use
[Special – r101]
Rating: 4 / 5
24 and 28 are crazy, but 32 consistent icons with every use is the best you can get, this is the top of the line when it comes to multiple use, shear power weapons. If you’re going up against any of these, you’ll want an earth defender of some kind. Check out Illusens Silver Shield, Shield of Pion Troect, and these earth reflectors. If you’re going up against the Seasonal Attack Pea, check out these full light blockers. Pirate Captains Hat would completely block it, and Kings Lens would even things out. The air Super Attack Pea hits with is more difficult to block, as it’s generally more expensive for a full air blocker or air reflector.

The alternatives at this point of battling are debatable I suppose, but they may include Faerie Slingshot, Rod of Dark Nova, Skarls Sword, Illusens Staff, and Wand of the Dark Faerie. The only reason I rate the peas a 4 is because of the outrageous prices. You could buy a few of the alternative weapons for the price of one of these, and I think that’s what I would rather do, personally.

Faerie Slingshot
FS
Weak hit: x2 x2 x1-3 (5-7 total) or
Multiple Use
Strong hit: x17 x12 x6-31 (35-60 total)
[Artifact – r250]
Note: weak hit ≈ 2/3, strong hit ≈ 1/3
Rating: 4 / 5
Although there are items in Neopia that do even more damage than the Faerie Slingshot, like Darigan Sword of Death, you will never see them. Of all the items that you could possibly hope to have one day, this is the one that will do the most possible damage in the Battledome. The potential to do more icons than the legendary Super Attack Pea for a fraction of the cost is enticing. However, you do lose a lot of consistency with this item. It will get a weak hit more often than a strong hit. I used two of these for a short time and had some fun with them against the Inflatable Balthazar, but it can really test your patience if you desperately need that strong hit, let alone two on the same turn. Pirate Captains Hat paired with Altadorian Swordbreaker would be a relatively cheap way to block this completely.

DefensiveBuilding a Battledome Set – Defensive

Defensive items are ones that don’t attack your opponent, but instead defend you. The idea is to cut down your opponent’s attack from a devastating finishing blow, to a tiny negligible scratch. Some pets with low defence may look to use full blockers, which don’t take advantage of a pet’s defence trait.
Shiny Shoal Shell Shield
SSSS
Multiple Use
x2.75 x2.75 x0.25-2.75 x2.75 (8.5-11 total)
[Special – r101]
Rating: 3 / 5
Studded Leather Cuirass
SLC
Multiple Use
x3 x2 x3 x3 (11 total)
[Ultra Rare – r97]
Rating: 4 / 5
Leaf Shield
LS
Multiple Use
x5 x3 x5 (13 total)
[Special – r101]
Rating: 4 / 5
Kiko Skull Pirate Hat
KSPH
Multiple Use
x5 x2-4 x5 (12-14 total)
[Special – r101]
Rating: 3 / 5
Shiny Shoal Shell Shield: The bad new is that this weapon loses a few points due to fractional icons. The good news is that this shield can still block quite a bit of the more common weapons both in 1P and in 2P, and perhaps most importantly, it’s cheaper than the Leaf Shield. This will stop a portion of all the newbie scrolls. Hubrid Nox Memorial Shield would make for a great upgrade.

Studded Leather Cuirass: This is rather similar to the Royal Blue Cape, although the cape is a little too pricy if you ask me. If you’re in the lower leagues of battling, imagine pairing this with a Hanso Charisma Charm for example; you would attack with 10 icons while still defending a large amount of icons. The cuirass will also cut the HCC attack in half if you’re attacked with one.

Leaf Shield: You will win this for completeing Illusens Glade Quest 29. Earth, physical, and water icons are all fairly common. Unless your opponent goes out of his / her way to not use those icons, chances are that you’ll defend something with this shield. Although, the very cheap Scroll of Ultranova will sneak right through this.

Kiko Skull Pirate Hat: This was awarded in August 2013 during the Daily Dare. The extra two physical will only be defended if you are also attacked by air icons. When attacked by air icons it will say it deflects the air attack, but it doesn’t. I suppose that’s just an indication that you’re defending the extra physical icons. When attack by air but not physical it will appear to defend physical even though none is present. I’m not the biggest fan of this. The only icon that stands out at this level is the dark, and I would prefer to use Hanso Charisma Charm for dark defence.

Patched Magic Hat
PMH
Multiple Use
x5 x3 x3-6 (11-14 total)
[Very Rare – r92]
Rating: 3 / 5
Wanderers Cloak
WC
Multiple Use
x2 x2 x3 x3 x2 (12 total)
[Ultra Rare – r97]
Rating: 3 / 5
Royal Blue Cape
RBC
Multiple Use
x3 x3 x3 x3 (12 total)
[Ultra Rare – r98]
Rating: 2 / 5
Sophies Magic Hat
SMH
Multiple Use
x3 x5 x3 x3 (14 total)
[Ultra Rare – r95]
Rating: 4 / 5
Tower Shield
TS
Multiple Use
x2 x2 x2 x2 x2 x2 (12 total)
[Super Rare – r99]
Rating: 1 / 5
Patched Magic Hat: If you take air damage you will defend all six physical icons, otherwise you will always defend three. This has some nice icon types for low level battling, and will help stop weapons like Glowing Meteor Rock, Pumpkin Launcher, Carved Qasalan Blowgun, Ridiculously Heavy Battle Hammer, and even Brynns Legendary Sword of Wraith Smiting. Devious Top Hat and Cane is very similar to this, but with an added attack. Ghostkershield, Dr. Sloths Personal Body Armour, and Hubrid Nox Memorial Shield all offer the same icon types, plus more.

Wanderers Cloak: It doesn’t defend a whole lot, but the best thing about this cloak is its icon spread, only being beat out by Tower Shield at this level. It’s difficult to find an item that doesn’t get partially blocked by this. Faerie Tabard and Hubrid Nox Memorial Shield have similar icon types and would be an upgrade.

Royal Blue Cape: This has a nice range of icons, but the price is not so nice. This works well against more common weapons though. For example, this would completely stop Bow of the Fire Faerie, and it would put a significant dent in Ylanas Blaster, Brynns Legendary Sword of Wraith Smiting, and Bow of Destiny. Look to Studded Leather Cuirass if you want something cheaper, it has similar icon types. Devious Top Hat and Cane offers similar defence, but with added attack power. These three big shields all offer the same icon types, minus one; Ghostkerbomb, Faerie Tabard, and Hubrid Nox Memorial Shield.

Sophies Magic Hat: This can take a good little bit out of a lot of weapons, weapons like Carved Qasalan Blowgun, Ridiculously Heavy Battle Hammer, Ylanas Blaster, Brynns Legendary Sword of Wraith Smiting and even Werelupe Claw Necklace should you find yourself up against one. This is what people usually upgrade from the Leaf Shield to.

Tower Shield: Once again the icon spread here is great, it’s just a shame it’s so expensive. I would consider getting this if it were around, say, a half million NP. This will help stop far too many weapons to list, so let me tell you about the weapons it will not help you against instead. Dr. Sloths Personal Bath Buddy, Kelpbeards Trident, and Sword of Tawre will all get a ton of water through. But don’t think that just because it doesn’t defend water that that’s the only thing you have to worry about. Because it only defends two icons of every other type, even very cheap items like Flask of Liquid Fire will still get 10 of its 14 icons through. Stone Foam Finger would get 11 out of 15 through. It’s the weapons with large amounts of a few icons that you’ll have to worry about while using this shield as well.

Downsize!
D!
Once Per Battle
50% (all icon types)
[r68]
Rating: 5 / 5
This is a nice little weapon to have in any set. In fact, I still have this in my set; this is the only weapon that I’ve had in my set since I first started out. Heavy Robe of Thievery gets second place.

This will defend half the damage done to you for one round, at a very cheap price as well. Thick Smoke Bomb and Thyoras Tear would be the upgrades, but the bomb is a one use item.

Thick Smoke Bomb
TSB
One Use
100% (all icon types)
[Special – r101]
Rating: 4 / 5
Thyoras Tear
TT, T-Tear, TTear
Once Per Battle
100% (all icon types)
[Super Rare – r99]
Rating: 4 / 5
Thick Smoke Bomb will defend everything from hurting you for one round, and then it disappears for good. It should only be used for important battles, like avatar or DoN challengers.

Thyoras Tear works the same way as the Thick Smoke Bomb, except that you can use it once per battle. The insane price is what keeps me from giving this a 5; also, I feel the new abilities in the Battledome make this a little less useful. Castle Defenders Shield works the same way as Thyoras Tear but it’s much more rare and expensive.

Pirate Captains Hat
PCH
Multiple Use, Semi-Fragile
100% 100% x5
[Artifact – r200]
Rating: 4 / 5
Semi-fragile means that this could break for the battle, but it does not break permanently. I think I’ve heard somewhere before that the average amount of turns that people usually get out of this before it breaks for the battle is about four. This will hurt the Honey Potion, Sword of Thigl, Sword of Thare, Ghostkerbomb, Sword of White Lies, Gr apes of Wrath, Faerie Slingshot, Illusens Staff, and all of the attack peas. It will also fully block the very common Hanso Charisma Charm. It’s rare to find a defensive item that can fully block two icon types, expecially for this price. The only other weapons that fully block two icon types would be the Alien Aisha Scrambler and Rod of Dark Nova, and the prices of those are insane.
Alien Aisha Scrambler
AAS
Multiple Use
100% 100%
[Retired – r180]
Rating: 2 / 5
This restocked at the Smugglers Cove many years ago. Although this is incredibly rare and expensive and you may never see one, the only reason it is here is because it is so rare to find a multiple use item in Neopia that can fully block two icon types. The only others being Pirate Captains Hat (although that one is semi-fragile) and Rod of Dark Nova. Jhudoras Wand and Illusens Staff come close, kind of. Other air defenders include Shield of Faerieland, Shield of Soaring, Tornado Ring, Jhudoras Wand, or the air reflectors. Other light defenders include Superior Reflection Shield, Pirate Captains Hat, Jhudoras Bewitched Ring, Dr. Sloths Personal Body Armour, Hubrid Nox Memorial Shield, Skarls Sword, and the light reflectors.
Shield of Faerieland
SoF
Multiple Use
100% x5 x5 (10 total)
[Artifact – r200]
Rating: 3 / 5
In lower tiers of battling, this will help stop items like Bow of Destiny, Wand of Reality, many newbie scrolls, as well as completely shut down Altador Cup Throwing Star. In higher tiers of battling, this will help you stop stuff like Sword of Ari, Pirate Captains Cutlass, and Ghostkersword. Many items will use tiny amounts of air or physical, so it’s not bad to have as a general defender if you’re not sure what your opponent is going to be using. I rate this a 3 because out of all the big name Hidden Tower shields, this one is the most expensive and it defends the least.

Other full air defenders: Alien Aisha Scrambler, Jhudoras Wand, Ring of Weightlessness, Shield of Soaring, Tornado Ring, and Weird Scarab.

Ghostkershield
G-Shield, GShield
Multiple Use
100% x3 x5 x3 x5 (16 total)
[Artifact – r200]
Rating: 2 / 5
Ghostkershields used to be a lot more common back in the day when Sword of Skardsen was not only the cheapest of the anagram swords, but it was the only one! Eventually though, Kelpbeards Trident was released making it not as necessary to block dark. Then Hanso Charisma Charm was released; just about everyone received one, and G-Shield became even less common. Ghostkershield is still a great shield in its own right, there’s just a much cheaper alternatives nowadays for full dark defence. This seems to fair better in lower tiers where it will take chunks out of the newbie scrolls, pre 13 iconers, and 13 iconers. Once you get to 14 or more icon weapons, the icon variance of the shield is nice, but each icon just doesn’t defend enough. For example, Dr. Sloths Personal Bath Buddy gets 12 out of 14 icons through. Mass dark icons aren’t too common in higher tiers except for the previously mentioned Sword of Skardsen and maybe the rarely used Jhudoras Potion and Wand of the Dark Faerie. It also performs well against Pirate Captains Cutlass. However, the commonly used Kelpbears Trident and Sword of Reif will get 16+ icons through, even Sword of Ari and Sword of Thigl will get 13+ icons through. Then there are the bigger weapons after the anagram swords… Use this in lower tiers if you can afford it, use a Hanso Charisma Charm and get a different shield for higher tiers.

Other full dark defenders: Hanso Charisma Charm, Illusens Staff, Ring of the Lost, and Rod of Dark Nova

Illusen Silver Shield
ISS
Multiple Use
100% x3
[Super Rare – r99]
Rating: 2 / 5
A lot of weapons use earth, but it’s rare to see so much of it in low tier battling. I’m not too sure you’ll need full earth defence until you start fighting higher league battles. This will put a large dent in items like Honey Potion, Sword of Thare, Attack Pea, , and to lesser degrees Skarls Hasty Mace, Ghostkerbomb, Gr apes of Wrath, Seasonal Attack Pea, Super Attack Pea, and Faerie Slingshot. It may be more prudent to use an earth reflector or a King Lens.

Other full earth defenders: Greater Staff of the Earth Faerie, Pirate Captains Hat, and Shield of Pion Troect.

Frozen Cyodrake Shield
FCS
Multiple Use
100% x5 x3 (8 total)
[Special – r101]
Rating: 2 / 5
The only problem with this shield is that there aren’t many times to use it effectively. I had and used this for about a year. I rather enjoyed it when it got to totally block fire, but it can really test your patience if your opponent doesn’t attack with any fire. This will shut down Scroll of Ultra Nova, Flask of Liquid Fire, Portable Kiln, and Sword of Reif. It will also take a portion away from Ghostkerbomb and Gr apes of Wrath. Other than those weapons I probably wouldn’t use this shield; it’s twice the cost of the big shields and you’re defending less. There are cheaper ways to reflect fire. Unfortunately the only other full fire blockers are either situational, ridiculously expensive, or both.

Other full fire defenders: A Shovel, Rod of Dark Nova, Slippery Floor Potion, and Wand of Flamebolt.

Parasol of Unfortunate Demise
PoUD
Multiple Use
100% x2-5 x3 (20 total)
[Ultra Rare – r98]
Note: uses strength boost of whoever ends turn first
Rating: 5 / 5
In 1P this will always use your opponent’s defence boost while in 2P it will use the defence boost of whoever ends their turn first. This is mainly for people who are going up against stronger players than themselves and could take advantage of their opponent’s higher defence boost. This might be good to use on the Space Faerie if you were going for the avatar for example. Even in higher tiers this would fair well against a Sword of Thigl. Add all of this to the fact that this is so incredibly cheap, and you have one crazy umbrella. I had a really tough time giving this a 5 because there are upgrades to this; it just depends on your perspective. If you’re a newbie battler with less than 10k to their name, then get this. If you’re an experienced battler with the 750 defence boost and could easily buy a Hubrid Nox Memorial Shield, then get the shield.
Dr. Sloths Personal Body Armour
DSPBA
Multiple Use
100% x5 x3 x5 x3 (16 total)
[Artifact – r200]
Rating: 3 / 5
Hubrid Nox Memorial Shield
HNMS
Multiple Use
100% x5 x5 x5 x5 (20 total)
[Artifact – r200]
Rating: 5 / 5
Both of these are good against a few lower tier weapons like Brynns Legendary Sword of Wraith Smiting, Wand of Reality, or Stone Foam Finger, and higher tier weapons like Sword of Thigl and its big brother the Sword of White Lies, or Seasonal Attack Pea… But that’s about it. Much like fire, it can be hard to find a weapon that attacks with a ton of light. Sloths armour is the cheapest of the big shields, while Nox’s shield is the most expensive. Both will help you pick apart smaller amounts of other weapons too. Nox’s shield fairs much better though and is capable of putting a dent in a larger array of weapons. Both are buyable from the Hidden Tower. I like the idea of combining the shield with a Hanso Charisma Charm. You’d get full light and dark defence, four other icon types defended, and you’ll still attack with ten icons. It can be a good way to feel out your opponent’s attack. The only weakness in that particular case would be fire. If your opponents keep using Flask of Liquid Fire or Sword of Reif, look towards a Frozen Cyodrake Shield or a fire reflector of some kind. I’d also love to pair this with Rod of Dark Nova, but good luck doing that.

Other full light defenders: Alien Aisha Scrambler, Golden Pirate Amulet, Jhudoras Bewitched Ring, Pirate Captains Hat, Shadow Shield, and Skarls Sword.

Yooyuball Keepers Chest Guard
YKCG
Multiple Use
100% x3 x3 x2 (8 total)
[Retired – r180]
 
Rating: 1 / 5
This was a prize for participating in the very first Altador Cup many years ago, and so it is very expensive now. There is one great option when it comes to full physical defence, and that is the Altadorian Swordbreaker. Get that instead.

Other full physical defenders: Altadorian Swordbreaker, Flaming Bronze Helm, Winged Scarab, Yooyuball Player Sling.

Faerie Tabard
FT, F-Tab, FTab
Multiple Use
100% x3 x3 x5 x5 (16 total)
[Artifact – r200]
Rating: 4 / 5
The full water defence is great against weapons like Dr. Sloths Personal Bath Buddy, Kelpbeards Trident, Slumberberry Potion, or Sword of Tawre. The added air, earth, fire, and physical icons are a great bonus against weapons like Ylanas Blaster, 13 iconers, or Rusty Pitchfork. When paired with Kings Lens this will reflect or defend a little bit of everything.

Other full water defenders: Battle Plunger, Dehydration Potion, Enchanted Kiko Squeeze Toy, and Slippery Floor Potion.


Dual Duty: Newbie | Intermediate | Advanced
Dual Duty Full Blockers: Newbie | Intermediate | Advanced

Dual duty items are ones that both attack your opponent and defend you. They may not attack or defend as much as an offensive or defensive weapon would at a comparable price, but that’s the sacrifice you make for doing two things at once. They may do additional things like heal your pet or reflect icons, but to be considered a dual duty item it must at least attack and defend.
Scrab Ring
SR
x2 x2 x2 (6 total)
Multiple Use
x3 x3 (6 total)
[Special – r101]
Rating: 5 / 5
Amulet of Altador
AoA
x3 x3 (6 total)
Multiple Use
x3 x3 (6 total)
[Ultra Rare – r96]
Rating: 4 / 5
The Scarab Ring has been around for a really long time now, and has been a part of many battler’s sets I’m sure. This was introduced after I had time to really use it. Back in the day I was using something called a Hand Painted Scarab. But anyway, the ring is really an amazing little weapon for its price. It can be won from the Lost Desert Scratchcard Kiosk, so it will remain relatively inexpensive unless it retires or a war comes around. If you’re a 2P battler, watch out for Kiko Skull Pirate Hat.

Recently, another weapon was released that challenges the ring, the Amulet of Altador. The amulet is a tad more expensive than the ring, but it could certainly fall to the same level as the ring one day. Head to head, the amulet would beat the ring, so I feel that it’s more for 2P. The air and light may be more difficult to block, cutting right through Leaf Shield and the aforementioned Kiko Skull Pirate Hat.

Golden Compass
GC
x3 x3 x3 (9 total)
Multiple Use
x2.67
[Rare – r85]
Rating: 3 / 5
Jhudoras Cursed Sword
JCS
x2 x3 x2 (7 total)
Multiple Use
x5
[Ultra Rare – r97]
Rating: 2 / 5
I used to really like the compass back in the day, but it’s fallen on some hard times, what with Hanso Charism Charm out now. The charm will attack with one icon more, and it defends all dark. Only get this if you can’t yet afford to upgrade to the charm just yet.

The sword is for those that want a stronger attack than the newbie dual duty weapons, but still want some defence. It can be difficult to find large amounts of light icons at this level of battling, so the five solid light icons of defence may be wasted. It will cut up the attack of Flask of Liquid Light, Wand of Reality, and Hanso Charisma Charm though. Dusty Magic Broom, Air Faerie Crown, and Stocking Full of Coal are all very similar items.

Spyder Stone Necklace
SSN
x2 x2 x2 x2 (8 total)
Multiple Use
x3 x3 (6 total)
[Ultra Rare – r97]
Rating: 3 / 5
Stocking Full of Coal
SFoC
x3 x3 x3 (9 total)
Multiple Use
x5
[Ultra Rare – r98]
Rating: 3 / 5
Rusty Pitchfork
RP
x3 x3 x5 (11 total)
Multiple Use
x5
[Very Rare – r94]
Rating: 4 / 5
The Spyder Stone Necklace is a minor upgrade from the Scarab Ring and Amulet of Altador. It’s going to cost you around 300k to grab one of these, so you’ll have to decide if that price is worth it. If you don’t have enough for a Hanso Charisma Charm then this might be a good option, but personally I would try to save up for a charm. The two would make a fine pair if it weren’t for the fact that this defends dark icons; they would somewhat be going to waste in that case. This gets two icon types through all of the newbie shields, and one to two icon types through the intermediate shields. It also ties or beats all of the newbie scrolls.

Both the Stocking Full of Coal and the Rusty Pitchfork are solid upgrades from the previous dual duties that we’ve been looking at so far. I would rather go with the pitchfork over the coal personally, and not just because it attacks with more icons, but because of the physical defence. Physical is an icon that TNT tacks onto a lot of weapons, so you’ll likely end up defending physical quite often with this. Weapons like Cursed Elixir, Brynns Legendary Sword of Wraith Smiting, Altador Cup Throwing Star, Stone Foam Finger, and so on. The attacking icon types could be better though. All of the newbie shields and intermediate shields will hurt this pretty bad. Altadorian Swordbreaker would be a similar alternative, and Fan of Swords would be the upgrade to this.

Mask of Coltzan
MoC
x8
Multiple Use
x6 x5 (11 total)
[Artifact – r200]
Rating: 1 / 5
Fearsome Gladius
FG
x2 x2 x3 x1-5 (8-12 total)
Multiple Use
x5 x5 (10 total)
[Super Rare – r99]
Rating: 1 / 5
Mask of Coltzan isn’t an item that sees much use any more. It’s too expensive for what it does, but is still up here for its tactical uses. Fire can be tough to block in large amounts, just look at all of these shields. MoC will get five fire through them at a minimum. Being able to block 11 additional icons is nice too. This would beat an Altadorian Swordbreaker or Hanso Charisma Charm going head to head, although it will still lose when going against cheaper items like Ylanas Blaster or Wand of Reality. If I was going to use this, I would consider pairing it with a shield of some kind to cover holes and strengthen my defence.

Although the Fearsome Gladius has a higher potential attack, it doesn’t provide the same tactical power as Mask of Coltzan does, and so it’s likely to be shut down by a number of shields. Although it’s cheaper, it’s also in the same boat as MoC right now in that it’s still too expensive to purchace and use. Ylanas Blaster uses the same icon types, provides more of them, and is cheaper. Go with that instead.

Dark Faerie Collar
DFC
x10
Multiple Use
25% (reflect) x5
[RARITY 130]
Rating: 1 / 5
This is a prize for completing Jhudoras Bluff Quest 44. I like the idea of this weapon, but not in practice. I mean, the idea of a weapon that attacks, defends, and reflects sounds pretty cool, but there aren’t enough icons here to justify the price. 10 attacking icons are only standard, if not below standard by now. The 5 light defence isn’t anything to be thrilled abour either. Does the 25% darkness reflection make it worth it then? Not when you look at Hanso Charisma Charm.
Fan of Swords
FoS
x5 x3 x3 x3 x3 x3 (17 total)
Multiple Use
x5
[Artifact – r200]
Rating: 4 / 5
One of the more recent Hidden Tower weapons, the Fan of Swords offers a total icon amount similar to the anagram swords but with an added defence. The icons add up to 17 because of fractional icons.

This weapon is bittersweet to me. Personally, I wouldn’t use this for 1P battles. You can do more damage with one of the anagram swords, and it will be about six million NP cheaper. Or you could even come close to buying two Kelpbeards Tridents for the price of one fan. It’s in 2P battles where this thing shines. The physical defence isn’t much, but I really like that TNT tacked it on here; I’d love to see more high level dual duties in Hidden Tower weapons. The icon types here are very diverse, this makes it so that it’s easy to defend something against, tough to completely block, and seemingly impossible to come out ahead against. Faerie Tabard, Dr. Sloths Personal Body Armour, and Ghostkershield all take it down to less than five icons, while Hubrid Nox Memorial Shield takes it down to less than three icons. The real problem comes with what it’s paired with. I would pair it with something like a Sword of Reif, or even Flask of Liquid Fire. This way you’ll get all icon types through; that’s really difficult to block. If some of the better shields on the site can’t block it completely, you have another weapon attacking you to worry about, and you’ve already used up one of your weapon slots defending, just what are you going to do?

I’ve been racking my brain trying to come up with counters to this, but everything I look at just didn’t seem to work. Kings Lens and Faerie Tabard would block a little bit of everything, but you still come out behind and can’t win with just the reflected icons. Tower Shield would take a good bit away from the fan, but again you still come out behind. The best counter I could think of to someone using a Fan of Swords and a Sword of Reif on you would be this: Frozen Cyodrake Shield and any anagram sword. The shield would take care of all fire bringing it down to 1.25-9 physical icons, and would cut seven icons off of the fan bringing it down to ten; pair that with the sword and you would end up doing 15 elemental icons, and up to 4 physical more if you get a good hit and manage to overpower the fans physical defence. You would end up doing 15-19 icons while your opponent did 11.25-19, so it’s still going to be fairly close. Similarily, if your opponent were to use the fan and a Sword of Ari, a Shield of Faerieland paired with any anagram sword would also prevail. But that introduces two more problems in our hypothetical; you don’t know which other sword your opponent will be using, and your opponent may switch things up and use different swords.

The problem with the fan is that it forces you into either trying to defend as much of it as you can, or to simply overpower it. And since we couldn’t defend against it all too well, let’s look into simply overpowering it. Ghostkerbomb would overpower this, but only for one turn. Ghostkersword and Sword of White Lies could potentially hit for more, but even they suffer due to the physical defence of the fan. Illusens Staff and Wand of the Dark Faerie would win against the fan, so would any of the attack peas, but we’re getting into insanely expensive territory now.

When I originally started to rate this weapon I gave it a 2 out of 5. I wanted to dislike it. I think it’s because I’m a 1P battler, and I still don’t like this for 1P. But the more I thought about it, the more I ended up liking it. As far as 2P is concerned, it’s hard to go wrong with it. I guess you could say I became a fan of this weapon… Get it?… Fan?… Um, let’s move on.

Altadorian Swordbreaker
AS
x5
Multiple Use
100%
[Very Rare – r94]
Rating: 4 / 5
Hanso Charisma Charm
HCC
x5 x5 (10 total)
Multiple Use
100%
[Special – r101]
Rating: 5 / 5
Altadorian Swordbreaker and Hanso Charisma Charm belong in a league of their own as far as I’m concerned. They’re two of the cheapest full blockers on the market, Parasol of Unfortunate Demise is another good one.

Physical isn’t an icon type that is used in massive amounts very often, however the sword will take 2/3 off of the Stone Foam Finger, a very common stop for players before they move up to Hidden Tower weapons. Physical is also an icon that gets tacked onto weapons a lot. You’re not likely to stop a weapon in its tracks with the sword, but you’ll end up putting a dent in quite a bit. This is more of a general defence weapon; if you don’t know what your opponent is going to use and you can’t yet afford some of the better shields out there, the sword can be a relatively cheap and safe choice.

The Hanso Charisma Charm was a prize for participating in The Faeries Ruin plot back in 2010 / 2011. You didn’t need very many points to purchace this weapon, and as a result, just about everyone and their grandmother has one of these. Ring of the Lost is a very similar but more expensive version of this. This pretty much made Sword of Skardsen obsolete in 2P battles. But then again, a lot of people who had a SoS and liked 2P battles could have switched to Kelpbeards Trident or one of the other anagram swords when they were released a few months later. Ghostkershield is another full dark defender. I like the idea of combining the charm with a Hubrid Nox Memorial Shield. You would fully block both light and dark, and a large amount of four other icons. Fire would be the only thing that could get through.

Shield of Pion Troect
SoPT, Shield of Protection
x3
Multiple Use
100% x1-2
[Artifact – r200]
Rating: 2 / 5
I’ve never known the Shield of Pion Troect of being used that much. It’s not great to be honest. It just doesn’t do all that much for the price. Still, it’s noteworthy for what it can do to the higher end items like Gr apes of Wrath, the Attack Pea Family, and Faerie Slingshot. Check out Illusens Silver Shield for an alternative full earth blocker.
Jhudoras Bewitched Ring
JBR
x10 x1-5 (11-15 total)
Multiple Use
100%
[Artifact – r200]
Note: can’t be unequipped
Rating: 3 / 5
I came this close to equipping this once, but decided against it. I’m not sure how I feel about that, I mean, I don’t think I would have regretted it that much. Although many full light blockers have been released since, this hasn’t exactly been overtaken by any of them. It’s not a bad weapon or anything; it’s a little pricy, but not bad. It’s almost like a mini Skarls Sword. You can technically unequip it by trading your pet to someone else. You don’t have to actually go through with the trade apparently. This will put all equipped items from your pet to your inventory. Whether that is actually legal or not is another question. If you don’t want to go through that hassle, Sword of Skardsen offers similar icon types and more of them for attack, while Pirate Captains Hat or Hubrid Nox Memorial Shield are great light defenders, although neither of them offer any attack, nor does the sword offer any defence. In fact, it’s not until weapons like Skarls Sword, Illusens Staff, or Wand of the Dark Faerie that you find a true upgrade to the ring.
Skarls Sword
SS
x5 x10 x6-10 (21-25 total)
Multiple Use
100%
[Special – r101]
Rating: 4 / 5
This was a TCG Rare Item Code prize, and wow to you if you actually got one! This is one of the best dual duty weapons obtainable, and has the potential to do more icons than the Attack Pea. It actually beats the Seasonal Attack Pea by just a tad too. It would also really hurt a Sword of Thigl and Sword of White Lies. It even beats a Fan of Swords head to head. It looks beautiful too! The price really hurts this though; this is an incredibly rare item.
Jhudoras Wand
JW, J-Wand, JWand
x5 x3 (8 total)
Multiple Use
100% 75% (reflect)*
[Special – r101]
Rating: 4 / 5
*This weapon is a little complicated because it doesn’t really defend all of that light. If you receive light damage while using the wand, the light will make a copy of itself into air. There will then be 100% light and 100% air. You’ll take 100% of the light and 25% of the air, and then you’ll reflect 75% of the air. You’re essentially taking 125% of any light damage received, and reflecting 75% light back as air. Illusens Staff works the same way. The fact that you take extra light damage is this weapons greatest undoing.

This item is on the verge of being a dual full blocker, putting it in the same league as Rod of Dark Nova, Illusens Staff, Pirate Captains Hat, Alien Aisha Scrambler, and perhaps Kings Lens or Superior Reflection Shield. It will hurt air based weapons like Sword of Ari and Ghostkersword. Although light isn’t necessarily an icon you would want to see your pet attacked with while using this, it could potentially come out ahead of light based weapons due to the eight icons the wand attacks with, depending on what the light is paired with and how much of it there is. This item was in the Hidden Tower many years ago, but has long since been retired and is very rare and expensive now.

Rod of Dark Nova
RoDN
x1.75 x1.75 (3.5 total)
Multiple Use
100% 100%
[Retired – r180]
6-60 (overheal) creates three dark novas
Rating: 4 / 5
This is one of my favourite of the really old weapons of Neopia because it does a number of really cool things. The attack isn’t anything special, but that’s not what you would want this for. The full dark and fire defence is extremely useful and will help you block items like Sword of Reif, Sword of Skardsen, Jhudoras Bewitched Ring, Jhudoras Potion, even Wand of the Dark Faerie. The only other two multiple use items that fully block two icon types are Pirate Captains Hat and Alien Aisha Scrambler. It also has a better multi heal ability than the Everlasting Crystal Apple (on average). The price however makes it so that few people will ever own this item. This item used to be in the Hidden Tower many years ago but it has long since been retired. I’d love to combine this with a Hubrid Nox Memorial Shield. You would attack, heal, and defend a little bit of everything, including three icon types completely.
Illusens Staff
IS, I-Staff, IStaff
x13 x1-6 (14-19 total)
Multiple Use
100% 75% (reflect)*
[Special – r101]
20% of max HP (only when HP is less than 20%)
Rating: 5 / 5
*This weapon is a little complicated because it doesn’t really defend all of that light. If you receive light damage while using the staff, the light will make a copy of itself into darkness. There will then be 100% light and 100% dark. You’ll take 100% of the light and 25% of the dark, and then you’ll reflect 75% of the dark. You’re essentially taking 125% of any light damage received, and reflecting 75% light back as darkness. Jhudoras Wand works the same way. The fact that you take extra light damage is this weapons greatest undoing. While this fact can hurt the wand moreso, I think it can be overlooked on the staff based on the other things it does.

Out of all the big name items; Gr apes of Wrath, Faerie Slingshot, Skarls Sword, Rod of Dark Nova, all the attack peas, even the superior Wand of the Dark Faerie, this is the only one that I rate a 5 out of 5. Why? Price. While the price of those other weapons can be astronomical, this is the cheapest one. Although still very expensive, the price has come down to a very reasonable amount. As more and more enter Neopia, the price will continue to fall as well. You will win this if you can manage to complete Illusens Glade Quest 50.

The ability to heal 20% of your HP multiple times in a match is the real reason for owning this weapon. Many pets with thousands of HP will try to grab one of these and / or the Wand of the Dark Faerie, and essentially use them to make themselves invincible. Sword of Lameness is really the only weapon that could challenge their healing power.

Wand of the Dark Faerie
WotDF
x20 x1-9 (21-29 total)
Multiple Use
75% (reflect)
[RARITY 130]
25% of max HP (only when HP is less than 25%)
Rating: 4 / 5
This is the prize for completing Jhudoras Bluff Quest 50, and is arguably the best weapon in Neopia, unless you want to count one of a kind items like Darigan Sword of Death. The only alternatives at this point will cost hundreds of millions of NP. Items like Super Attack Pea, Skarls Sword, Rod of Dark Nova, or Illusens Staff. The price is the only thing that prevents me from giving this a 5 out of 5.

Much like Illusens Staff, the heal is the main draw of this weapon. With enough HP, healing 25% over and over again can make some pets invincible. Again, the staff or Sword of Lameness are really the only weapons that could challenge the healing power here. The attack and reflection is nothing to scoff at either. It will attack with more force than any of the anagram swords, and reflect the majority of weapons like Sword of Thigl right back at your opponent.

FreezersBuilding a Battledome Set – Freezers

Freezers are items that freeze your opponent, which makes them not able to do anything the next turn. This will devastate many opponents. A good freezer is essential to any serious Battledomer.

 Freezers are limit one, meaning only one freezer can be equipped at a time.

Randomly Firing Freeze Ray
RFFR
x2 x2 (4 total, 50% chance) or
Multiple Use, Semi-Fragile
[Special – r101]
Freeze (50% chance)
Rating: 4 / 5
Your first freezer in the Battledome will likely be this one, although Snowglobe Staff is a cheaper possible option. The freeze ray has a very good freeze percentage of 50%. It will either attack or freeze your opponent, and will disappear for the battle once it freezes. The freeze ray was awarded for correctly guessing in the 2011 Daily Dare Staff Tournament.
(Ancient) Lupe Wand
ALW / LW
(Lupe Only)
 
Once Per Battle, Fragile
[RARITY 113]
Freeze (100% chance)
Rating: 4 / 5
Entangling Lenny Lasso
ELL
(Lenny Only)
 
Once Per Battle
[Ultra Rare – r97]
Freeze (100% chance)
Rating: 4 / 5
Icy Chia Goggles
ICG
(Chia Only)
Once Per Battle
[Super Rare – r99]
Freeze (100% chance)
Rating: 3 / 5
Golden Peophin Harp
GPH
(Peophin Only)
Once Per Battle
x3
[Super Rare – r99]
Freeze (100% chance)
Rating: 3 / 5
Lupe Wand and Ancient Lupe Wand are both very cheap, but they will eventually break after repeated use so you’ll likely have to buy a few. The other three weapons are a cheaper alternative to the first non-species specific 100% freezer, H4000 Helmet. If you need an even cheaper alternative, Randomly Firing Freeze Ray isn’t bad.
Scroll of Freezing
SoF
Once Per Battle, Fragile
[Super Rare – r99]
Freeze (100% chance)
Rating: 3 / 5
Heavy Blue Tunic
HBT
 
Once Per Battle
x3 x3 x3 (9 total)
[Super Rare – r99]
Freeze (100% chance)*
Rating: 4 / 5
Scroll of Freezing is a fragile (meaning it will permanently break eventually) freezer that should only be used for important battles, like DoN or avatar opponents, or if you cannot yet afford a solid freezer like Randomly Firing Freeze Ray or a multiple use 100% freezer.

*Your pet must have 1,001 or more intelligence for the freeze to work, otherwise it just defends. If you have less than 1,001 intelligence. it’s a multiple use item that will just defend. If you have 1,001 or more intelligence, it’s a once per battle item that will freeze your opponent.

The HBT is actually one of the better ones out there, assuming you end up defending some icons with it. A pet with the 350 defence boost could potentially get more use out of this than a pet with the 750 strength boost using a Sleep Ray. The intelligence part may seem daunting, but it’s easier than you think. You can get literally hundreds of books from the Book Shop for less than 1K NP each. You’ll probably need more than just the books at the book shop though, so also try other book shops around Neopia, such as Sutek’s Scrolls in the Lost Desert. If you’re seriously interested in this weapon, spend a few weeks at different book shops, and that 1,000 intelligence should cost no more than 500K.

H4000 Helmet
H4K
Once Per Battle
[Special – r101]
Freeze (100% chance)
Rating: 5 / 5
Freezing Potion
FP, F-Pot, FPot
x2
Once Per Battle
[Ultra Rare – r98]
Freeze (100% chance)
Rating: 4 / 5
Magical Marbles of Mystery
MMoM
x3
Once Per Battle
[Artifact – r200]
Freeze (100% chance)
Rating: 4 / 5
Sleep Ray
SR, S-Ray, SRay
x2 x2 (4 total)
Once Per Battle
[Special – r101]
Freeze (100% chance)
Rating: 3 / 5
Moehog Skull
MS, M-Skull, MSkull
x10 x5 (15 total)
Once Per Battle
x5 x5 (10 total)
[Special – r101]
Freeze (100% chance)
Rating: 4 / 5
All five of these weapons have a 100% chance of freezing your opponent for one turn, and then will disappear for the battle once used. Obtaining your first 100% freezer is a turning point in ones battling career; this is when things really start to get good for you. A 100% freeze is essential for mid to high level battling, and will help ensure a victory against many opponents. At the very least it will neutralize your opponent’s freeze and put you on even ground with them, although with the new faerie abilities it may be harder than it once was to freeze your opponent.

When deciding which 100% freezer to use, figure out in your own mind whether or not the extra price justifies the extra icons. For example, the Freezing Potion will do the exact same thing as the H4000 Helmet, plus two water icons. If a Freezing Potion costs an extra 500k to 1m more than a H4000 Helmet, then ask yourself if spending that much is worth two icons. Most of the time, it wont be. It depends on what the rest of your set looks like too. That 500k to 1m could be better spent on upgrading other weapons you have.

Now, the Moehog Skull… Combining more power than the Freezing Potion, Magical Marbles of Mystery, Sleep Ray, and Heavy Blue Tunic put together, this is arguably the best freezer that you can buy. These are very rarely obtained as a prize from the Haunted Woods Scratchcard Kiosk.

Finally, if you’re looking for a more defensive freezer, check out the Heavy Blue Tunic. If you’re looking for a multi-freezer, check out the Slumberberry Potion, Ice Dice, or Sword of Lameness.

Slumberberry Potion
Slum Pot, S-Pot, SPot
x10
Multiple Use
[Artifact – r200]
Freeze (17% chance)
Rating: 4 / 5
This does not disappear after a freeze. As long as you use this you will always attack with 10 icons of water, and have roughly a 17% chance to freeze your opponent. Ice Dice is a similar weapon. The somewhat common Faerie Tabard would be something to worry about, as well as Enchanted Kiko Squeeze Toy or Mega U-Bend.

Using this item or not is a tough choice to make later on in your Battledome career. Pets with 1,000 HP or more will sometimes use multi freeze items like this or Ice Dice because they can afford to take a few hits in the beginning, and with any luck get in a few freezes. The important thing to keep in mind if you’re planning on using this item is, can you survive the first two rounds if you don’t freeze and your opponent does? I’ve used this many times in the past and it was my freezer of choice for a long time, until Sword of Lameness was released. Yes you can go many turns without a freeze, but you can also go multiple turns with freezes. I wish I would have recorded some stats on this item over the few thousand times I used it, maybe one day. Having no freezes for quite a few turns can hurt, but having 3, 4, 5, or even more freezes in a row is such a devastating power to have.

Ice Dice
ID
 
Multiple Use
[Retired – r180]
Freeze (25% chance)
Rating: 2 / 5
Ice Dice is an old Hidden Tower item that retired quite a while ago now. It has roughly a 25% chance to freeze your opponent. It’s probably something that most people wouldn’t use in the BD because it’s so expensive now. It’s very similar to the Slumberberry Potion and to a lesser degree the Sword of Lameness, both of which I would say are better, but the dice are noteworthy because they have the highest chance to multi-freeze.

HealersBuilding a Battledome Set – Healers

Healers are items that will restore some or all of the health back to your pet in the Battledome. A good healer is very important to have in the Battledome.

 Healers are limit one, meaning only one healer can be equipped at a time.

Newbie Healers | Intermediate Healers | Scorchstones
Brightvale Clothing | Species Healers | Big Boy Healers

Magical Healing Potion
MHP
Once Per Battle
[r74]
15 (regular heal)
Rating: 4 / 5
Oasis Tonic
OT
Once Per Battle
[Special – r101]
35 (overheal)
Rating: 5 / 5
These are both good healers for beginners in the Battledome. The Magical Healing Potion is dirt cheap and the Oasis Tonic provides a great step up. You will however likely outgrow these fairly quickly. Once you do, it’s time to move up to the next level of healers. Take a look at the Cursed Elixir and some of the scorchstones too. The tonic was awarded as a prize from the August 2014 Desert Diplomacy event and falls right in between the Blue Scorchstone and the Green Scorchstone in particular.
Cursed Elixir
CE
x1-3
Once Per Battle
[Super Rare – r99]
20 (overheal, drained from opponent)
Rating: 5 / 5
This drains 20 HP from your opponent and heals your pet. It doesn’t say that it will do this in the combat log, but it does. The small attack is a nice little bonus. That’s pretty crazy for lower level pets that might still use newbie dual duty or newbie scrolls. This is potentially better than the newly released Oasis Tonic because you’re healing 20 HP, stealing 20 HP, and doing physical damage. Crisp Blue Tunic would be the upgrade to this, but it’s a huge jump in price.
Greater Healing Scroll
GHS
Once Per Battle
[Super Rare – r99]
50 (regular heal)
Rating: 4 / 5
Rejuvenating Jar of Brains
RJoB
Once Per Battle
[Special – r101]
60 (regular heal)
Rating: 4 / 5
Everlasting Crystal Apple
ECA
Multiple Use
Lists your opponent’s weapons in 2P
[Artifact – r250]
30 (overheal)
Rating: 4 / 5
The GHS used to be a lot cheaper, same with the Blue Scorchstone, which is a shame because I remember suggesting those to newbies quite often, but now they usually have to take a step back and buy something cheaper. Anyway, unless you’re rich and can afford something like a Short Sleeved Yellow Tunic, either of these healers will likely last you until you have well over 100 HP. At which time, a Crisp Blue Tunic, or a Species Healer may be more prudent.

The ECA is great for lower leveled pets with a lot of NP. This is like being able to use a Blue Scorchstone over and over again. This is made through combining Jhudoras Crystal Ball and an Everlasting Apple in the Mystery Island Cooking Pot, both of which are buyable from the Hidden Tower. This also tells you what weapons your opponent has if you are in a 2P fight.

Bronze Scorchstone
Bronze SS, B-SS, BSS
Once Per Battle
[Rare – r89]
15 (overheal)
Rating: 2 / 5
Red Scorchstone
Red SS, R-SS, RSS
Once Per Battle
[Very Rare – r92]
20 (overheal)
Rating: 2 / 5
Blue Scorchstone
Blue SS, B-SS, BSS
Once Per Battle
[Very Rare – r94]
30 (overheal)
Rating: 3 / 5
Green Scorchstone
Green SS, G-SS, GSS
Once Per Battle
[Ultra Rare – r96]
40 (overheal)
Rating: 2 / 5
Purple Scorchstone
Purple SS, P-SS, PSS
Once Per Battle
[Ultra Rare – r98]
50 (overheal)
Rating: 1 / 5
Rainbow Scorchstone
Rainbow SS, R-SS, RSS
Once Per Battle
[Super Rare – r99]
80 (overheal)
Rating: 1 / 5
Glittery Scorchstone
Glittery SS, G-SS, GSS
Once Per Battle
[Ultra Rare – r100]
100 (overheal)
Rating: 1 / 5
Ice Scorchstone
Ice SS, I-SS, ISS
Multiple Use, Semi-Fragile
[Artifact – r200]
Full (25% chance)
Rating: 2 / 5
Jade Scorchstone
Jade SS, J-SS, JSS
Once Per Battle
[Retired – r180]
Full
Rating: 3 / 5
These are all of the scorchstones that heal. Scorchstones are great for low level battlers because they are overhealers. This means that they will heal after damage is calculated, and are in a way capable of healing you more than a regular healer. Click here for a more detailed explanation between regular healers and overhealers.

The Bronze, Red, and Blue Scorchstones are all commonly used in low levels of battling, and it’s likely that you’ll own and use at least one of them at some point in time. After this point, the scorchstones get kind of expensive for what they do, and there are cheaper upgrades than the Green or Purple scorchstones; Greater Healing Scroll and Rejuvenating Jar of Brains are two such examples. The reason people may buy and use something like the Rainbow or Glittery scorchstones is for low level battling. The massive overheal would act as a sort of Thyoras Tear for low league pets.

Then there are the full healers; Ice and Jade. I’m not a huge fan of the Ice Scorchstone because it is so unreliable, but it’s the only full healer available for this price, unless you look into species healers. I’m also not a huge fan of the Jade Scorchstone, but only because of the price. Consider getting a Leaded Elemental Vial instead.

Short Sleeved Yellow Tunic
SSYT
Once Per Battle
x2 x2 x2 (6 total)
[Super Rare – r99]
75 (regular heal)*
Rating: 2 / 5
Crisp Blue Tunic
CBT
Once Per Battle
x2 x2 (4 total)
[Super Rare – r99]
100 (regular heal, drained from opponent)**
Rating: 3 / 5
*In regards to the SSYT, your pet needs to have 501 or more intelligence for the heal to work, otherwise it just defends. Once used, it will disappear for the rest of the battle.

**With the CBT, your pet needs to have 751 or more intelligence for the heal to work, otherwise it just defends. You also must have lost at least 100 HP, and your opponent needs at least 100 HP in order to take advantage of the drain. Once used, it will disappear for the rest of the battle.

A lot of people might be turned off from the amount of intelligence that you need in order to use these, but 501 and 751 intelligence isn’t too bad. You can get tons of books from the Book Shop for less than 1K NP each. Scroll Potion is another option.

Both of these items are very expensive nowadays, so they may not be worth it. Consider looking towards Rejuvenating Jar of Brains, a species healer if you can use one, or perhaps a Bag of Healing Dust.

Kacheek Life Potion
KLP
(Kacheek Only)
Once Per Battle
[Very Rare – r92]
Full if HP is over 33%, else 33% (regular heal)
Rating: 4 / 5
I used this so much in the past, and a lot of people who can’t afford a better healer will use this. You can buy a morphing potion or potentially get someone to help you Kacheek Flour your pet in order to use this healer. Check out the other Species Healers for cheap healing options. Otherwise, Bag of Healing Dust is the only 50% non-species healer.
Blumaroo Health Potion
BHP
(Blumaroo Only)
Once Per Battle
[Super Rare – r99]
50% of max HP (regular heal)
Rating: 3 / 5
Bag of Lenny Healing Seeds
BoLHS
(Lenny Only)
Once Per Battle
[Super Rare – r99]
50% of max HP (regular heal)
Rating: 3 / 5
Elephante Unguent
EU
(Elephante Only)
Once Per Battle
[Ultra Rare – r96]
50% of max HP (regular heal)
Rating: 4 / 5
Gelert Healing Remedy
GHR
(Gelert Only)
Once Per Battle
[Ultra Rare – r96]
50% of max HP (regular heal)
Rating: 4 / 5
Healing Ankh of the Nimmo
HAotN
(Nimmo Only)
Once Per Battle
[Super Rare – r99]
50% of max HP (regular heal)
Rating: 3 / 5
Lucky Uni Charm
LUC
(Uni Only)
Once Per Battle
[Super Rare – r99]
50% of max HP (regular heal)
Rating: 3 / 5
Squishy Shoyru Healing Stone
SSHS
(Shoyru Only)
Once Per Battle
[Super Rare – r99]
50% of max HP (regular heal)
Rating: 3 / 5
These are the 50% species healers. If you have a Blumaroo, Lenny, Elephante, Gelert, Nimmo, Uni, or Shoyru, consider getting one of these if your HP is big enough to take advantage of a 50% heal. Some of these are a lot more expensive than others, so look into the pricing a bit first to see if it’s worth it for you. If you use the lab ray it may not be a good idea to have any species specific weapons, unless you have a way to cheaply change back into that species. Kacheek Life Potion is an alternative if you have a Kacheek. And of course Bag of Healing Dust is a 50% healer that doesn’t require any particular species in order to use it.
Bag of Healing Dust
BoHD
Once Per Battle
[Super Rare – r99]
50% of max HP (regular heal)
Rating: 4 / 5
I’ve used the BoHD in the past but the more I used it the more I craved a good 100% healer. A lot of people will grab this if they can’t yet afford a Leaded Elemental Vial. Sword of Lameness costs roughly the same amount, and it might be a toss up between the two. I would much rather go with the sword personally. Check out the species healers if you want to take a look at a cheaper 50% healer.
Jade Elixir
JE
One Use
[Special – r101]
Full
Rating: 4 / 5
Much like the Thick Smoke Bomb, the Jade Elixir is one use and should only be used for important battles, like DoN or avatar battles. Lucky Robots Foot may be a cheaper alternative.
Leaded Elemental Vial
LEV
Once Per Battle
[Super Rare – r99]
 Full
Rating: 4 / 5
If you’re not into the Sword of Lameness, the LEV is probably the heal most BDers would work towards. It’s great to have a full heal in the BD, it’s just unfortunate that this is so costly. You’re not going to find a cheaper 100% heal, unless you count the Sword of Lameness, which is a fine alternative. It is possible to feed this to your pet! Be very careful when equipping this item, or equip this item through the Battledome’s new status page.
Sword of Lameness
SoL
x10 x1-10 (11-20 total) or
Multiple Use
x3 x3 x3 x3 (12 total) or
[Artifact – r200]
Full or Freeze (12.9% chance) or Nothing
Rating: 4 / 5
I decided to put this under healers because this is the only healing item that you can buy that can potentially heal you back to full hit points multiple times in a match. I tested this 2,000 times, and my percentages were as follows: 11 – 20 icons (37.45%), 12 icons (25.05%), freeze (12.90%), heal (13.15%), and nothing (11.45%). An extra note; out of the 2,000 times I used this, I only hit 11 icons once.

This weapon is very similar to the Slumberberry Potion in that you should wait until you have a lot of HP to use it, just in case you get an attack when you need a freeze, or nothing when you desperately need a heal, etc. You need to be able to survive a few rounds if you don’t get what you’re looking for. Initially I didn’t like this weapon because it felt less reliable than the potion, but now I feel like it’s an essential part of my set. I will say that with the potion you have a slightly higher chance of freezing, but even if you don’t freeze you’re still getting in 10 icons of water attack. My biggest problem with the two items still, is that you get pigeonholed into using them nearly every turn. This will be your freezer and healer for the match. Your opponent will know that and try to counter accordingly, but if you don’t use it, you have no chance of freezing or healing. It would be great if you could pair this with a good back-up healer like Illusens Staff or Wand of the Dark Faerie, but I know that isn’t feasible for the majority of us. Pets under 1,000 HP should probably stick to a 100% freezer and a good healer. Pets over 1,000 HP should definitely consider this.

BombsBuilding a Battledome Set – Bombs

Bombs are one use or once per battle items that do massive damage; more than your multi-use weapons. They are commonly paired up with a freeze weapon to offset the low damage freeze weapons often do; this is called a “freeze-bomb” combo.

 Most bombs are limit one, meaning only one of each item can be equipped at a time. Muffins are an exception.

One Use Bombs | Once Per Battle Bombs

Icy Muffin
IM
x5 x5 x5 (15 total)
One Use
 
[Uncommon – r83]
 
Rating: 3 / 5
Shooting Star Muffin
SSM
x5 x5 x5 (15 total)
One Use
 
[Retired – r180]
 
Rating: 3 / 5
Muffins should be used for important battles like DoN or avatar challengers, and when you can’t yet afford a once per battle bomb. There are 11 muffins that do 15 icons. I’m not going to show what each of them does, but I will list them: Brain Muffin, Darigan Muffin, Golden Muffin, Icy Muffin, Poison Muffin, Radioactive Muffin, Robot Muffin, Shooting Star Muffin, Smelly Dung Muffin, Stone Muffin, and Water Muffin. Use whichever is the cheapest.
Honey Potion
HP, H-Pot, HPot
x13 x0.3-3 (13.3-16 total)
Once Per Battle
 
[Special – r101]
 
Rating: 3 / 5
Rainbow Clockwork Grundo
RCG
x3.2-5 x3.2-5 x3.2-5 x3.2-5 (12.8-20 total)
Once Per Battle
 
[Artifact – r200]
 
Rating: 2 / 5
Jhudoras Potion
JP, J-Pot, JPot
x16 x1-8 (17-24 total)
Once Per Battle
 
[RARITY 135]
 
Rating: 3 / 5

Ghostkerbomb

Ghostkerbomb
G-Bomb, GBomb
x10 x10 x1-10 (21-30 total)
Once Per Battle
 
[Artifact – r200]
 
Rating: 5 / 5
The Honey Potion and Rainbow Clockwork Grundo were great back in the day when most sets consisted of two multiple use weapons doing ten icons each, but I’m a little sad to see that both of these are not the bombs they were once made out to be, what with items like Ylanas Blaster, Brynns Legendary Sword of Wraith Smiting, or Dr. Sloths Personal Bath Buddy now being fairly common. These bombs tend to lose their value quite a bit when you can do nearly the same amount of icons each turn with a multiple use weapon.

Jhudoras Potion is an unexpected item in the Battledome. I think most people would prefer to skip it and go straight to the Ghostkerbomb, or perhaps even combine it with the Ghostkerbomb for a single turn berserk like attack. The Ghostkerbomb is the best bomb that you can buy. On average it even outperforms over much more expensive items like the Ghostkersword and the Sword of White Lies. Still, I consider this to be a sort of luxury weapon in the sense that you should only get it if the rest of your set is decent. Back in the day, I didn’t pick up one of these until I had dual Sword of Skardsens.

ReflectorsBuilding a Battledome Set – Reflectors

A reflector is an item that not only defends, but reflects damage back at your opponent. Reflectors don’t usually end up blocking as much as a typical defender would, but they make up for it with the fact that they will deal damage if they happen to reflect.

 Reflectors are limit one, meaning only one of each item can be equipped at a time.

Air Reflectors | Dark Reflectors | Earth Reflectors | Fire Reflectors
Light Reflectors | Water Reflectors | Multi-Reflectors | Special Reflectors

Double Dryer
DD
Multiple Use, Fragile
50% (reflect)
[Uncommon – r84]
 
Rating: 2 / 5
Triple Turbo Dryer
TTD
Multiple Use
75% (reflect)
[Super Rare – r99]
 
Rating: 3 / 5
Air is used quite frequently in higher end Battledome fights and a defence to it can be expensive. Items like Pirate Captains Cutlass, Sword of Ari, or Ghostkersword all use a lot of air. If you want a full air blocker, Shield of Faerieland is a good one. If you’re rich there is also Jhudoras Wand.
Ultra Dark Reflectorb
UDR
Multiple Use, Fragile
50% (reflect)
[Rare – r87]
 
Rating: 1 / 5
Ultimate Dark Reflectorb
UDR
Multiple Use
75% (reflect)
[Super Rare – r99]
 
Rating: 2 / 5
Heavy amounts of dark icons are used by items like Sword of Skardsen, Dark Faerie Collar, Jhudoras Potion, or even a Wand of the Dark Faerie. Kings Lens would be an upgrade. Dark isn’t something you have to worry about too much anymore, not with the fairly cheap Ghostkershield and the very common Hanso Charisma Charm out there nowadays.
Shovel Plus
SP
Multiple Use, Fragile
50% (reflect)
[Rare – r87]
 
Rating: 2 / 5
Ultra Dual Shovel
UDS
Multiple Use
75% (reflect)
[Super Rare – r99]
 
Rating: 3 / 5
These would be used in higher levels of battling, and would be a great defence against weapons like Honey Potion, Sword of Thare, Gr apes of Wrath, Attack Pea, Seasonal Attack Pea, Super Attack Pea, Faerie Slingshot, or even Illusens Staff. Kings Lens would be a great upgrade to this. If you’re looking for more earth defence, check out Illusens Silver Shield or Shield of Pion Troect.
Turbo Flame Reflector
TFR
Multiple Use, Fragile
50% (reflect)
[Uncommon – r83]
 
Rating: 2 / 5
Flame Reflectozap
FR, F-Zap, FZap
Multiple Use
75% (reflect)
[Super Rare – r99]
 
Rating: 3 / 5
Clawed Shield
CS
Multiple Use
x3 60%-80% (reflect)
[Special – r101]
 
Rating: 3 / 5
These are great if you know you’re going to go up against a Flask of Liquid Fire, Mask of Coltzan, Portable Kiln, or Sword of Reif. You could also check out the Frozen Cyodrake Shield.
Dual Battle Mirror
DBM
Multiple Use, Fragile
50% (reflect)
[Rare – r86]
 
Rating: 2 / 5
Combo Battle Mirror
CBM
Multiple Use
75% (reflect)
[Super Rare – r99]
 
Rating: 3 / 5
These will reflect light icons and protect you from weapons like Sword of Thigl, Sword of White Lies, or Skarls Sword. Kings Lens would once again make a nice upgrade to these, same with Superior Reflection Shield. You could also look towards a full light blocker.
Super U-Bend
SUB
Multiple Use, Fragile
50% (reflect)
[Rare – r85]
 
Rating: 2 / 5
Mega U-Bend
MUB
Multiple Use
75% (reflect)
[Super Rare – r99]
 
Rating: 3 / 5
Mega U-Bend is the cheapest of the 75% reflectors. Good if you know you’re going to go up against a Kelpbeards Trident, Sword of Tawre, Slumberberry Potion, or other heavy water based attacks. Or you can check out the Faerie Tabard.
Superior Reflection Shield
SRS
Multiple Use
100% (reflect) 25% (reflect)
[Super Rare – r99]
 
Rating: 4 / 5
Kings Lens
KL, K-Lens, KLens
Multiple Use
50% (reflect) 50% (reflect) 50% (reflect)
[RARITY 135]
 
Rating: 3 / 5
Prismatic Mirror
PM
Multiple Use
80%-100% (reflect all)
[Unobtainable – r0]
 
Rating: X / 5
Superior Reflection Shield is the only full icon reflector there is, and would work wonders against items like Sword of Thigl, Sword of White Lies, or perhaps even a Seasonal Attack Pea. The water reflection is a nice bonus too, albeit a small one. The price is what hurts this; it’s kind of rare. There are full light blockers out there that are much cheaper.

The Kings Lens is considered by many to be the best reflector weapon buyable. Combine this with a Faerie Tabard and you’ll block or reflect a little bit of everything. It would be a great way to feel out your opponent’s attack. Craftsmans Lens and Princely Lens are weaker versions of this.

The Prismatic Mirror is here because although it cannot be bought and equipped, it can be stolen from certain enemies and used for that battle. It will reflect 80% to 100% of everything but physical. It seems there are no reflectors for physical.

Prickly Potion
PP, P-Pot, PPot
Multiple Use
x3 x3 (reflect)
[Very Rare – r91]
Note: reflected icons use opponent’s strength boost
Rating: 3 / 5
Voidberry Potion
VP, V-Pot, VPot
Multiple Use
x3 x3 (reflect)
[Very Rare – r92]
Note: reflected icons use opponent’s strength boost
Rating: 3 / 5
Glowing Cauldron
GC
Drains 20 HP from opponent, non-heal or Nothing or
Multiple Use
x10 (reflect)
[Super Rare – r99]
Note: reflected icons use opponent’s strength boost
Rating: 2 / 5
All of these items are unique because they attack with reflected icons using your opponent’s strength boost. Or at least they used to, before the Battledome update. Currently they use your own strength boost and they aren’t reflected. Reflected icons are much more difficult to block because they are not stopped by defensive items. Maybe I’m naive to do this, but I’m reviewing these items with the assumption that the BD will one day be updated so that these items will once again do what they were originally meant to do.

Pricky Potion and Voidberry Potion are both buyable potions that will do six reflected icons using your opponent’s strength boost. This makes them great for pets going up against a stronger opponent. If you have the 55 boost and attack with 18 icons (two 9-iconers) you’ll end up doing 36 damage, while if you attack with 12 icons (using two of these potions) against someone who has the 200 strength boost, you’ll end up doing 54 damage. These are great for pets who don’t really train and just want to get their avatar or DoN challengers done and over with. Glowing Cauldron works the same way, although it has a small chance of draining HP or doing nothing as well. In 2P, you must end your turn last in order to attack with icons that can’t be blocked, otherwise they can be stopped. Bracelet of Kings works like these items too, but it is more unreliable.

StealersBuilding a Battledome Set – Stealers

Stealers can steal items from your opponent. The weapon you steal is random and not permanent, meaning all items will be returned to their original owners at the end of the battle.

 Stealers are limit one, meaning only one stealer can be equipped at a time.

Purple Sticky Hand
PSH
 
Multiple Use, Semi-Fragile
 
[Retired – r180]
Roughly 50% chance to steal a weapon
Rating: 3 / 5
Stealing is a risky maneuver, as you use up a turn stealing the item and you may not even get a good item. You will steal an item at random and all items are returned to their original owners after the battle is finished.

Once you steal something with any sticky hand, the sticky hand then goes to your opponent for them to use for the battle. If you’re interested in stealing items there’s no better place to start. This was given out as an Advent Calendar prize many years ago, so the price is fairly cheap and will only go up.

Heavy Robe of Thievery
HRoT
 
Once Per Battle
x2
[Ultra Rare – r95]
100% chance to steal a weapon*
Rating: 5 / 5
*Your pet must have 201 or more agility, and 101 or more intelligence for this item to steal, otherwise it just defends. Once used, it will not go to your opponent like a sticky hand would, but instead it will disappear for the rest of the battle.

This is one of the best stealing weapons out there; it’s the only one with a 100% success rate, your opponent doesn’t get it, and it even defends as a small bonus. The only downside is that 201 agility part. It’s a thinker, but if you want to train your agility to use this stealer (or hope for the best from kitchen quests and lab ray), go for it.

Tornado Ring
TR, T-Ring, TRing
x2 x1-2 (3-4 total)
Multiple Use
100%
[Retired – r180]
Roughly 5% chance to steal a weapon
Rating: 2 / 5
The Tornado Ring is a very unique item because it will not disappear after stealing an item; it’s one of the only weapons that can steal multiple items from your opponent. Although the chance to steal a single weapon is low, let alone all eight from your enemy, it’s possible to strip your opponent of all of their weapons.
Scroll Potion
SP, S-Pot, SPot
 
Once Per Battle
 
[Super Rare – r99]
Steals 5 intelligence from your opponent, 2P only
Rating: 2 / 5
It’s not exactly polite to use this against people in 2P fights unless they agree to it, since this kind of steal is permanent. People who buy this tend to hang out on the Battledome Chat asking for some free intelligence points. This can be an easy way to gain a lot of intelligence in order to use weapons like Heavy Robe of Thievery, Heavy Blue Tunic, or the other Brightvale clothing.
Last updated: 12/13/2024

Neopets Tangor’s Workshop Guide

Tangor’s Workshop is located in Moltara, a massive underground city of magma-filled caves located deep beneath the surface of Neopia. Discovered during the events of the Atlas of the Ancients plot, Moltara offers an assortment of fire-y delights for explorers, including Tangor’s Workshop itself!

Within his Workshop, Tangor can take the odds and ends of Moltara and turn them into a series of wonderful petpets for you to enjoy! When standing in the workshop, the available items that you have in your inventory are displayed in order to be clicked and turned in to Tangor for him to cobble together. Luckily, there are only four items that you need to be concerned with when it comes to Tangor: Shiny Obsidian, Miscellaneous Gears, Scrap Metal and Stone, and Red Moltite. Although visiting the workshop prompts you to trade any and every item in your inventory, (almost) all but these four can be ignored, as they do not lead to the creation of any petpets in Tangor’s Workshop. The exception to this is that Tangor will also build special combination petpets by combining the basic petpets that he makes from these four items. A list of valid item combinations is located at the end of this guide for your convenience.

Although these four items can be purchased from other users, they can also be found within the city limits of Moltara, either by visiting certain locations or completing mini-quests!

GATHERING THE ITEMS AT TANGOR’S WORKSHOP

SHINY OBSIDIAN

Shiny Obsidian is undoubtedly the easiest of the four items to obtain, as you can collect one per day merely by visiting the large Obsidian Quarry located in the lower left-hand corner of Moltara’s city map. It does not have a map label like the other locations, but can still be accessed by clicking the black rocks along the city’s edge.

MISCELLANEOUS GEARS

The Miscellaneous Gears appear at random on the Moltara City map. If you do not see any on your current view of the city, refresh the page often until they appear. There are eight known spawning locations for the gears:

  • Front door of Lampwyck’s Shop
  • By the large bank vault
  • Roof of Molten Morsels
  • Roof of Town Hall
  • Roof of Cog’s Togs
  • Front of Town Hall
  • Just under the string of red lights in the center of the map
  • Between Cog’s Tog’s and Town Hall

Moltara gear map

A rough guide to Miscellaneous Gears spawning locations.

SCRAP METAL AND STONE

Scrap Metal and Stone is awarded by a random event occurring in Moltara City. Simply refresh the map until the event appears, and the scrap will be added to your inventory.

RED MOLTITE

Red Moltite is the hardest of the four items to obtain, requiring you to complete not just one, but two mini-quests in order to find it. First and foremost, you must finish the Worm Lantern quest. To begin the quest, visit Lampwyck’s Lights Fantastic. The first time you visit, and any time after that in which you visit without having an empty lantern, an event will occur:

Once you have an Empty Lantern, you will be able to go out into Moltara City and the Moltara Caves and collect the ten Worms that loiter around these two areas. You may have seen a worm or two as you have refreshed the map looking for gears and scrap – each of the ten worms has a specific respawn point that they will always appear in – but click fast! A worm is not guaranteed to be there just because you see its picture on the map. The locations of the worms are known to change approximately every five minutes, so if they change before you have a chance to capture it, it will return an error message when you attempt to capture it.

The locations of the ten worms and their colors are as follows:

Moltara City

  1. Red: Left of Town Hall
  2. Orange: Center, between orange lanterns
  3. Green: Roof of Cog’s Togs
  4. White: Entrance of Bank Vault
  5. Rainbow: Entrance to The Caves

Moltara Caves

  1. Purple: Ledge above Magma Pool
  2. Pink: Just below Magma Pool
  3. Yellow: Path above Petpetorium
  4. Blue: Next to Petpetorium stairs
  5. Black: Doorway to the right of Petpetorium sign

With enough refreshing and enough patience, you will collect all ten worms. Once the ten worms and the empty lantern are all in your inventory, select the lantern in your inventory and select ‘Fill it with worms’ from the dropdown menu. The ten worms will be consumed and the empty lantern will become a Brightly Lit Lantern!

With this new item, you can successfully navigate the Dark Cave and explore its labyrinthine contents. Entering the cave with a lit lamp allows you to venture down a series of paths in search of Red Moltite. The correct path is dependent on the bolded sentence that greets you when you first enter the cave with a lit lantern. Each of the sentences has its own solution. For speed and ease of reference, a collection of the correct inputs follows – The bolded words are the beginning of the applicable starter sentence, and the four letters that follow are the correct combination of Left and Right turns that will get you to the Red Moltite:

At least… RLRL
Does it… RLLL
Hello? LLRR
I hope I… RLLR
I hope there’s… LRRR
I should… RRRL
I sure… RRLL
I wonder… LLLR
It’s very… LLRL
Jordie… LRLR
Let’s go… RRRR
Look at… LRRL
This lantern… RLRR
What a… LLLL
Where does… LRLL
Which way… RRLR

Collecting Red Moltite can be done once per day – after you have successfully collected a piece from the cave, your lantern’s worms will get tired and cease to glow. In order to reset your lantern for the next day, you must return it to Lampwyck’s shop when the worms get tired. Lampwyck will nurse your worms back to health for tomorrow… or will he? Upon returning, you find out that he has accidentally allowed them all to escape! He returns the empty lantern so that you may catch them all again in the wilds of Moltara, effectively resetting the quest to the beginning.

PUTTING IT ALL TOGETHER

Depending on what you are interested in building at Tangor’s workshop, you should collect the necessary supplies either by purchasing them from other users or by completing the sidequests above. Once you have obtained all the parts that you need, click them one at a time to add them to the recipe. When you are finished, click the first button to turn the items into Tangor so he can build the resulting petpet. If you make a mistake, there is a handy reset button, as well!

RECIPES

dal-9242054 Dal: Obsidian + Scrap
oop-7070728 Oop: Obsidian + Gears
ada-7154653 Ada: Scrap + Gears
val-7692178 Val: Obsidian + Moltite
rav-1855127 Rav: Gears + Moltite
goy-9322522 Goy: Scrap + Moltite
gio-9813882 Gio: Obsidian + Gears + Scrap
albot-8492228 Albot: Obsidian + Scrap + Moltite
teek-8260740 Teek: Obsidian + Gears + Moltite
erge-7161513 Erge: Scrap + Gears + Moltite
nik-8475908 Nik: Obsidian + Scrap + Gears + Moltite

Petpet Combos

daloop-7579045 Daloop: Dal + Oop
adagio-7319109 Adagio: Ada + Gio
raverge-6244780 Raverge = Rav + Erge
valteek-4606486 Valteek = Val + Teek
goyalbotnik-6923583 Goyalbotnik = Goy + Albot + Nik
toy_vaggendotra5000-3656775 Vaggendotra 5000 = Daloop + Adagio + Raverge + Valteek + Goyalbotnik

NOTES

  • Due to the highly random nature of events and item spawns required to gather the raw materials for constructing petpets at Tangor’s Workshop, it may be advisable to purchase the components cheaply through the Shop Wizard instead and get right to building!
Last updated: 05/14/2025