Neopets Ghoul Catchers Guide

Ghosts have escaped from Haunted Woods and have inhabited houses throughout the Neopian world. It’s your job to help Brave Bren, the Professor, and Glyn to rid these houses of spirits! Ghoul Catchers is Neopet’s smartphone application that is very similar to Sutek’s Tomb. The goal is to strategically match three or more ghouls together to achieve a target, a set number of points and in later levels delivering items.

This application is available for iOS and Andriod users, but the game can also be accessed from Facebook as well.

HOW TO PLAY:

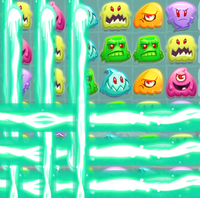
Each map will show a path with 20 different haunted houses. Each house represents a different level, and you need to meet the basic requirement for the first level before you move onto the second. You can continue to replay each level to earn neopoints or to improve your number of stars.

Map features:
Hearts – This shows exactly how many lives you have. You begin with a maximum of 5 lives. Hearts are lost whenever you fail to meet a level’s requirements or restart a level. Whenever you lose a life, it takes 20 minutes to replace. Another method for gaining lives is receiving some from friends on Facebook or purchasing lives inside the application.
Stars – This number represents how many stars you have earned. Try to collect as many stars as possible so you are able to continue on to the next map. Each house can earn you up to three stars.
Envelope – This feature shows your friend list and lets you send them extra lives.

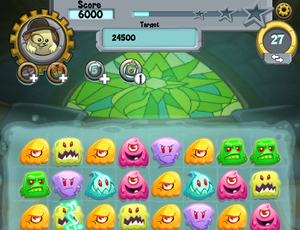
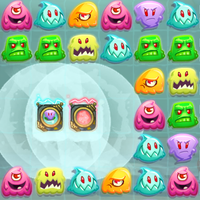
Inside the haunted house:
Target – This shows the requirement for each level.
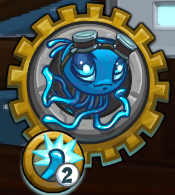
Petpet – Different petpets are unlocked for different maps. Each petpet will provide different options for two power-ups.
Moves – This shows how many moves you have left to use in the game.
Star meter – This shows how close you are to achieving a star.

If you run out of moves without reaching the target, you can choose to flee and lose a life or purchase more moves.

Brightvale

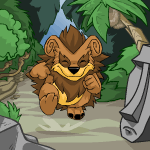
The ghouls have left Haunted Woods, and your first stop is in Brightvale. In this map, a Warf petpet will accompany you. Your Warf petpet will learn two power-ups throughout the Brightvale map: Tailchaiser and Prismatic Sparkler. The Brightvale maps are fairly easy to beat as it only requires you to achieve a certain amount of points to reach the requirement.

Faerieland

The next map you can unlock is Faerieland, but you can only move on from Brightvale after you have collected 50 stars. A red Cyodrake petpet will accompany you through these levels, but you can choose the Warf petpet if you like its power-ups better. The Cyodrake petpet will learn two power-ups throughout the Faerieland map as well: Fireball and Spitfire. This map is a little bit harder because some maps require you to achieve a certain amount of points as well as deliver items. You can deliver items by letting the item drop to the bottom row in the game.

Terror Mountain


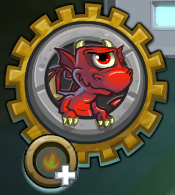
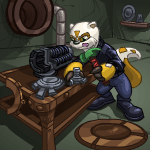
The next map is Terror Mountain, and you can unlock this map after you have achieved 100 stars. A Neucloop petpet will accompany you though starting on level 42. The Neucloop has two power-ups, Blocker Buster and Ink Splash. This map is introduces a new obstacle, urns. Urns are unable to be swapped and ultimately block your path. Urns can be destroyed by creating a match touching the urn, or using a special tile to eliminate it.

Lost Desert

The next map is Lost Desert, and you can unlock this map after you have achieved 150 stars. If there are urns present in a level, the Neucloop petpet will be present. If there isn’t, you can choose between the Warf and the Cyodrake. The new target for this map is eliminating plagued ghouls. Basically, there will be a required number of ghouls of a certain color you need to eliminate. For example, you may have to eliminate 5 pink ghouls and earn a certain amount of points before you can achieve the target. This is easy at first, but becomes difficult in the later levels when it asks to eliminate 25 ghouls of a certain color, and there aren’t many present on the board.

STRATEGIES

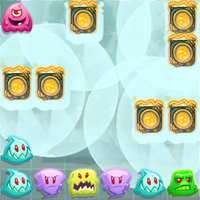
Creating Special Tiles


Spectral Shackle | Glyph of Banishment | Ghost Trap

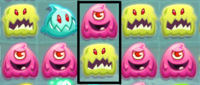
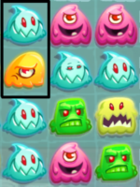
An important aspect of meeting all the requirements of each level is creating special tiles. You can create special tiles by matching 4 or 5 ghouls together.
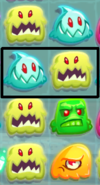
Spectral Shackle: Match 4 ghouls to create a single tile. Matching it again will eliminate an entire row or column depending on which way the green line is facing.


Glyph of Banishment: Match 5 ghouls to create a single tile. Swap this power-up tile and it will banish all ghouls of the same color of the tile you swapped.


Ghost Trap: Match 5 ghouls in an L or T shape to create a single tile. Matching this tile again will eliminate a 3×3 block of the ghouls around it.

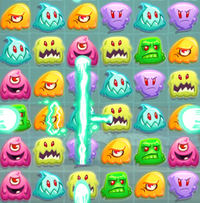
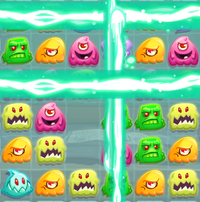
Swapping Special Tiles

The best way to earn points in Ghoul Catchers is to swap two special tiles. Swapping these two tiles, depending on what they are, will produce different reactions. In the later levels, it is extremely important to be able to swap these tiles, otherwise, it is unlikely you’ll be able to meet the level’s target.


Two Spectral Shackles: Will eliminate a column and a row for 100 points per ghoul


Spectral Shackle and Glyph of Banishment: Will eliminate rows and columns of the color of the spectral shackle for 100 points per ghoul.


Spectral Shackle and Ghost Trap: Will eliminate 3×3 row and a 3×3 column for 200 points per ghoul.


Two Ghost Traps: Will eliminate a 3×4 region around the traps for 200 points per ghoul.


Ghost Trap and Glyph of Banishment: Will eliminate 3×3 regions of the color of the Ghost Trap for 200 points per ghoul.


Two Glyphs of Banishment: Will eliminate all ghouls on the board for 100 points per ghoul

Power-ups

In various levels throughout the game, a level will start and have you complete a tutorial about some of the power-ups. However, don’t forget that these power-ups do not replenish after you complete a level but are available for purchase. I recommend you don’t use these unless you feel like you can’t beat a level without it.


Ghoul-B-Gone – Allows you to eliminate ONE ghoul. Available at level 4+. All petpets.


Tailchaser – This power up allows you to swap two different ghouls without making a match. Available at level 5+. Warf petpet.


Prismatic Sparkler – Eliminates all ghouls of two random colors. Available at level 10+. Warf petpet.


Utility Kit Booster – Gives you five extra moves. Available at level 15+. All petpets.


Fireball – Eliminates 10 random ghouls. Available level 22+. Cyodrake petpet.


Spitfire – Eliminate one column of ghouls. Available level 31+. Cyodrake petpet.


Extra Life – Restores your life meter


Map Unlock – Allows you to unlock a map early if you do not meet the star requirement.


Blocker Buster – Eliminates one urn. Available level 42+. Neucloop petpet.


Ink Splash – Eliminates a 3×3 block, including urns. Available level 51+. Neucloop petpet.

PRIZES

Completing a level: (levels 1-40)

3 stars – 1,000 NP
2 stars – 600 NP
1 star – 350 NP

Completing a level: (levels 40-80)

3 stars – 1350 NP
2 stars – 850 NP
1 star – 500 NP

Signing up:


10,000 NP, Ghoul Catchers Coat of Containment, Official Ghoul Catchers Stamp

For completing level 20, the final house on the Brightvale map, you’ll receive:


Brightvale Mansion Background, Haunted Brightvale Amulet

For completing level 40, the final house on the Faerieland map, you’ll receive:


Faerieland Mansion Background, Haunted Faerieland Amulet

For completing level 50, you’ll receive:


Blue Bruce Collectors Cup Slushie, Sparkling Berry Ice Cream

For completing level 60, the final house on the Terror Mountain Map, you’ll receive:


Terror Mountain Mansion Background, Haunted Terror Mountain Amulet

For completing level 70, you’ll receive:


Cursed Qasalan Pancakes, Marble Tablet

For completing level 80, the final house on the Lost Desert Map, you’ll receive


Lost Desert Mansion Background, Haunted Lost Desert Amulet

For completing level 90, you’ll receive:


Bow of the Hegelob, Hot and Sour Soup

For completing level 100, the final house on the Shenkuu map, you’ll receive:


Haunted Shenkuu Amulet, Shenkuu Mansion Background

For completing level 110, you’ll receive:


Traditional Altadorian Gyro, Warriors Spatha

For completing level 120, the final house on the Altador Map, you’ll receive:


Haunted Altador Amulet, Altador Mansion Background

LEVELS

Brightvale Map

LevelMovesTargetOne StarTwo StarsThree Stars
151,000 points1,000 points1,200 points1,500 points
281,500 points1,500 points1,900 points2,400 points
3102,000 points2,000 points2,500 points3,000 points
4102,500 points2,500 points3,000 points3,500 points
5123,000 points3,000 points3,700 points4,500 points
6154,500 points4,500 points6,500 points9,000 points
7155,000 points5,000 points8,500 points9,300 points
8156,000 points6,000 points8,000 points10,000 points
9188,000 points8,000 points11,000 points14,000 points
10209,000 points9,000 points11,000 points13,000 points
112010,500 points10,500 points15,000 points18,000 points
122010,000 points10,000 points12,000 points14,500 points
13229,000 points9,000 points11,000 points14,000 points
142413,000 points13,000 points15,500 points19,000 points
153023,000 points23,000 points29,000 points35,000 points
162512,000 points12,000 points14,000 points16,000 points
173016,000 points16,000 points23,000 points30,000 points
182820,000 points20,000 points24,000 points28,000 points
193216,500 points16,500 points20,000 points25,000 points
203524,500 points24,500 points34,500 points45,000 points

Faerieland Map

You must have 50 stars before you are able to unlock this map.

LevelMovesTargetOne StarTwo StarsThree Stars
213527,000 points, 2 items27,000 points36,000 points45,000 points
223030,000 points, 1 item30,000 points36,000 points42,000 points
233530,000 points, 2 items30,000 points35,500 points42,000 points
243415,500 points15,500 points22,000 points32,000 points
253218,000 points18,000 points23,000 points28,000 points
264030,000 points, 2 items30,000 points37,000 points44,000 points
273829,000 points29,000 points39,000 points52,000 points
282516,000 points, 1 item16,000 points19,000 points23,000 points
292013,000 points13,000 points17,500 points23,000 points
303023,500 points, 3 items23,500 points27,500 points31,500 points
312015,000 points, 1 item15,000 points17,300 points22,000 points
324028,000 points, 4 items28,000 points31,000 points35,500 points
333228,000 points28,000 points39,500 points47,000 points
343423,500 points23,500 points32,500 points40,000 points
353630,000 points30,000 points36,000 points42,500 points
363630,000 points, 3 items30,000 points37,000 points44,000 points
374027,000 points27,000 points31,500 points36,000 points
383839,000 points39,000 points47,000 points56,000 points
393531,000 points31,000 points33,500 points37,500 points
403530,000 points, 4 items30,000 points32,500 points35,000 points

Terror Mountain Map

You must have 100 stars before you are able to unlock this map.

LevelMovesTargetOne StarTwo StarsThree Stars
413015,000 points, 2 items15,000 points22,500 points30,000 points
424025,000 points, 1 item25,000 points35,000 points45,000 points
434020,000 points, 3 items20,000 points27,500 points35,000 points
445030,000 points, 2 items30,000 points35,000 points40,000 points
454725,000 points, 3 items25,000 points37,500 points50,000 points
463720,000 points20,000 points25,000 points30,000 points
473520,000 points, 2 items20,000 points25,000 points30,000 points
484025,000 points, 4 items25,000 points30,000 points35,000 points
494222,000 points22,000 points26,000 points30,000 points
504525,000 points, 5 items25,000 points30,000 points35,000 points
513528,000 points28,000 points32,000 points35,000 points
523617,500 points, 2 items17,500 points19,000 points20,500 points
533325,00 points, 1 item25,000 points32,000 points39,000 points
542720,000 points, 2 items20,000 points22,500 points25,000 points
553520,000 points, 5 items20,000 points22,000 points24,000 points
563422,000 points22,000 points24,000 points26,000 points
574023,000 points, 2 items23,000 points25,000 points27,000 points
584119,000 points, 2 items19,000 points20,000 points21,000 points
592726,000 points26,000 points30,000 points34,000 points
605044,000 points, 6 items44,000 points50,000 points56,000 points

Lost Desert Map

You must have 150 stars before you are able to unlock this map.

LevelMovesTargetOne StarTwo StarsThree Stars
613018,000 points, 11 plagued ghouls18,000 points20,500 points23,000 points
622012,000 points, 2 items12,000 points14,000 points16,000 points
634032,000 points, 24 plagued ghouls32,000 points35,000 points38,000 points
642520,000 points20,000 points24,000 points28,000 points
652819,000 points, 3 items19,000 points20,000 points21,000 points
665034,000 points, 44 plagued ghouls34,000 points36,000 points40,000 points
67168,000 points, 2 items8,000 points11,000 points14,000 points
682012,000 points, 20 plagued ghouls12,000 points16,000 points20,000 points
693012,000 points12,000 points16,000 points20,000 points
703022,000 points22,000 points26,000 points30,000 points
712518,000 points, 60 plagued ghouls18,000 points20,000 points22,000 points
722012,500 points12,500 points16,500 points20,500 points
734037,000 points, 4 items35,000 points37,000 points41,000 points
742520,500 points, 40 plagued ghouls20,500 points22,500 points24,500 points
753019,000 points, 3 items19,000 points22,000 points25,000 points
762012,000 points, 35 plagued ghouls12,000 points14,500 points17,000 points
771813,000 points, 2 items13,000 points18,000 points22,000 points
782518,000 points, 50 plagued ghouls18,000 points21,500 points25,000 points
792815,000 points, 3 items15,000 points20,000 points25,000 points
803023,000 points, 60 plagued ghouls23,000 points26,000 points29,000 points

Shenkuu Map

You must have 200 stars before you are able to unlock this map.

LevelMovesTargetOne StarTwo StarsThree Stars
812525,000 points25,000 points30,000 points35,000 points
822820,0000 points20,000 points23,000 points26,000 points
833015,000 points, 3 items15,000 points17,500 points20,000 points
843017,500 points, 40 plagued ghouls17,500 points20,000 points22,500 points
85259,000 points, 42 plagued ghouls9,000 points12,000 points15,000 points
863520,000 points, 4 items20,000 points24,000 points28,000 points
872222,000 points22,000 points24,000 points26,000 points
882525,000 points, 40 plagued ghouls25,000 points27,000 points32,000 points
894530,000 points30,000 points35,000 points40,000 points
903020,000 points, 6 items20,000 points24,000 points27,000 points
913522,000 points, 1 item22,000 points27,000 points32,000 points
92206,000 points6,000 points7,500 points10,000 points
933015,000 points, 45 plagued ghouls15,000 points20,000 points25,000 points
94307,000 points7,000 points9,000 points11,000 points
953522,000 points, 43 plagued ghouls22,000 points35,000 points40,500 points
963024,000 points, 2 items24,000 points29,000 points35,000 points
97175,000 points5,000 points6,500 points8,000 points
98156,000 points, 45 plagued ghouls6,000 points8,000 points10,000 points
993524,000 points, 2 items24,000 points30,000 points40,000 points
1003033,000 points33,000 points36,000 points40,000 points

Altador Map

You must have 250 stars before you are able to unlock this map.

LevelMovesTargetOne StarTwo StarsThree Stars
1013515,000 points, 3 items15,000 points30,000 points37,000 points
1024525,000 points25,000 points32,000 points38,000 points
1033012,000 points, 30 plagued ghouls12,000 points15,000 points18,000 points
1042010,000 points, 42 plagued ghouls10,000 points15,000 points20,500 points
105206,000 points6,000 points10,000 points13,000 points
1062517,000 points, 5 items17,000 points20,000 points24,000 points
107147,000 points7,000 points9,000 points11,000 points
108157,000 points, 35 plagued ghouls7,000 points12,000 points15,000 points
109157,000 points, 35 plagued ghouls7,000 points9,000 points11,000 points
110156,000 points, 4 items6,000 points8,000 points10,000 points
111104,000 points, 2 items4,000 points6,000 points8,000 points
1123520,000 points20,000 points27,000 points35,000 points
1132512,000 points, 35 plagued ghouls12,000 points18,000 points24,000 points
114105,000 points, 1 item5,000 points6,000 points7,000 points
1154025,000 points25,000 points33,000 points39,000 points
1163015,000 points, 50 plagued ghouls15,000 points22,000 points27,000 points
1176035,000 points35,000 points45,500 points55,000 points
1183020,000 points, 2 items20,000 points22,000 points28,000 points
1193525,000 points, 50 plagued ghouls25,000 points30,000 points32,000 points
1204530,000 points, 2 items30,000 points35,000 points37,000 points

TIPS

  • Always check to see if you can create a special tile before swapping any ghouls.
  • Swapping special tiles will earn you the most points and get you closer to a three star achievement.
  • Try not to get items you are trying to deliver stuck along the sides as this makes it more difficult to make them reach the bottom.
  • If you are close to running out of moves, try creating as many special tiles as possible, and they will detonate at the end of a level, giving you more points.
  • If you’re looking to make some quick NP, repeat level 1 multiple times. You can earn up to 50k NP a day
  • If you have already passed a level and are trying to get all three stars, don’t worry about delivering items or eliminating plagued ghouls if they’re being troublesome; focus on achieving a higher score as you’ll still be awarded the stars regardless of reaching the requirement.
Last updated: 02/23/2021

Neopets Island Builders App

Neopets: Island Builders is Neopets’s fourth mobile neopets app game. It is a 3D Construction Simulation game and your job is to rebuild the destroyed island civilization of Dacardia. The game is currently in open beta for Android and closed beta for iOS. For information on how to download and play the game, I would read over Jellyneo’s on-going article:

Is downloading Neopets: Island Builders worth it?
As of it’s launch, you cannot earn NP nor obtain any tradable items on-site, so not really unless you want the three No-Trade items.

Do I expand my island towards the giant jungle waterfall first or the purple space mountain?
It is recommended that you expand your island towards the Mystic Jungle first over the Crystal Plateau. This is because the Mystic Jungle Route has the following:

– An increased amount of Core Buildings for faster Town Leveling.
– Quests and Gathering items are more quickly obtainable.
– An increased pet amount.
– The Crystal Plateau items are generally more difficult to come by.
– Jungle Route has Active Quest sequence that also unlocks an amenity building sooner.

Are pet elements and ideals randomized? Is there any way I can get a specific pet element/ideal combination?
Yes, pet elements and ideals randomized, and no, there is currently no way how to get a specific pet element/ideal combination.

What’s the most efficient way to gather Power Neggs?
Here is a quick list of ways you can efficiently gather Power Neggs:

– Turn in items that can gathered quickly en masse such as Rocks, Pirate Daggers, Magnets, and Echo to the Power Plant.
– Complete Quests (namely Pet Quests)

What’s the most efficient way to gather Building Materials?
Here is a quick list of way you can efficiently gather Building Materials:

– Turn in items that can gathered quickly en masse such as Bamboo, Straw, Rocks, and Spyder Webs to the Molten Mixer.
– Complete Quests (namely Pet Quests)

What’s the most efficient way to increase my Town Level?
The most efficent way how to increase your Town Level is by leveling up your Core Buildings. The higher the level of the core building, the more exp gained, so instead of raising 3 different buildings all to level 4, focus on getting one up to max level.

You can also increase your Town experience by placing decorations on your island (the larger and/or more recipe complex the decorations are, the more EXP you earn), but in addition, do note that removing decorations from your island decreases your Town experience. Also, completing the Active Quests from the storyline awards Town experience.

What’s the giant egg in the Crystal Plateu for?
The giant egg in the Crystal Plateu is just an immovable decoration.

Why isn’t the Trading Post working?
The Trading Post is broken on Android and has been temporarily disabled for iOS. When functional, the Trading Post would be a way for players to trade their items for other items within the game. Players were encouraged to use the Trading Post when they needed items from their opposing expansion route (Mystic Jungle/Crystal Plateau).

Does upgrading my Core Buildings do anything?
Upgrading your Core Buildings can give you Town Level experience, but aside from that, it just sits there and look pretty.

Why do I keep getting these constant tutorial/error messages?
The error messages are most occurring when you’re crafting/gathering items too quickly, but you shouldn’t be in any trouble for that. You’ll have a certain amount of items taken away and returned, but you can still create/gather said items afterward. This also appears when you’re putting ingredients in the Molten Mixer too quickly. You would want to click one item and do a full slow one-count before clicking anything again. The constant tutorial pop-ups is a known problem, and it is presumed to be worked on.

Is the Premium Emporium/Crystal Negg Store worth investing money in?
Personally, I would say no, since the game is not exactly functional for In-Game Purchases just yet. It is a personal and financial choice if you do wish to purchase an extra pet (Kacheek, but only available for a limited time at the beginning of your playthrough) and additional decorative items. You can steadily obtain Crystal Neggs from the Wheel of Offers and Level 3 Daily Goals.

How do I raise happiness?
You can raise your pet’s and overall island happiness by doing any of the following:

– Eating Omelettes
– Visiting an Amenity Building
– Painting your Neopet (not recommended)
– Customizing your Neopet (not recommended)

Also if your pet levels up it’s Affinity then happiness and hunger restored to 100%.

NOTE: Paint Brushes and wearables are Single Use. Blank Paint Brush, Blank Roller, Basic Hat are not craftable and at the time only obtainable through the Wheel of Offers for iOS. For Android, Blank Paint Brush, Blank Roller, Basic Hat can be obtained in the Premium Emporium.

How do I craft X item in Island Builders?
I would check out Jellyneo’s guide for a crowdsourced compiled list of items that can be crafted in the game.

In the crafting buildings, you can mix and match new craftable items through the Discovery Item section with the except for the Omelette Slab and Workshop. For the Workshop, the equipment cannot be unlocked early, and you can only obtain them through Active Quests. For the Omelette Slab, you will have to match ingredients every time you want to create/discover a specific omelette. For all failed attempts at the Omelette Slab, items will not be returned and your creation will always result in a Dubious Omelette.

Neopets Island Builder Avatar

An avatar for Neopets: Island Builders has been discovered, but the avatar is not currently active, but will most likely be made available in the future.

Island Builders – What to Gather

SourceItemSec. to completeItem neededRare DropElementIdeal
Fast-Grass FarmStraw15EarthEfficiency
Fast-Grass FarmPumpkin30BasketEarthStrength
Fast-Grass FarmApple (2)90BucketWormEarthLuck
Fast-Grass FarmBerry (2)300SpadeWormEarthDexterity
Crokabek FieldBamboo15DarkStrength
Crokabek FieldFeather60Spyder-Web NetVaeolus FeatherDarkEfficiency
Crokabek FieldSoil60BucketFertilizerDarkStrength
Crokabek FieldHedge Sapling300SpadeMistletoeDarkIntuition
Enigma WharfSpyder Web30WaterDexterity
Enigma WharfBicycle Wheel60Spyder-Web NetWaterAgility
Enigma WharfCrab300BucketFishWaterIntuition
Enigma WharfFresh Fish900Fishing RodHumongous FishWaterLuck
Enigma WharfDriftwood540WheelbarrowDriftwoodWaterEfficiency
Secret BeachSeawe*ed30WaterEfficiency
Secret BeachShell60BasketSpadeWaterIntuition
Secret BeachCoconut120Spyder-Web NetBucketWaterAgility
Secret BeachStarfish600BucketWaterIntuition
Secret BeachSand600SpadeSugar CaneWaterStrength
Mysterious MineRock30DarkDexterity
Mysterious MineOre60Stone HammerFireDarkStrength
Mysterious MineIce300PickaxeCoalDarkEfficiency
Mysterious MineClay1800WheelbarrowGoldDarkLuck
Mysterious MineCoal (2)3600DynamiteGoldDarkEfficiency
ShipwreckPirate Dagger90WaterIntuition
ShipwreckSail Cloth300ScissorsGemsWaterLuck
ShipwreckHoneycomb420Grappling HookWaxWaterAgility
ShipwreckCannon Ball1200Suction Cup GloveGun PowderWaterStrength
ShipwreckVaeolus Feather3600SlingshotGemsWaterLuck
CenoteVines120WaterAgility
CenoteMushroom (2)300ScissorsCacao BeansWaterDexterity
CenoteSquid420Grappling HookSquid InkWaterAgility
CenoteSea Urchin1800GloveNeedleWaterDexterity
CenoteLimestone1800DynamiteGemsWaterLuck
Negg TreeTree Branch120WaterAgility
Negg TreeBloomin’ Negg (2)300ScissorsWaterStrength
Negg TreeFerocious Negg420SpearPirate NeggWaterAgility
Negg TreeJungle Negg900SlingshotShadow NeggWaterDexterity
Negg TreeDacardian Negg3600Dynamite?WaterLuck
Negg TreePirate Negg900SlingshotShadow NeggWaterIntuition
Crash SiteMagnet90AirEfficiency
Crash SiteDark Crater Rocks300Magnet ClawLight Crater RocksAirStrength
Crash SiteRadioactive Green Ooze420Crystal BucketAirEfficiency
Crash SiteMeteor Ore600Laser AxeAlien CircuitboardAirStrength
Crash SiteSafety Pylon900Magnetic Field NetAlien CircuitboardAirAgility
Crash SiteSpace Bugs3600Ultrasonic CannonLight Crater RocksAirIntuition
Crystal GeyserCrystal Shard120AirEfficiency
Crystal GeyserIridescent Water300Crystal BucketRough CrystalAirEfficiency
Crystal GeyserJellyfishUnknownCrystal Fishing Rod???AirLuck
Crystal GeyserElectric Eel1500Magnetic Field NetVenomAirAgility
Crystal GeyserSnowflake600Echo ChamberRough CrystalAirIntuition
Sonata StelaeEcho120AirAgility
Sonata StelaePulsing Sound300Echo ChamberHarmonious SoundAirAgility
Sonata StelaeTranquil Sound600Laser HarpHarmonious SoundAirDexterity
Sonata StelaeSynth Sound900Laser AxeExtraterrestrial SoundAirIntuition
Sonata StelaeThunderous Sound3600Sound AmplifierExtraterrestrial SoundAirStrength

Island Builders – Workshop Recipes

ItemMix 1Mix 2Remark
BasketStrawSeawe*ed
Blow DartFeatherNeedle
Crystal BucketBucketCrystal Shard
Bungee CordGrappling HookRubber
DynamiteGun PowderCandle
Echo ChamberEchoCrystal Bucket
Spyder-Web NetWebBamboo
Crystal Fishing RodPerfect CrystalFishing Rod
Fishing RodStringSpyder-Web Net
Negg Lure Fishing RodJungle NeggFishing Rod
GloveStarfishRubber
Suction Cup GloveGloveSuction Cup
Grappling HookVinesPirate Dagger
Laser AxePickaxeRed Laser Beam
Laser HarpRed Laser BeamSynth Sound
Magnet ClawCrabMagnet
Magnetic Field NetSpyder-Web NetMagnet
PickaxeStone HammerSoft Metal
BucketPumpkinBasketRare Drop
ScissorsPirate DaggerPirate Dagger
SlingshotTree BranchRubber
Sound AmplifierSafety PylonPulsing Sound
SpadeShellStone HammerRare Drop
SpearTree BranchPirate Dagger
Stone HammerRockBamboo
Ultrasonic CannonAlien CircuitboardThunderous Sound
WheelbarrowBucketBicycle Wheel
GPS BeaconGyroscopeAlien Circuitboard
Apple SeedsMortar & PestleApple
BarrelWood PlankNail
Big PumpkinPumpkin SeedsFertilizer
Black InkSquid InkCoal
BrickClayFire
CandleWaxThread
CementLimestoneFire
CheeseMilkMushroom
BurlapStrawSpyder Web
LinenBurlapThread
CompassClear GlassNeedle
Rough CrystalCrystal ShardIridescent Water
Flawless CrystalRough CrystalHarmonious Sound
DiamondFlawless CrystalExtraterrestrial Sound
Raw CrystalCrystal ShardPulsing SoundRare Drop
FertilizerSoilFresh FishRare Drop
Jungle FertilizerFertilizerJungle Negg
Nuclear FertilizerFertilizerGreen Laser Beam
Overgrowth FertilizerFertilizerFierce Jungle Negg
Radioactive FertilizerFertilizerRadioactive Green Ooze
Rich FertilizerSoilHumongous Fish
FireOreThatchRare Drop
FlourStrawMortar & Pestle
Clear GlassCloudy GlassLimestone
Cloudy GlassSandFire
Focus LensCrystal ShardCloudy Glass
Glass LensClear GlassSuction Cup
Optic LensFocus LensFlawless Crystal
Gun PowderCannon BallFeatherRare Drop
GyroscopeMeteor AlloyMagnetic Field
Jelly BeansHoneycombApple Seeds
Green Laser BeamRed Laser BeamRadioactive Rod
Red Laser BeamElectric EelFocus Lens
Magnetic FieldMagnetMagnet
MapBamboo PaperCompass
MedicineHealing NeggMushroom
Alien AlloyMeteor AlloyExtraterrestrial Sound
Strong MetalSoft MetalCoal
Meteor AlloyMeteor OreRed Laser Beam
Soft MetalOreFire
MilkCoconutSuction Cup
Miniature StarStarfishThunderous Sound
Mortar & PestleRockCoconut
NailNeedleSoft Metal
NeedleSea UrchinCrabRare Drop
Bejeweled NeggGemsGolden Negg
Fierce Jungle NeggJungle NeggFerocious Negg
Healing Negg??????
Golden NeggFaerie NeggGold
Tropical NeggJungle NeggCoconut
Dark OozeRadioactive Green OozeBlack Ink
Bamboo PaperBambooBamboo
Newsprint PaperBamboo PaperDriftwood
Carbon FibreCoalSynth Sound
FibreglassCloudy GlassSynth Sound
Pumpkin SeedsPumpkinMortar & Pestle
Radioactive RodRadioactive Green OozeSnowflake
Light Crater RocksDark Crater RocksTranquil SoundRare Drop
Strong RopeRopeVines
RopeStringString
RubberTree SapFire
SandpaperSandBamboo Paper
Alien Plant SaplingHedge SaplingExtraterrestrial Sound
Harmonious SoundTranquil SoundThunderous SoundRare Drop
SpiceWormSandpaper
Squid InkSquidFeatherRare Drop
StrawberrySugar CaneRaspberry
StringThreadThread
Suction CupSquidPirate Dagger
Sugar CaneBambooPumpkin SeedsRare Drop
Table ClothLinenVaeolus Feather
ThatchStrawBamboo
ThreadSpyder WebBicycle Wheel
Tree SapTree BranchSuction Cup
WaterIceFire
WaxHoneycombFire
Palm Tree WoodTree BranchTropical Negg
Wood PlankTree BranchPirate Negg
Purple WoodAlien Plant SaplingGreen Laser Beam
Reclaimed WoodDriftwoodSandpaper

Island Builders Rare Drop Items

ItemLocationWhen GatheringWith Equipment
WormFast-Grass FarmAppleBucket
WormFast-Grass FarmRaspberrySpade
Vaeolus FeatherCrokabek FieldFeatherSpyder-Web Net
FertilizerCrokabek FieldSoilStone Hammer
MistletoeCrokabek FieldHedge SaplingSpade
FishEnigma WharfCrabBucket
Humongous FishEnigma WharfFresh FishFishing Rod
DriftwoodEnigma WharfDriftwoodWheelbarrow
SpadeSecret BeachShellBasket
BucketSecret BeachCoconutSpyder-Web Net
Sugar CaneSecret BeachSandSpade
FireMysterious MineOreHammer
CoalMysterious MineIcePickaxe
GoldMysterious MineClayWheelbarrow
GoldMysterious MineCoalDynamite
GemsShipwreckSail ClothScissors
WaxShipwreckHoneycombSpear
Gun PowderShipwreckCannon BallGlove
GemsShipwreckVaeolus FeatherSlingshot
Cacao BeansCenoteMushroomScissors
Squid InkCenoteSquidGrappling Hook
NeedleCenoteSea UrchinGlove
GemsCenoteLimestoneDynamite
Pirate NeggNegg TreeFerocious NeggGrappling Hook
Shadow NeggNegg TreeJungle NeggSlingshot
???Negg TreeDacardian NeggDynamite
Light Crater RocksCrash SiteDark Crater RocksMagnet Claw
Alien CircuitboardCrash SiteMeteor OreLaser Axe
Alien CircuitboardCrash SiteSafety PylonMagnetic Field Net
Light Crater RocksCrash SiteDark Crater RocksUltrasonic Cannon
Raw CrystalCrystal GeyserIridescent WaterCrystal Bucket
???Crystal GeyserJellyfish? Crystal Fishing Rod?
VenomCrystal GeyserElectric EelMagnetic Field Net
Raw CrystalCrystal GeyserSnowflakeEcho Chamber
Harmonious SoundSonata StelaePulsing SoundEcho Chamber
Harmonious SoundSonata StelaeTranquil SoundLaser Harp
Extraterrestrial SoundSonata StelaeSynth SoundLaser Axe
Extraterrestrial SoundSonata StelaeThunderous SoundSound Amplifier
Last updated: 04/13/2022

Grave Danger Neopets – Petpet Adventures and Hidden Treasures Revealed

You might think that petpets are simply sidekicks but you’d be wrong (some might say you are in Grave Danger)! Petpets can go on adventures of their own, and even wear equipment and collect prizes, just like your Neopets. Through Grave Danger in Neovia, you can send a petpet on a mission to bring you back untold fortune!

Grave Danger Neopets

How to Play Neopets Grave Danger

If it is not obvious already, it is essential that you have a petpet to play Grave Danger, which means one pet on your main account needs to have a petpet attached and named.

Grave Danger Neopets
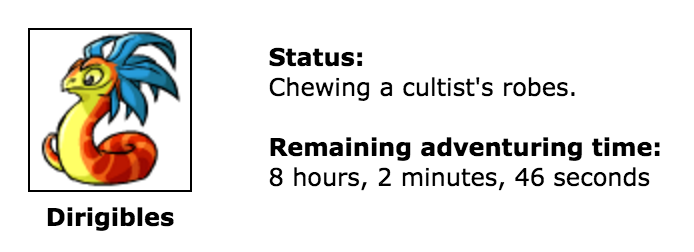
Meet Dirigibles. He’s going into the Catacombs.

It’s important that you’re careful about which petpet you choose to go on an adventure. When you do this, the pet of which this petpet is attached cannot be pounded, the petpet cannot be removed, and the petpet cannot be zapped.

Equipping your Neopet on Grave Danger

This is the point in which you can decide if you’d like to equip your petpet before sending it into the Catacombs. You can equip your petpet with items from the NC Mall that can only be used one time. After that, they disappear! There is only one piece of equipment currently available:

Grave Danger

You don’t need to do anything to the equipment to use it. Simply click “Equipment” under your chosen petpet’s image and you will be prompted to chose something. You cannot stack equipment.

Using NC Mall equipment means your petpet will bring back an additional prize, specific and exclusive NC prize. You can read more about that below, in the Prizes section.

Starting your Journey in Grave Danger Neopets

Once you’ve chosen a petpet and equipped them (if you’d like to), then you will be prompted to verify your decision:

Screen Shot 2016-01-03 at 10.33.14 AM

After you’ve done this, the image of your petpet on your pet’s lookup will change to this:

Screen Shot 2016-01-03 at 11.14.20 AM

Next, you wait. You wait and wait and wait. In fact, you can wait anywhere from 3 to 10 hours for your petpet to return with a prize. During this time, you will be provided regular status updates on your petpet should you chose to check up on them:

Neopets Grave Danger

Possible statuses:

  • Ate a Grumblebug.
  • Batted around an old ring with a triangular symbol.
  • Begging for scraps at the table of a cultist tea party.
  • Being cuddled by an evil cultist.
  • Being taught how to glorp by a Gelatinous Non-Cube.
  • Chased a Skidget past a sewer, a dragon, and a mob of Meepits. Survived.
  • Chasing its tail on Level 92.
  • Chewing a cultist’s robes.
  • Chewing a slime-covered shoe left by some unfortunate adventurer.
  • Clambering across the keys of an organ as curses fly in all directions.
  • Cowered in fear as a skeleton shot arrows at it.
  • Danced in a circle with Ghost Meepits.
  • Dancing to some sweet jazz music with a friendly cultist.
  • Dug up some bones and played with them for a bit.
  • Exploring an empty corridor.
  • Followed its nose to the scent of cinnamon rolls.
  • Fought a cult dedicated to the destruction of Neopia… then made friends and went out for cupcakes.
  • Found an old shoe! Grrr… Rawr!
  • Found a peanut.
  • Found a treasure room! Wandered away without taking anything.
  • Got covered in slime… Ew. That’s going to take a good scrubbing.
  • Got eaten by a Gelatinous Non-Cube… and was spit back out.
  • Got stepped on at a cultist dance party.
  • Had a sneezing competition with a dragon.
  • Had a staring contest with its doppleganger.
  • Invited to be mascot of a cult. Declined the offer.
  • Located some bacon. Mmm, catacombs bacon.
  • Made friends with a pile of Spyders and played Chase the Vernax.
  • Making friends with a giant Globilol.
  • Nearly got eaten by a Gelatinous Non-Cube.
  • Observing a banjo duel with some interest.
  • Played tag with a Psimouse.
  • Ran away from a hungry zombie.
  • Rolled in a heap of discarded dung cream sandwiches.
  • Rooted through a pile of old cultist robes.
  • Running away from a fire-breathing dragon!
  • Sitting around on Level 83.
  • Stepped in glowing ghostly residue.
  • Tried on some mummy bandages.
  • Walking backward with a pair of mummies.

Grave Danger Prizes

Now onto the best part! You can check back to the Grave Danger homepage when the time of your petpet’s adventure has expired. There, it will have your prize:

Grave Danger Neopets
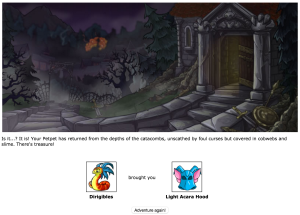
Not exactly what I wanted but… okay. Thanks, Dirigibles!

There are three types of prizes you can win from Grave Danger: exclusive Grave Danger prizes, general prizes, and exclusive NC Grave Danger Prizes:

Exclusive Neopets Grave Danger Prizes

nbo_gd_meepits_danceg-9720160
Dancing with Ghost Meepits
spf_gd_non-cube_gelb-2914108
Gelatinous Bouillon Non-Cube
sta_gd_grave_danger-4823632
Grave Danger Stamp
spf_gd_pie_grumblebug-7551150
Grumblebug Pie
nbo_gd_howtowin_stare-7407934
How to Win Staring Contests
spf_gd_cake_oneofus-1333043
One of Us Tea cake

General Prizes

bd_gemgold_sword-3017207
Amber Sword
petpet_babith-4534427
Babith
inst_banjo1-3349161
Banjo
gif_basket_veggies-1755208
Basket of Vegetables
shpp_biyako_white-7487818
Biyako
sta_white_kougra-2036893
Biyako Stamp
bva_blackvelvet_cloak-4638782
Black Velvet Cloak
plu_meerca_bluegnome-8877419
Blue Meerca Gnome Plushie
pps_bed_bluemoon-8828680
Blue Moon Petpet Bed
pot_xweetok_blue-8357130
Blue Xweetok Morphing Potion
shw_srr_boots-5953570
Boots of Leaping
can_butterscotchdisc-3288778
Butterscotch Disc
boo_buzz_gourmet-6712421
Buzz Gourmet
boo_carrot_sculpture-4658586
Carrot Sculpture
fur_casket_table-1612625
Casket Table
gif_rock_cave_fg-1720141
Cave Foreground
mus_cello-5140888
Cello
nfo_bearog_claw_choco-9443923
Chocolate Bearog Claw
nfo_chococherry_bundtcake-3892575
Chocolate Cherry Bundt Cake
bd_snakes_can-8385527
Cobrall In A Can
coff_service_coffee-3485532
Coffee Service
toy_courgette_building-6483719
Courgette Building Logs
clo_darkfaerie_translwing-9279120
Dark Translucent Wings
bd_deadly_attackspork-5366538
Deadly Attack Spork
food_diamondhotdog-9081807
Diamond Hot Dog
med_doctorsbag-1396564
Doctors Bag
dragonfly_petpetpet-1786019
Draphly
coff_service_eleganttea-1531822
Elegant Tea Service
bd_peanut_attack-3360957
Elephante Attack Peanut
elixir_of_intelligence-8557676
Elixir Of Intelligence
bpo_elixir_intellect-3585027
Elixir of Intellect
sta_altador_fauna-4259255
Fauna Stamp
bpo_flask_liquidfire-2166638
Flask of Liquid Fire
bpo_flask_liquidlight-5547665
Flask of Liquid Light
goople_ghost-1382009
Ghost Goople
inst_ghostkerchief_banjo-4512340
Ghostkerchief Banjo
goldtradingcardback-4744681
Ghoul Catchers
bd_gildedwarhammer-1461993
Gilded War Hammer
petpetpet_glyme-9994857
Glyme
bva_tunic_goldtrim-7838048
Gold Trimmed Tunic
bd_greenstickyhand-5994988
Green Sticky Hand
ldm_lotion_orange-6062730
Gwontek Syrup
sta_halloween_ona-2809900
Halloween Ona Stamp
bd_desert_knife-2379236
Hand Painted Scimitar
gif_asparagus_hand-4478306
Handful of Asparagus
coff_happy_face-8536270
Happy Face Latte
potion11-6100562
Healing Potion XIX
potion15-3586953
Healing Potion XV
potion12-1615842
Healing Potion XVIII
bd_icemirror-6829499
Ice Mirror
gar_pirate_bouncyship-4426328
Inflatable Bouncy Pirate Ship
bd_jhudora_cursedcoin-9804501
Jhudoras Cursed Coin
food_korbat_mooncake-6418618
Korbat Mooncake
stamp_hal_korbatslab-6074913
Korbats Lab Stamp
 bpo_leaded_earth-3973020
Leaded Earth Vial
 bpo_leaded_fire-4988091
Leaded Fire Vial
bd_acara_hood-4171522
Light Acara Hood
 shm_lotus_leaves-1909352
Lotus Leaves
bd_mace_manacle-2739624
Manacle Mace
maraquanpntbrush-5773012
Maraquan Paint Brush
petpetbrush_maraquan-4565952
Maraquan Petpet Paint Brush
mfo_skeweredmeat-3186254
Meat Skewered Meat
 minitaurus-6586989
Minitheus
ldm_lotion_pink-6225211
Minor Healing Ointment
foo_mintchoco_kacheek-6774411
Mint Chocolate Kacheek
petpetpet_1-7702362
Mootix
 nbo_neovian_darkfall-2767871
Neovian Darkfall
toy_niptor_plushie-9572592
Niptor Plushie
book_nobonesaboutit-9818564
No Bones About It
can_gummystamp_rectangle-1717291
Orange Gummy Stamp
mus_organ-3432470
Organ
 hfo_organicpeanut-4348633
Organic Peanut
 boo_organization-9148093
Organisation is Easy
toy_pinata_pawkeet-6298675
Pawkeet Pinata
sp_pinkcandyapple-3205743
Pink Apple Lantern
plu_flotsam_pirate-6725150
Pirate Flotsam Plushie
gar_plushie_fungus-8249109
Plushie Fungus
toy_yoyo_potato-5754143
Potato Yo-Yo
 bd_pottery_shard-2651209
Pottery Shard Dagger
pot_poog_red-1915066
Red Poogle Morphing Potion
gif_red_toadstool-8255107
Red Toadstool
gif_return_sloth_cards-7329092
Return of Dr. Sloth Valentine Card Set
bkg_oceanrockbackground-1321573
Rocky Ocean Background
gro_sand_bodywash-1345444
Sandy Body Wash
 bd_shield_northwind-6616339
Shield of the North Wind
 plushie_skeletonwocky-8741955
Skeleton Wocky Plushie
boo_slorg_care-9166245
Slorg Care
gro_snotlotion-7721309
Snot Lotion
gif_snowfortfg-9200321
Snowball Fortress Foreground
 boo_skeith_spookadv-6225693
Spooky Skeith Adventures
gro_perfume_spookyskull-8826405
Spooky Skull Perfume
foo_square_gelatin-7597913
Square Gelatin
 pot_grarrl_starry-7865680
Starry Grarrl Morphing Potion
bm_supersize-6757239
Supersize Gargantuplex
 qa_zombie_tablet-1545791
Tablet of the Zombie
 gif_tale_woe_cards-2338585
Tale of Woe Valentine Card Set
 toy_tencals_balloon-7314591
Tencals Balloon
17411-7031761
Terracotta Lamp
bd_tomato_bomb-7508443
Tomato Bomb
 gpp_tootum-4935821
Tootum
fae_book_floral-9893241
Tropical Flora and Fauna
 gar_tropic_twirrly-2839717
Twirly Plant
 petpetpet_mystery-5355010
Unidentified Petpetpet
 bd_space_sword-9099555
Virtupets Energy Sabre
bd_space_shield-8474760
Virtupets X-514 Super Shield
can_walkcarpet_floss-2366719
Walking Carpet Cotton Candy
piz_anchovy6-1089997
Whole Anchovy Pizza
 food_chilidog_pizza6-7066977
Whole Chilli Deluxe Pizza
boo_wings_of_a_ghost-9428562
Wings of a Ghost
gif_hand_wraith_staff-7041938
Wraith Staff
bd_yellowstickyhand-6504899
Yellow Sticky Hand
 plu_flotsam_zombie-1864786
Zombie Flotsam Plushie
boo_zombiegravebook-4598788
Zombie Grave Book
 boo_zombiehandbook-4700683
Zombie Handbook

Exclusive NC Grave Danger Neopets Prizes

mall_clo_blackbeadshirt-6429106
Black Beaded Shirt
mall_bg_mysteriousbridge-5294219
Bridge to Nowhere Background
mall_acc_floralcuffs-9523358
Floral Vine Cuffs
mall_acc_lavenderponytail-3172699
Lavender Highlights Ponytail Wig
mall_bg_topmountain-4484625
Mountain Summit Background
mall_gar_branchshrub-9495383
Parted Branches Garland
mall_wings_sheermystical-3073071
Sheer Blue Wings
mall_gar_umbrellalights-1047163
Umbrella Lights Garland

Grave Danger FAQ

General Gameplay Questions

1. What is Grave Danger in Neopets?
Grave Danger is a daily activity where you send your Petpet into the Catacombs beneath Neovia to retrieve prizes. It’s based on the Spooky Food Eating Contest storyline.

2. How do I participate in Grave Danger?
To play, you must attach a Petpet to one of your Neopets. Select the Petpet and send it into the Catacombs from the Grave Danger page.

3. Do I need Neocash to play Grave Danger?
No, Neocash is not required. However, you can use NC Mall equipment for additional exclusive prizes.

4. How long does it take for the Petpet to return?
The Petpet will return within 4 to 10 hours. Status updates appear every 10 minutes.

5. Can my Petpet disappear or get lost in Grave Danger?
No, your Petpet is always safe and will return after the adventure is complete.

6. Can I send more than one Petpet at a time?
No, you can only send one Petpet at a time into the Catacombs.

7. What happens if I remove the Petpet or transfer its Neopet during the adventure?
A broken image may appear on the Grave Danger page, but you will still be able to collect your prize once the timer ends.

8. How do I check the remaining adventure time?
The timer is displayed on the Grave Danger page but may glitch if your computer’s clock settings are altered.

9. Can I participate on side accounts?
No, because Grave Danger awards Neopoint items, it is not allowed on side accounts.

10. Is there any risk of the Turmaculus eating my Petpet during the adventure?
If the Turmaculus eats your Petpet, its image will disappear, but the adventure will proceed as normal.

Prize Questions

11. What kind of prizes can I win in Grave Danger?
Prizes include exclusive Grave Danger items, such as stamps, plushies, and wearable items, as well as regular Neopoint items.

12. How are prizes awarded?
Once your Petpet returns, the prize is automatically placed in your inventory when you visit the Grave Danger page.

13. Can I win the same prize more than once?
Yes, prize selection is randomized, and it is possible to receive duplicates.

14. What are Grave Danger-exclusive prizes?
Exclusive prizes include items like the Grave Danger Stamp, Evil Cultist Plushie, and Dancing with Ghost Meepits book.

15. Can I preview my prize before accepting it?
Yes, you can view the prize before accepting it. If you do not want it, simply click “Adventure again!” to reset the page.

NC Mall Equipment Questions

16. What is the purpose of NC Mall equipment in Grave Danger?
NC Mall equipment allows your Petpet to bring back exclusive NC prizes in addition to a regular prize.

17. Do I need to activate NC Mall equipment?
No activation is needed. Equip the item when sending your Petpet into the Catacombs.

18. Can I reuse NC Mall equipment?
No, NC Mall equipment is single-use only and must be repurchased for additional adventures.

19. What are examples of NC Mall equipment?
Examples include the Ghostly Wand of Spades, Illuminant Head Lantern, and Adventurer’s Sword and Shield.

20. Are retired NC Mall items still usable?
Yes, retired items like the Illuminant Head Lantern can still be used if you have them in your inventory.

Status Update Questions

21. What are status updates in Grave Danger?
Status updates are short descriptions of what your Petpet is doing in the Catacombs, displayed every 10 minutes.

22. Can status updates predict the prize?
No, the status updates are for entertainment and do not indicate what prize you will receive.

23. What are some example status updates?
Examples include “Dancing with Ghost Meepits” and “Exploring an empty corridor.”

24. Do status updates affect gameplay or outcomes?
No, they are purely narrative and have no impact on the prizes or results.

Strategy and Miscellaneous Questions

25. Can equipping specific NC Mall items increase my chances of winning rare prizes?
No, the NC Mall items only guarantee an additional exclusive NC prize; they do not influence regular prize rarity.

26. What should I do if the timer glitches?
Ignore the displayed time and check back between 4 and 10 hours after starting the adventure.

27. How often can I play Grave Danger?
You can send your Petpet on an adventure again immediately after collecting your prize.

28. Can I retrieve my Petpet early?
No, you must wait for the full duration of the adventure before collecting your prize.

29. Do I lose any prizes if I don’t check back immediately after the timer ends?
No, your prize will remain available until you claim it.

30. What makes Grave Danger unique compared to other dailies?
Grave Danger offers rich storytelling through its status updates, randomized prizes, and the ability to use NC Mall items for exclusive rewards.

Closing Notes

Last updated: 12/13/2024

Neopets Rainbow Pool – Paint your Neopets!

neopets rainbow pool

The Neopets Rainbow Pool is located in Neopia central where you will have to bring your Neopet and a paint brush. The Neopets Rainbow Pool will give you the opportunity to paint your Neopet to change its color to the one of your choice, if you have what it takes. When you visit the pool, you’ll be greeted with the message – “Come to the Rainbow Pool and change your Neopet’s colour. To change colour, you will need a magic paintbrush. These are magical items that are given to you in the game at random. They are very, very rare however.”

Where to find the Neopets Rainbow Pool?

The Neopets Rainbow Pool is located in Neopia Central, one of the most accessible and bustling areas in the Neopets world. To visit the Rainbow Pool, simply navigate to the Neopia Central map and click on the icon featuring a colorful pool surrounded by paint brushes. This iconic landmark is hard to miss and serves as a hub for customizing your Neopet’s appearance. You can also access it directly via the “Rainbow Pool” link under the “Explore” menu on the site’s main navigation bar.

https://www.neopets.com/pool/

Painting your Neopet at the Pool

At first, you will have to get a paint brush and you will have to get there. It can be one of your choice, that is usable.

To receive Paint Brushes, you will have to purchase them, to participate in rainbow pool neopetscontests to receive them as prizes, they can be obtained from random events, etc. Some of them are also in the Hidden Tower like the Baby Paint Brush, the Darigan Paint Brush, the Maractite Paint Brush, and the Royal Paint Brush. If you have enough Neopoints, depending on the Paint Brush you’re looking for, you can go to the trading post from where you can trade or to purchase one for yourself. There are some on the Shop Wizard for the lower end ones, and lastly you can snipe them in the auction house, however many people will be trying to do so, which means that you will require some good sniping skills.

After that, go to the Rainbow Pool and make sure that your Paint Brush is actually in your inventory, from where you will want to click on the pool that is located on the bottom. You will then have to select the Paint Brush that you will want to use.

There will be all of your Neopets on the bottom of the screen andrainbow pool the Paint Brush will be on the top of them. You will see a drop down menu with anarrow on it, click on that arrow for the Neopets you would like to paint and select the Paint Brush. For example if you have a Blue Kacheek that is name BOB, then go find BOB on the bottom of the screen and click on the arrow to look at the drop down menu. From there, if you wanted to paint him Darigan and you have a Darigan Paint Brush in your inventory, you will be able to select Darigan (that will be the color you will want to paint him with), then proceed to submit. You will then see that your Neopets color has changed, and you will be able to enjoy.

Neopets Petpet Puddle

The Rainbow Pool is also home to the Petpet Puddle, where you can paintpetpet puddle your petpets with a petpet paint brush. The link to visit the Petpet Puddle is here.

Similar to the Rainbow Pool, you must have the petpet paint brush in your inventory in order to paint your petpet. Your petpet must also be attached to one of your pets.

When you visit the puddle, you’ll be greeted with a message that states “Right next to the Rainbow Pool is a small puddle… where Neopets bring their Petpets to get painted! To paint a Petpet, you need a) a Petpet, and b) the Petpet paint brush. Understood? Good! 🙂 “.

Neopets Rainbow Pool Colors

Each color comes with its own special look, often tailored to the personality and style of that Neopet species. Whether you’re aiming for the elegant sophistication of a Royal Neopet or the playful charm of a Christmas design, the Rainbow Pool brings your creative vision to life. Some colors, like Pirate or Usuki, even include special accessories, adding an extra layer of customization to your Neopet.

While the Rainbow Pool boasts an impressive selection of Neopets colors, not all are immediately accessible. Certain colors require specific items beyond paint brushes, such as morphing potions, magical plushies, or special lab ray transformations. Additionally, exclusive colors like Chocolate or Stealthy are prized for their rarity and aesthetic appeal. For collectors and customization enthusiasts, the Rainbow Pool serves as a canvas where the possibilities are as endless as your imagination. Whether you’re updating your Neopet’s look for a gallery showcase or creating a standout pet for your account, the Rainbow Pool remains an essential stop for every Neopian.

Baby Paint Brush

baby

600,000 NPs

Biscuit Paint Brush

biscuit

195,000 NPs

Blue Paint Brush

blue

65,000 NPs

Brown Paint Brush

brown

700,000 NPs

Camouflage Paint Brush

camouflage

300,000 NPs

Candy Paint Brush

candy

4,000,000 NPs

Checkered Paint Brush

checkered

72,000 NPs

Christmas Paint Brush

christmas

50,000 NPs

Cloud Paint Brush

cloud

150,000 NPs

Darigan Paint Brush

darigan

1,350,000 NPs

Dimensional Paint Brush

dimensional

1,200,000 NPs

Disco Fever Paint Brush

disco

380,000 NPs

Electric Blue Paint Brush

electric

500,000 NPs

Eventide Paint Brush

eventide

1,100,000 NPs


Faerie Paint Brush

faerie

2,400,000 NPs

Fire, Fire, Your Pants On Fire Paint Brush

fire

505,000 NPs

Get Off My Lawn Paint Brush

elderlyboy

1,900,000 NPs

Ghost Paint Brush

ghost

200,000 NPs

Glowing Paint Brush

glowing

60,000 NPs

Golden Paint Brush

gold

400,000 NPs

Green Paint Brush

green

58,000 NPs

Grey Paint Brush

grey

2,000,000 NPs

Halloween Paint Brush

halloween

2,300,000 NPs

Invisible Paint Brush

invisible

1,200,000 NPs

Lost Desert Paint Brush

desert

3,200,000 NPs

Maractite Paint Brush

maractite

3,000,000 NPs

Maraquan Paint Brush

maraquan

4,300,000 NPs

Marble Paint Brush

marble

980,000 NPs

Mystery Island Paint Brush

island

1,100,000 NPs

Oil Paint Brush

oil paint

3,000,000 NPs

Orange Paint Brush

orange

550,000 NPs

Origami Paint Brush

origami

500,000 NPs

Pastel Paint Brush

pastel

4,800,000 NPs

Pink Paint Brush

pink

1,100,000 NPs

Pirate Paint Brush

pirate

300,000 NPs

Plushie Paint Brush

plushie

2,800,000 NPs

Polka Dot Paint Brush

polka dot

500,000 NPs

Purple Paint Brush

purple

300,000 NPs

Rainbow Paint Brush

rainbow

490,000 NPs

Red Paint Brush

red

60,000 NPs

Relic Paint Brush

relic

310,000 NPs

Royal Paint Brush

royalboy

1,700,000 NPs

Scritchy Sketchy Paint Brush

sketch

58,000 NPs

Shadow Paint Brush

shadow

1,100,000 NPs

Silver Paint Brush

silver

200,000 NPs

Skunk Paint Brush

skunk

550,000 NPs

Snow Paint Brush

snow

45,000 NPs

Speckled Paint Brush

speckled

65,000 NPs

Split Paint Brush

split

68,000 NPs

Spotted Paint Brush

spotted

1,100,000 NPs

Starry Paint Brush

starry

100,000 NPs

Stealth Paint Brush

stealthy

5,500,000 NPs

Steampunk Paint Brush

steampunk

1,400,000 NPs

Strawberry Fields Forever Paint Brush

strawberry

150,000 NPs

Striped Paint Brush

striped

250,000 NPs

Swamp Gas Paint Brush

swamp gas

180,000 NPs

Toy Paint Brush

toy

2,500,000 NPs

Transparent Paint Brush

transparent

3,000,000 NPs

Tyrannian Paint Brush

tyrannian

180,000 NPs

Usuki Paint Brush

usukiboy

1,100,000 NPs

Water Paint Brush

water

1,700,000 NPs

White Paint Brush

white

2,000,000 NPs

Woodland Paint Brush

woodland

2,000,000 NPs

Wraith Paint Brush

wraith

3,000,000 NPs

Yellow Paint Brush

yellow

60,000 NPs

Zombie Paint Brush

zombie

1,100,000 NPs

Faerie Painted Neopets

Faerie Acara
Faerie Acara
Faerie Aisha
Faerie Aisha
Faerie Blumaroo
Faerie Blumaroo
Faerie Bori
Faerie Bori
Faerie Bruce
Faerie Bruce
Faerie Buzz
Faerie Buzz
Faerie Chia
Faerie Chia
Faerie Chomby
Faerie Chomby
Faerie Cybunny
Faerie Cybunny
Faerie Draik
Faerie Draik
Faerie Elephante
Faerie Elephante
Faerie Eyrie
Faerie Eyrie
Faerie Flotsam
Faerie Flotsam
Faerie Gelert
Faerie Gelert
Faerie Gnorbu
Faerie Gnorbu
Faerie Grarrl
Faerie Grarrl
Faerie Grundo
Faerie Grundo
Faerie Hissi
Faerie Hissi
Faerie Ixi
Faerie Ixi
Faerie Jetsam
Faerie Jetsam
Faerie Jubjub
Faerie Jubjub
Faerie Kacheek
Faerie Kacheek
Faerie Kau
Faerie Kau
Faerie Kiko
Faerie Kiko
Faerie Koi
Faerie Koi
Faerie Korbat
Faerie Korbat
Faerie Kougra
Faerie Kougra
Faerie Krawk
Faerie Krawk
Faerie Kyrii
Faerie Kyrii
Faerie Lenny
Faerie Lenny
Faerie Lupe
Faerie Lupe
Faerie Lutari
Faerie Lutari
Faerie Meerca
Faerie Meerca
Faerie Moehog
Faerie Moehog
Faerie Mynci
Faerie Mynci
Faerie Nimmo
Faerie Nimmo
Faerie Ogrin
Faerie Ogrin
Faerie Peophin
Faerie Peophin
Faerie Poogle
Faerie Poogle
Faerie Pteri
Faerie Pteri
Faerie Quiggle
Faerie Quiggle
Faerie Ruki
Faerie Ruki
Faerie Scorchio
Faerie Scorchio
Faerie Shoyru
Faerie Shoyru
Faerie Skeith
Faerie Skeith
Faerie Techo
Faerie Techo
Faerie Tonu
Faerie Tonu
Faerie Tuskaninny
Faerie Tuskaninny
Faerie Uni
Faerie Uni
Faerie Usul
Faerie Usul
Faerie Vandagyre
Faerie Vandagyre
Faerie Wocky
Faerie Wocky
Faerie Xweetok
Faerie Xweetok
Faerie Yurble
Faerie Yurble
Faerie Zafara
Faerie Zafara

Royal Painted Neopets

Royalgirl Acara
Royalgirl Acara
Royalgirl Aisha
Royalgirl Aisha
Royalgirl Blumaroo
Royalgirl Blumaroo
Royalgirl Bori
Royalgirl Bori
Royalgirl Bruce
Royalgirl Bruce
Royalgirl Buzz
Royalgirl Buzz
Royalgirl Chomby
Royalgirl Chomby
Royalgirl Cybunny
Royalgirl Cybunny
Royalgirl Draik
Royalgirl Draik
Royalgirl Elephante
Royalgirl Elephante
Royalgirl Eyrie
Royalgirl Eyrie
Royalgirl Flotsam
Royalgirl Flotsam
Royalgirl Gelert
Royalgirl Gelert
Royalgirl Gnorbu
Royalgirl Gnorbu
Royalgirl Grarrl
Royalgirl Grarrl
Royalgirl Grundo
Royalgirl Grundo
Royalgirl Hissi
Royalgirl Hissi
Royalgirl Ixi
Royalgirl Ixi
Royalgirl Jetsam
Royalgirl Jetsam
Royalgirl Jubjub
Royalgirl Jubjub
Royalgirl Kacheek
Royalgirl Kacheek
Royalgirl Kau
Royalgirl Kau
Royalgirl Kiko
Royalgirl Kiko
Royalgirl Koi
Royalgirl Koi
Royalgirl Korbat
Royalgirl Korbat
Royalgirl Kougra
Royalgirl Kougra
Royalgirl Krawk
Royalgirl Krawk
Royalgirl Kyrii
Royalgirl Kyrii
Royalgirl Lenny
Royalgirl Lenny
Royalgirl Lupe
Royalgirl Lupe
Royalgirl Lutari
Royalgirl Lutari
Royalgirl Meerca
Royalgirl Meerca
Royalgirl Moehog
Royalgirl Moehog
Royalgirl Mynci
Royalgirl Mynci
Royalgirl Nimmo
Royalgirl Nimmo
Royalgirl Peophin
Royalgirl Peophin
Royalgirl Poogle
Royalgirl Poogle
Royalgirl Pteri
Royalgirl Pteri
Royalgirl Quiggle
Royalgirl Quiggle
Royalgirl Ruki
Royalgirl Ruki
Royalgirl Scorchio
Royalgirl Scorchio
Royalgirl Shoyru
Royalgirl Shoyru
Royalgirl Skeith
Royalgirl Skeith
Royalgirl Techo
Royalgirl Techo
Royalgirl Tonu
Royalgirl Tonu
Royalgirl Tuskaninny
Royalgirl Uni
Royalgirl Uni
Royalgirl Usul
Royalgirl Usul
Royalgirl Wocky
Royalgirl Wocky
Royalgirl Xweetok
Royalgirl Xweetok
Royalgirl Yurble
Royalgirl Yurble
Royalgirl Zafara
Royalgirl Zafara

Conclusion

The Neopets Rainbow Pool is a cornerstone of creativity and individuality in Neopia, allowing players to bring their customization dreams to life. Whether you’re painting your Neopet a classic color like red or blue or opting for something rare and extravagant like plushie or faerie, the Rainbow Pool is where the magic happens. With its vibrant aesthetic and straightforward mechanics, it continues to be a beloved feature for collectors and casual players alike.

From its convenient location in Neopia Central to the excitement of using a paint brush, the Rainbow Pool offers endless possibilities for expressing your unique style. It’s not just about colors—it’s about transforming your Neopets into something that represents your vision. Whether you’re saving up for that elusive paint brush or simply browsing the gallery of available colors, the Rainbow Pool is an experience every Neopian should enjoy. Let it be your gateway to making your Neopets truly one-of-a-kind!

Last updated: 12/13/2024

Guide to Rare, Popular and Notable NC (Neocash) Items

Welcome to your ultimate visual guide to the rare, popular, and iconic NC wearables in Neopets! Neocash (NC) items have always been a highly coveted part of the game, with certain wearables standing out as fan favorites and hard-to-find treasures. Whether you’re a seasoned collector or just starting your journey into the world of NC, this guide will showcase some of the most notable and sought-after wearables in Neopia. From exclusive items released during special events to limited-edition treasures, these are the NC wearables that have captured the hearts and imaginations of Neopians everywhere. Get ready to explore these must-have items and discover what makes them so special!

Accessories


Popular / Notably Liked


Rare / Hard To Find


Baby Weararbles


Popular / Notably Liked


Rare / Hard To Find


Backgrounds


Popular / Notably Liked


Rare / Hard To Find


Clothing


Popular / Notably Liked


Rare / Hard To Find


Dyeworks Wearables


Popular / Notably Liked


Rare / Hard To Find


Facial Wearables


Popular / Notably Liked


Rare / Hard To Find


Foregrounds


Popular / Notably Liked


Rare / Hard To Find


Handhelds


Popular / Notably Liked


Rare / Hard To Find


Headwear


Popular / Notably Liked


Rare / Hard To Find


Miscellaneous Wearables


Popular / Notably Liked


Rare / Hard To Find


Last updated: 11/11/2024