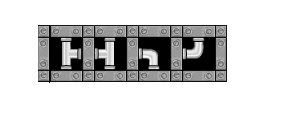
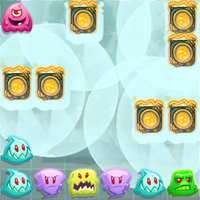
Sewage surfer is a puzzle game. You will be presented with a puzzle and have to place the pipes to complete a circuit from the start to the exit without any gaps. All the possible pieces are below:
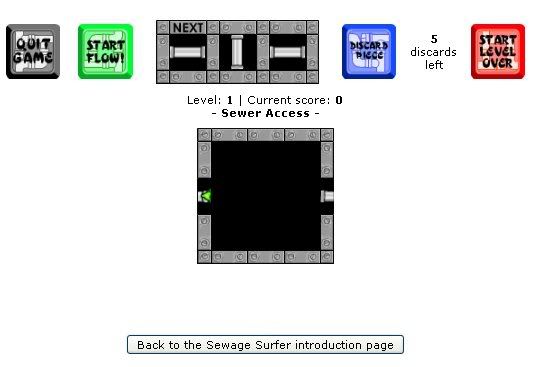
The gamepage looks like this:
1. The puzzle – this is where you place the pieces with a left click 2. The next pieces for placing 3. The number of discards you have left for the level 4. Quit the game (do not press!) 5. Restart the level 6. Start the flow (only press when you have completed the puzzle) 7. Discard piece – discards the next piece so you don’t have to use it
There are some important items to note:
• On each level you will only get certain pieces. For example, many levels do not have the 4-way piece available • When you play a level, the order in which you are given pieces and the mix of pieces will, in most instances, change if you replay the level. For example, first time through you may get:
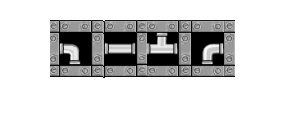
Second time through you may get
• If you fail a level or choose to restart a level you lose 50 points. A gold trophy score is in the region of 30,000 so its not the end of the world and it is very unlikely you will do all 50 levels without having to restart some puzzles, and often will have to restart the same puzzle a few times • Sometimes the game gives you pieces which are impossible to complete the level with. It’s annoying but there is nothing you can do about it except restart and hope for better pieces next time • If you have run out of discards you can place pieces into blank spaces you don’t need instead. These pieces lose you points
Avatar
There is an avatar available for sewage surfer
To obtain this you have to play all the way through to level 50 and then quit. It does not matter what your score is, you will have the avatar. So if you are playing for the avatar, do the simplest solutions you can. This is not what this guide is aimed at, we are going for a trophy and need a high score. If you want a guide to help you in getting the avatar, I recommend:
Now it is possible you can follow my guide and get a trophy before reaching level 50 and then quit to get the avatar too. It will take longer to get the avatar though and clearly without the last level it makes it harder to get a high score. To maximize your chances it is important you know how the high score table works.
High Score Table
Upon completing a level you obtain a score for that level, this is added to the scores you got for previous levels and gives your current total. So if I have 50 points for completing level 1 and then 80 for level 2 my total score at that point is 130. To record a score in a month you have to complete a level in that month. The level you are working on is carried over from the previous month, for example if I complete 10 levels in this month then when I play the following month I will start on level 11 and my cumulative score will also be carried over.
It is also important to note that your score only updates to the high score table when you complete a level divisible by 5 (ie when you complete levels 5, 10, 15, 20, 25, 30, 35, 40, 45 and 50).
So for example, if you want to try to get the avatar and trophy in one go, play all the way through completing level 44 using this guide. Place all the pieces for level 45 but do not press the button to complete the level (unless you are confident your score is good enough for a trophy based on the high score table at the moment). On the first day of the next month when the high score tables have cleared, complete level 45 which will submit your score to level 45 score for the month. Wait until the following day and then play through to level 50 and quit level 50 and you get your avatar. If you are lucky and have scored really well and other scores on the high score table are very low you might get a bronze for your level 45 score. However, getting on the highscore table when others may have completed all 50 levels is going to be very tough. I recommend play through for the avvie quickly and then play again for a trophy score.
I’m not certain you have to wait a day, I suspect the score you had upon completing level 45 would stay on the high score table even if you quit, but I have not tried it and having slogged your way through 45 levels I suggest you wait a day before quitting, just in case. If anyone can confirm this please let me know.
How to Get a High Score
The secret to getting a high score is simple. Every piece you use as part of the solution gives you points. The more pieces you use in a solution the better. I haven’t managed to work out how much each piece is worth, I believe the junctions are worth more than curves are worth more than straights but if anyone knows and can mail me that would be great. Not knowing this didn’t stop me from getting a gold trophy and frankly its probably a level of complexity too far, its hard enough try to complete the puzzles without worrying about this too. You use the pieces it gives you and hope you don’t run out! Every piece you place which does not form part of the solution loses you points. Restarting a level loses 50 points, as does starting the sewage flow when the pipe network was not complete. So basically to get a high score use loads of pieces, never place any you don’t need and never restart or fail a level. Unfortunately it’s not quite that simple.
You will have to make judgment calls. Some levels only get you around 100 points. Others give you 2000. It may be worth restarting a high scoring level and losing 50 points in the hope of a really high scoring solution. In the case of a low scoring level you may go for a simpler solution to avoid failing the level and losing 50 points. There is no hard and fast rule on this. Clearly if you fail a level and then get the perfect pieces so you score 500 more it was a great decision. However, if it then gives you 10 games with the wrong pieces, you lose 500 and end up with the same solution you had before, it wasn’t so good.
As a rule of thumb, if the level scores over 1000 I try very hard to get a high score on the level. There aren’t many that score that high and for a trophy we need the points so it’s a calculated risk. 500 to 1000 I look for at least a good if not great solution. Below 500 I just make sure I don’t fail them if at all possible and get the best solution I can.
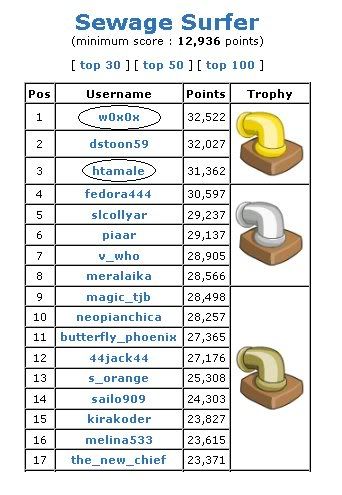
Here is a picture of the high score table after I finished walking through all the levels and completed level 50. Ended up third, pretty good considering I restarted so often. You can see w0x0x in first place – beaten again! And there in tenth lies my guild leader – what a small world.
A quick note regarding grandmaster status for sewage surfer. You need a score of over 40,000 which unless you had perfect solutions throughout is impossible. There were some occasions in the past when the database glitched and everyones game was reset to level 1 but their score at that point was kept. w0x0x had just completed level 49 when it did this and therefore got to restart at level 1 from a 49th level score (I’m not jealous). Personally I would say anything over 32,000 should be a grandmaster score but for the moment its not so lets just focus on the trophy and hope neopets have a change of heart.
Solutions to levels
Below are high scoring solutions to every level. I have indicated where I believe that this is definitely the solution to go for (for example Level 1 can only be solved in one way).
However, and this is very important, for most levels your solution will not be exactly the same. It depends upon the pieces you are given.
Use the solutions as a guide on how to get a high score for the level but you have to react to the pieces you have been given. If you just blindly try to copy my exact solutions you will fail levels so often (and lose 50 points each time) that you will not get a trophy.
On many levels you can score more than I did – I am not pretending the solutions below are an exhaustive list of the best solutions – they aren’t. However, I did restart very often until I got a high score for each level to create this guide. In terms of getting a high overall score I would have been better off scoring a lower score on some levels and not failing so often. This is up to you to decide.
If anyone believes one of my levels to be horribly flawed and a much higher score is possible please let me know, I’m not too interested in the fact you got 20 points more for the purposes of this guide (although I am very happy for you!), as I said above, they illustrate how to approach the levels and hopefully get a trophy.
Here are my solutions, best of luck, I love feedback, let me know how it goes, thanks:
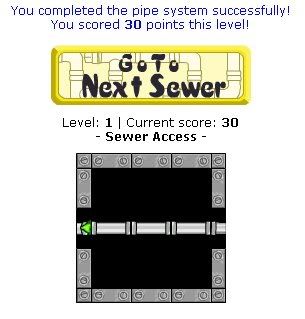
Level 1 – this is the only solution
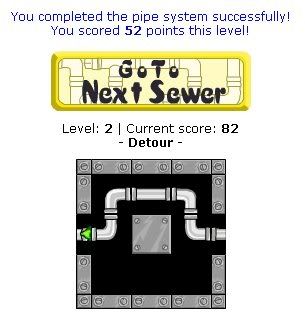
Level 2 – go under or over
Level 3 – high score solution
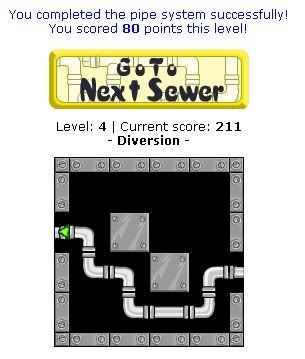
Level 4 – go over or under
Level 5 – could score a little higher with more turns
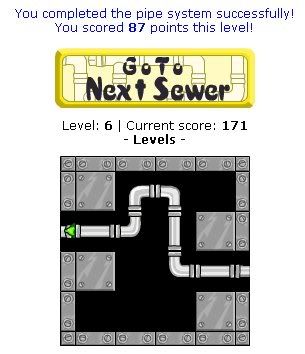
Level 6 – high score solution but could go down instead
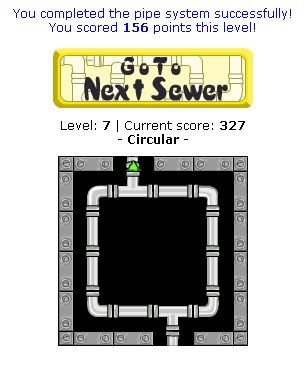
Level 7 – high score solution
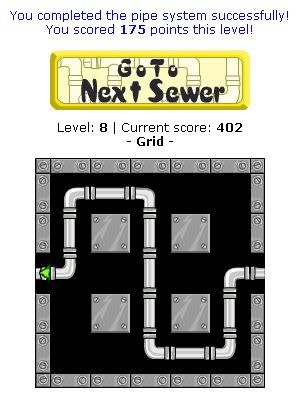
Level 8 – high score solution
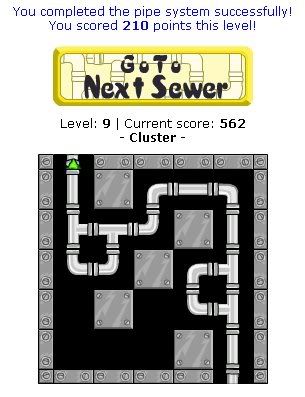
Level 9 – high score solution
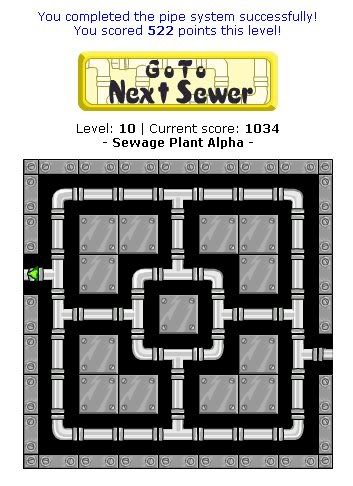
Level 10 – high score solution (you could not do one corner if you want to make it easier)
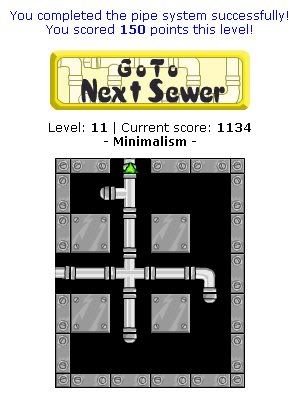
Level 11 – can be done many ways but basic principle is shown
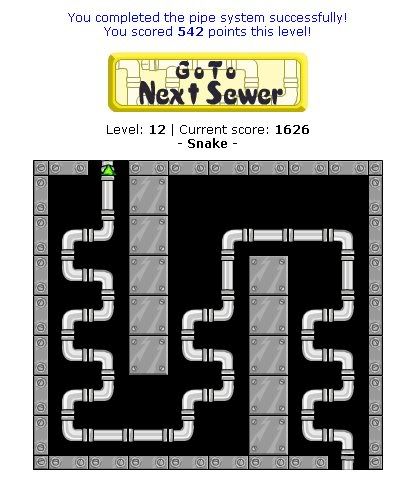
Level 12 – can be done many ways but basic principle is shown
Level 13 – Important level – you can score a lot of points here – the basic priciple is shown, fill the board and use as many pieces as possible – shame I ran out of discards and had to dump some in gaps
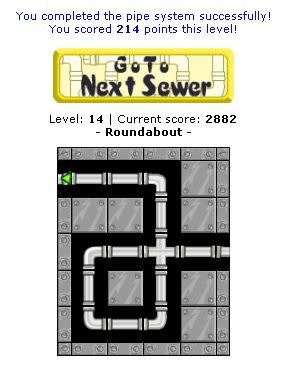
Level 14 – this is the only solution
Level 15 – this is the only solution (it tries to trick you that you can complete the big loop with the first piece but you can’t)
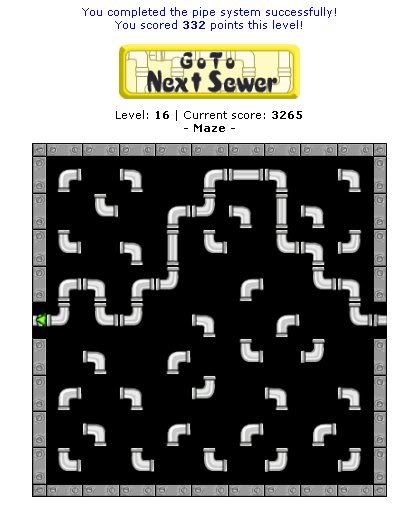
Level 16 – this is the only solution (I think) It is a maze – other routes loop on themselves and you get stuck but happy to be proved wrong
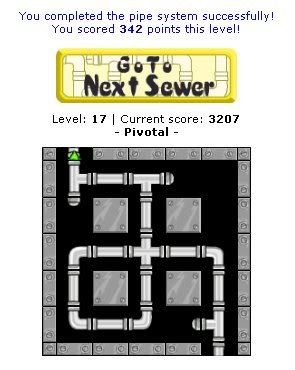
Level 17 – basic principle shown – depends on the pieces you get. Level is not that high scoring – don’t fail it too often!
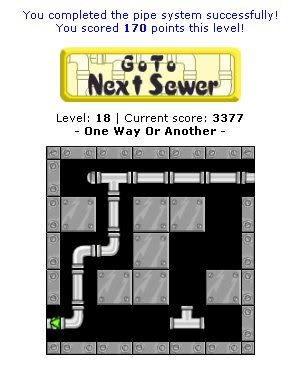
Level 18 – the only solution is down or up as shown – shame I ran out of discards and had to dump a piece
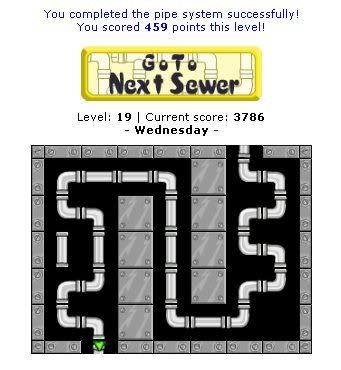
Level 19 – basic priniple shown, put the verticals in the middle first as they are the only pieces that can go there. Plan the routes down the sides to make sure they can join up
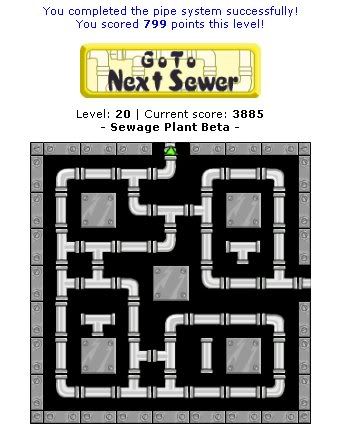
Level 20 – lots of ways to do this but basic priniple shown. Try to link all the loops together but you have to work with the pieces it gives you – easy to fail this as you have little spare room for unwanted pieces at the end
Level 21 – high score solution
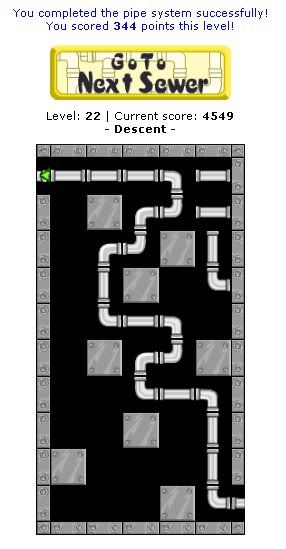
Level 22 – could have scored higher by extending the loops further left
Level 23 – high score solution – definitely go for this, it gives you the pieces within a few goes and is worth the points in my opinion
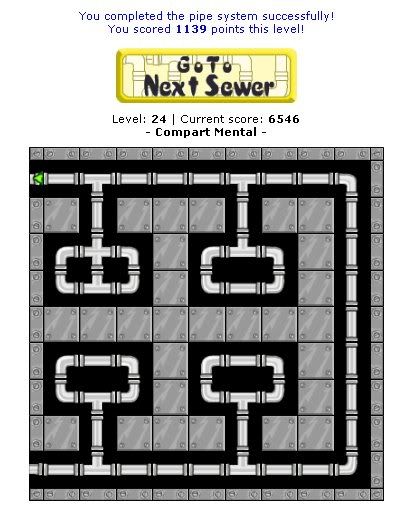
Level 24 – high score solution – again I always play for this even if I have to restrt a few times
Level 25 – basic principle shown but can be done better
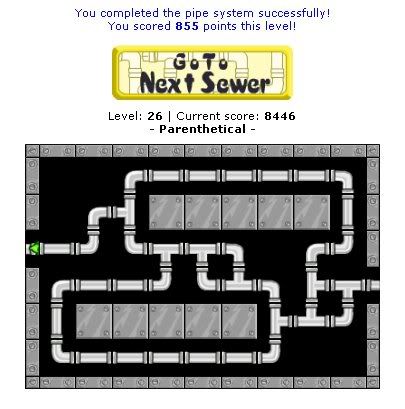
Level 26 – loops around the top and bottom always required – how you join them up depends on the pieces you get
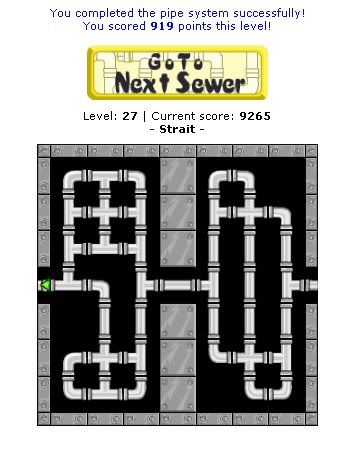
Level 27 – not a bad solution – shows the basic principle of how to fill the spaces
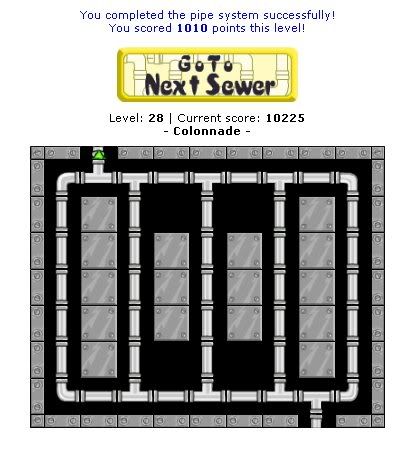
Level 28 – high score solution
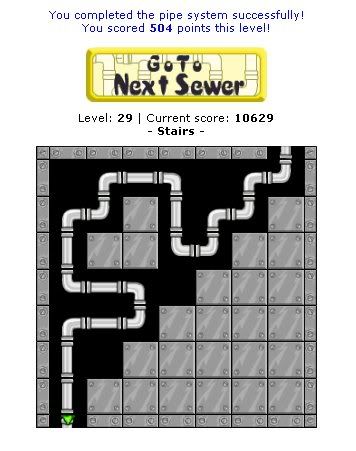
Level 29 – high score solution
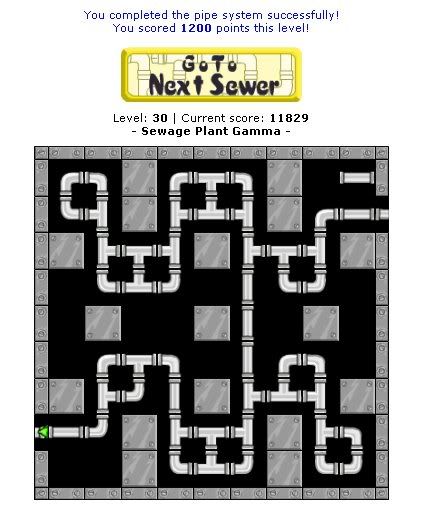
Level 30 – high score solution – could score a little more by filling the extra spaces but risky
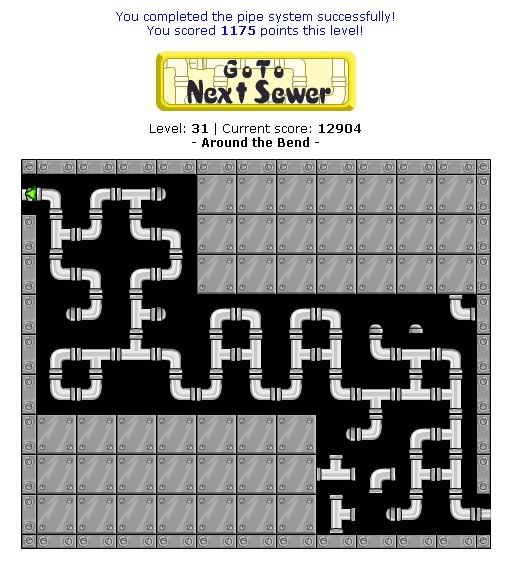
Level 31 – this was a high scoring solution but this level depends very much on the pieces you get – take care to make sure you can join it all up and go for the small loops
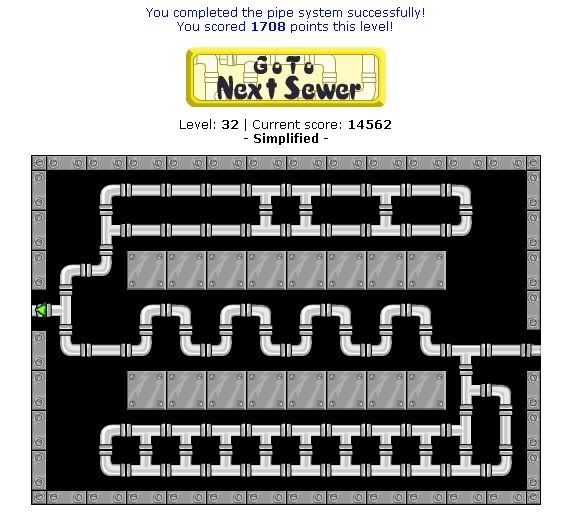
Level 32 – good solution – could perhaps score a little higher if you joined up all three at both ends
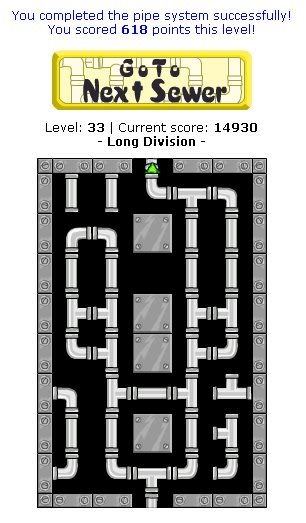
Level 33 – good solution – clearly you could make the side loops longer but this level is easy to fail (as you can see from my discarded pieces I nearly failed that go too)
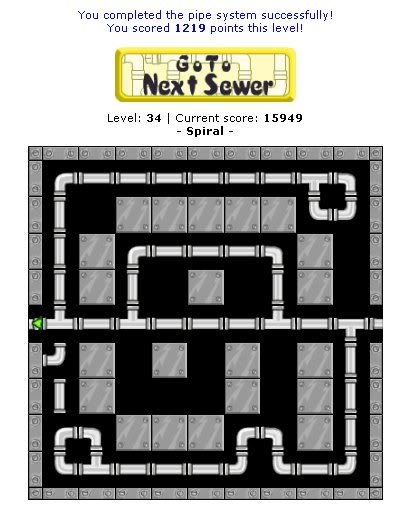
Level 34 – high score solution
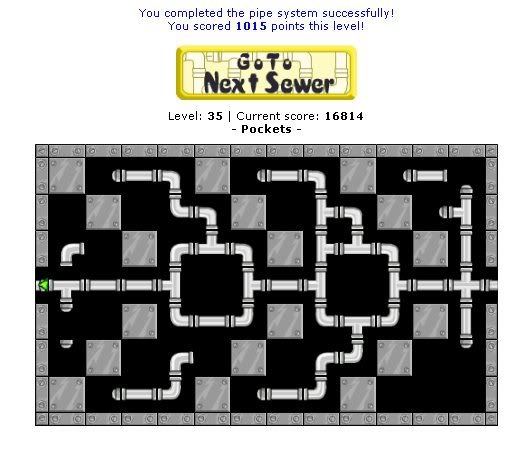
Level 35 – this is an ok solution – in my defence I had failed this so often and I was tired and grumpy so I just wanted to complete it! Should really have joined up the arm in the bottom middle part and extended the pipes at the ends but you can see the shape of it
Level 36 – good solution – could add a few more lopps in for an extra few points
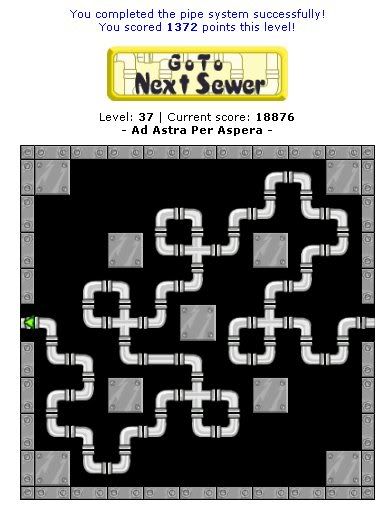
Level 37 – there may be a better solution than this but I haven’t found it. If you take the loops away to try and extend them it seems impossible to joi them back up so I stick with this solution
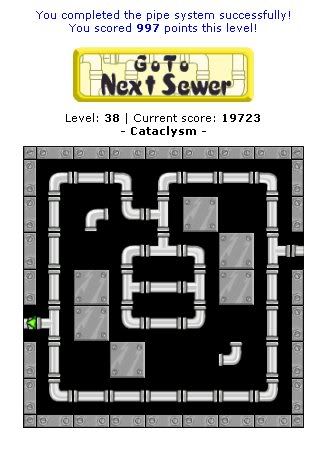
Level 38 – basic principle shown but depending on the pieces how you join the outside to the inside can vary and you could add a kink at the bottom, see what pieces you get dealt
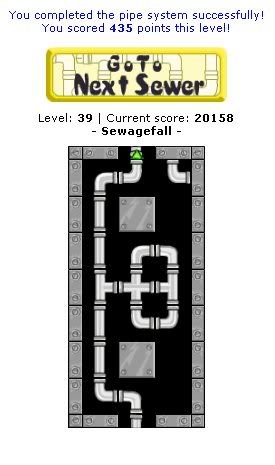
Level 39 – look at this puzzle as a top and bottom half. If you join up to the entrance by going left, you have to form a small loop to the right side. The same is true of linking to the exit. The basic principle is shown, hopefully you can see what I mean
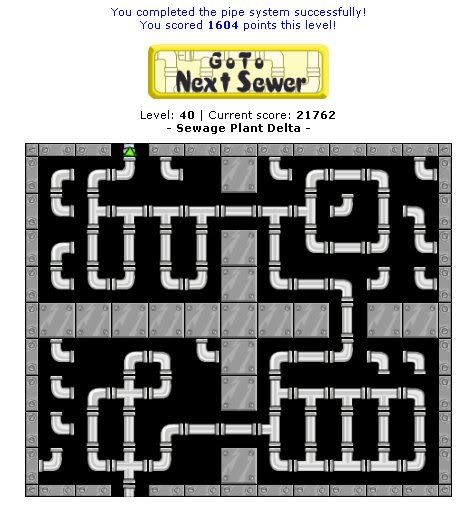
Level 40 – high scoring level and can be done many ways. I try to sort out a section at a time. Just lay as many pieces as you can whilst minimising discards. The solution is a good example of roughly how mine look but it can vary somewhat
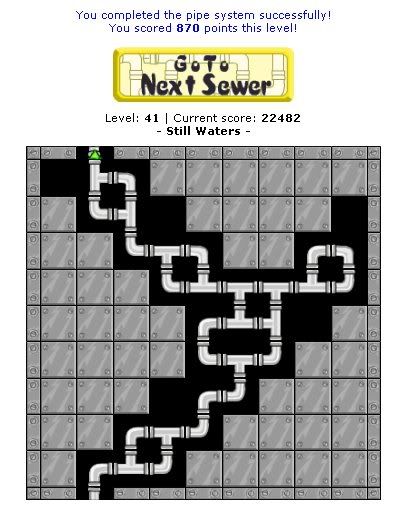
Level 41 – good solution, form lots of small loops to maximise the amount of pieces you use
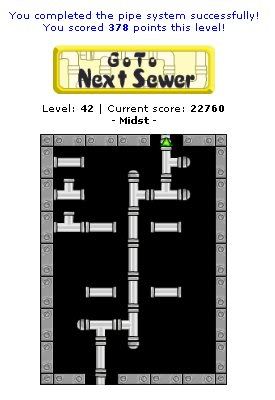
Level 42 – basic principle shown – its quite easy to fail this level and its not that high scoring so beware
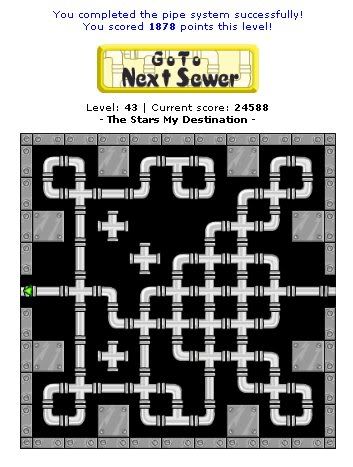
Level 43 – good solution – the final pattern will depend somewhat on how many cross pieces you get but this is a solid example of how to get a good score
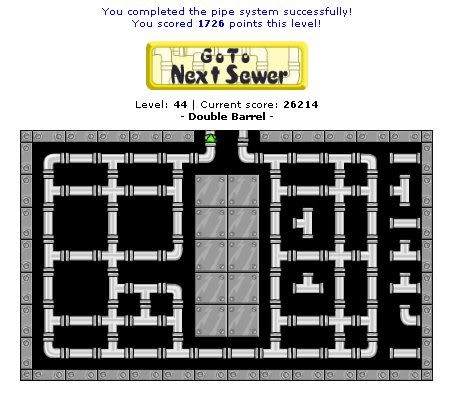
Level 44 – good example of the basic pattern although a few more discards than I would like but better than failing the level
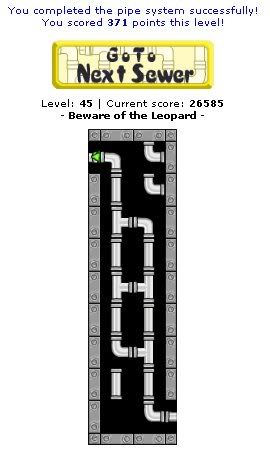
Level 45 – this is the only solution
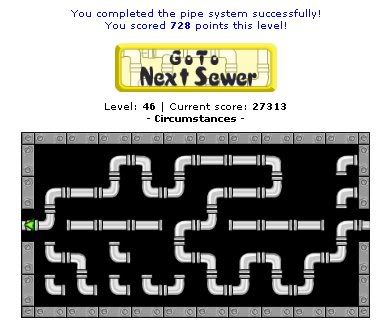
Level 46 – good solution – you could try and extend the top loop
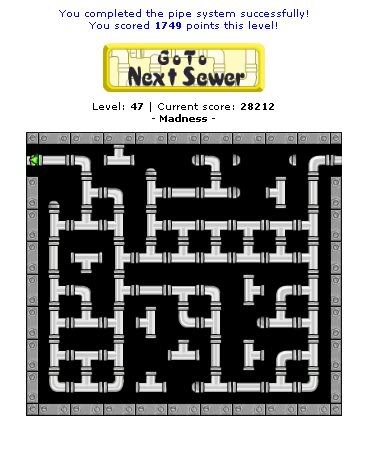
Level 47 – good solution – could be done other ways but my solutions are always very close to this
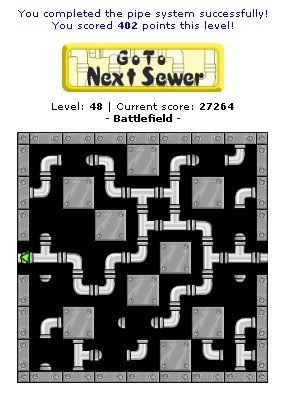
Level 48 – yuk – an ok solution I suppose but I can’t tell you how easy this level is to fail. For a high score run off the arms as far as possible and get it all to join up but I really would just try and get something ok down and move on
Level 49 – good solution – you only get curves in two directions so its not easy to link it all up. I would recommend linking the entrance to exit as soon as possible and then run off the arms for points afterwards
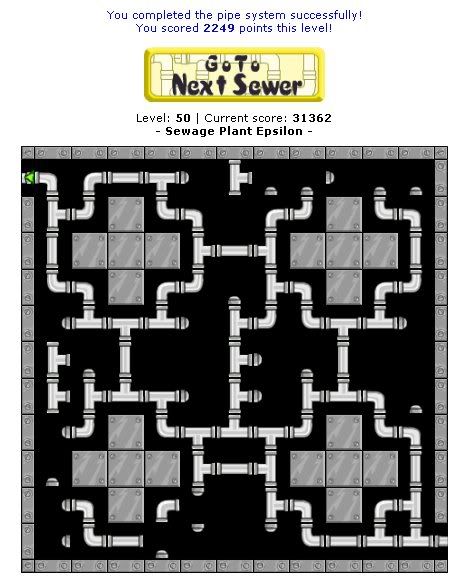
Level 50 – good solution – follow the basic pattern but note you do not get any discards so you have to work with what it gives you
Finished! Hopefully you are sat on the high score table and come tomorrow you will have a nice shiny new trophy!
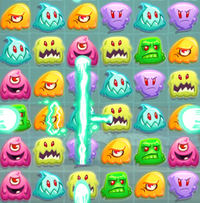
Ghosts have escaped from Haunted Woods and have inhabited houses throughout the Neopian world. It’s your job to help Brave Bren, the Professor, and Glyn to rid these houses of spirits! Ghoul Catchers is Neopet’s smartphone application that is very similar to Sutek’s Tomb. The goal is to strategically match three or more ghouls together to achieve a target, a set number of points and in later levels delivering items.
This application is available for iOS and Andriod users, but the game can also be accessed from Facebook as well.
HOW TO PLAY:
Each map will show a path with 20 different haunted houses. Each house represents a different level, and you need to meet the basic requirement for the first level before you move onto the second. You can continue to replay each level to earn neopoints or to improve your number of stars.
Map features: Hearts – This shows exactly how many lives you have. You begin with a maximum of 5 lives. Hearts are lost whenever you fail to meet a level’s requirements or restart a level. Whenever you lose a life, it takes 20 minutes to replace. Another method for gaining lives is receiving some from friends on Facebook or purchasing lives inside the application. Stars – This number represents how many stars you have earned. Try to collect as many stars as possible so you are able to continue on to the next map. Each house can earn you up to three stars. Envelope – This feature shows your friend list and lets you send them extra lives.
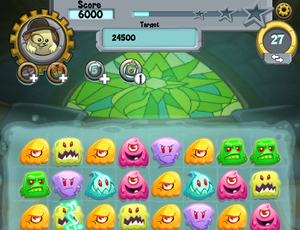
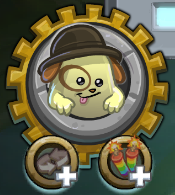
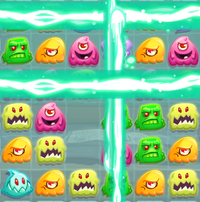
Inside the haunted house: Target – This shows the requirement for each level. Petpet – Different petpets are unlocked for different maps. Each petpet will provide different options for two power-ups. Moves – This shows how many moves you have left to use in the game. Star meter – This shows how close you are to achieving a star.
If you run out of moves without reaching the target, you can choose to flee and lose a life or purchase more moves.
Brightvale
The ghouls have left Haunted Woods, and your first stop is in Brightvale. In this map, a Warf petpet will accompany you. Your Warf petpet will learn two power-ups throughout the Brightvale map: Tailchaiser and Prismatic Sparkler. The Brightvale maps are fairly easy to beat as it only requires you to achieve a certain amount of points to reach the requirement.
Faerieland
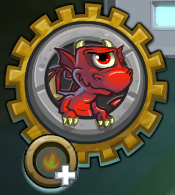
The next map you can unlock is Faerieland, but you can only move on from Brightvale after you have collected 50 stars. A red Cyodrake petpet will accompany you through these levels, but you can choose the Warf petpet if you like its power-ups better. The Cyodrake petpet will learn two power-ups throughout the Faerieland map as well: Fireball and Spitfire. This map is a little bit harder because some maps require you to achieve a certain amount of points as well as deliver items. You can deliver items by letting the item drop to the bottom row in the game.
Terror Mountain
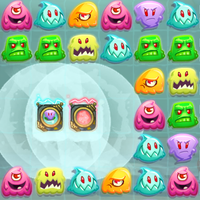
The next map is Terror Mountain, and you can unlock this map after you have achieved 100 stars. A Neucloop petpet will accompany you though starting on level 42. The Neucloop has two power-ups, Blocker Buster and Ink Splash. This map is introduces a new obstacle, urns. Urns are unable to be swapped and ultimately block your path. Urns can be destroyed by creating a match touching the urn, or using a special tile to eliminate it.
Lost Desert
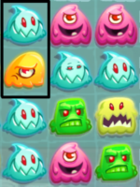
The next map is Lost Desert, and you can unlock this map after you have achieved 150 stars. If there are urns present in a level, the Neucloop petpet will be present. If there isn’t, you can choose between the Warf and the Cyodrake. The new target for this map is eliminating plagued ghouls. Basically, there will be a required number of ghouls of a certain color you need to eliminate. For example, you may have to eliminate 5 pink ghouls and earn a certain amount of points before you can achieve the target. This is easy at first, but becomes difficult in the later levels when it asks to eliminate 25 ghouls of a certain color, and there aren’t many present on the board.
STRATEGIES
Creating Special Tiles
Spectral Shackle | Glyph of Banishment | Ghost Trap
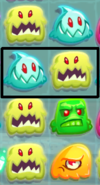
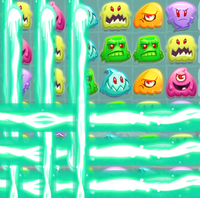
An important aspect of meeting all the requirements of each level is creating special tiles. You can create special tiles by matching 4 or 5 ghouls together. Spectral Shackle: Match 4 ghouls to create a single tile. Matching it again will eliminate an entire row or column depending on which way the green line is facing.
Glyph of Banishment: Match 5 ghouls to create a single tile. Swap this power-up tile and it will banish all ghouls of the same color of the tile you swapped.
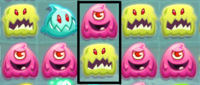
Ghost Trap: Match 5 ghouls in an L or T shape to create a single tile. Matching this tile again will eliminate a 3×3 block of the ghouls around it.
Swapping Special Tiles
The best way to earn points in Ghoul Catchers is to swap two special tiles. Swapping these two tiles, depending on what they are, will produce different reactions. In the later levels, it is extremely important to be able to swap these tiles, otherwise, it is unlikely you’ll be able to meet the level’s target.
Two Spectral Shackles: Will eliminate a column and a row for 100 points per ghoul
Spectral Shackle and Glyph of Banishment: Will eliminate rows and columns of the color of the spectral shackle for 100 points per ghoul.
Spectral Shackle and Ghost Trap: Will eliminate 3×3 row and a 3×3 column for 200 points per ghoul.
Two Ghost Traps: Will eliminate a 3×4 region around the traps for 200 points per ghoul.
Ghost Trap and Glyph of Banishment: Will eliminate 3×3 regions of the color of the Ghost Trap for 200 points per ghoul.
Two Glyphs of Banishment: Will eliminate all ghouls on the board for 100 points per ghoul
Power-ups
In various levels throughout the game, a level will start and have you complete a tutorial about some of the power-ups. However, don’t forget that these power-ups do not replenish after you complete a level but are available for purchase. I recommend you don’t use these unless you feel like you can’t beat a level without it.
Ghoul-B-Gone – Allows you to eliminate ONE ghoul. Available at level 4+. All petpets.
Tailchaser – This power up allows you to swap two different ghouls without making a match. Available at level 5+. Warf petpet.
Prismatic Sparkler – Eliminates all ghouls of two random colors. Available at level 10+. Warf petpet.
Utility Kit Booster – Gives you five extra moves. Available at level 15+. All petpets.
Fireball – Eliminates 10 random ghouls. Available level 22+. Cyodrake petpet.
Spitfire – Eliminate one column of ghouls. Available level 31+. Cyodrake petpet.
Extra Life – Restores your life meter
Map Unlock – Allows you to unlock a map early if you do not meet the star requirement.
Blocker Buster – Eliminates one urn. Available level 42+. Neucloop petpet.
Ink Splash – Eliminates a 3×3 block, including urns. Available level 51+. Neucloop petpet.
You must have 50 stars before you are able to unlock this map.
Level
Moves
Target
One Star
Two Stars
Three Stars
21
35
27,000 points, 2 items
27,000 points
36,000 points
45,000 points
22
30
30,000 points, 1 item
30,000 points
36,000 points
42,000 points
23
35
30,000 points, 2 items
30,000 points
35,500 points
42,000 points
24
34
15,500 points
15,500 points
22,000 points
32,000 points
25
32
18,000 points
18,000 points
23,000 points
28,000 points
26
40
30,000 points, 2 items
30,000 points
37,000 points
44,000 points
27
38
29,000 points
29,000 points
39,000 points
52,000 points
28
25
16,000 points, 1 item
16,000 points
19,000 points
23,000 points
29
20
13,000 points
13,000 points
17,500 points
23,000 points
30
30
23,500 points, 3 items
23,500 points
27,500 points
31,500 points
31
20
15,000 points, 1 item
15,000 points
17,300 points
22,000 points
32
40
28,000 points, 4 items
28,000 points
31,000 points
35,500 points
33
32
28,000 points
28,000 points
39,500 points
47,000 points
34
34
23,500 points
23,500 points
32,500 points
40,000 points
35
36
30,000 points
30,000 points
36,000 points
42,500 points
36
36
30,000 points, 3 items
30,000 points
37,000 points
44,000 points
37
40
27,000 points
27,000 points
31,500 points
36,000 points
38
38
39,000 points
39,000 points
47,000 points
56,000 points
39
35
31,000 points
31,000 points
33,500 points
37,500 points
40
35
30,000 points, 4 items
30,000 points
32,500 points
35,000 points
Terror Mountain Map
You must have 100 stars before you are able to unlock this map.
Level
Moves
Target
One Star
Two Stars
Three Stars
41
30
15,000 points, 2 items
15,000 points
22,500 points
30,000 points
42
40
25,000 points, 1 item
25,000 points
35,000 points
45,000 points
43
40
20,000 points, 3 items
20,000 points
27,500 points
35,000 points
44
50
30,000 points, 2 items
30,000 points
35,000 points
40,000 points
45
47
25,000 points, 3 items
25,000 points
37,500 points
50,000 points
46
37
20,000 points
20,000 points
25,000 points
30,000 points
47
35
20,000 points, 2 items
20,000 points
25,000 points
30,000 points
48
40
25,000 points, 4 items
25,000 points
30,000 points
35,000 points
49
42
22,000 points
22,000 points
26,000 points
30,000 points
50
45
25,000 points, 5 items
25,000 points
30,000 points
35,000 points
51
35
28,000 points
28,000 points
32,000 points
35,000 points
52
36
17,500 points, 2 items
17,500 points
19,000 points
20,500 points
53
33
25,00 points, 1 item
25,000 points
32,000 points
39,000 points
54
27
20,000 points, 2 items
20,000 points
22,500 points
25,000 points
55
35
20,000 points, 5 items
20,000 points
22,000 points
24,000 points
56
34
22,000 points
22,000 points
24,000 points
26,000 points
57
40
23,000 points, 2 items
23,000 points
25,000 points
27,000 points
58
41
19,000 points, 2 items
19,000 points
20,000 points
21,000 points
59
27
26,000 points
26,000 points
30,000 points
34,000 points
60
50
44,000 points, 6 items
44,000 points
50,000 points
56,000 points
Lost Desert Map
You must have 150 stars before you are able to unlock this map.
Level
Moves
Target
One Star
Two Stars
Three Stars
61
30
18,000 points, 11 plagued ghouls
18,000 points
20,500 points
23,000 points
62
20
12,000 points, 2 items
12,000 points
14,000 points
16,000 points
63
40
32,000 points, 24 plagued ghouls
32,000 points
35,000 points
38,000 points
64
25
20,000 points
20,000 points
24,000 points
28,000 points
65
28
19,000 points, 3 items
19,000 points
20,000 points
21,000 points
66
50
34,000 points, 44 plagued ghouls
34,000 points
36,000 points
40,000 points
67
16
8,000 points, 2 items
8,000 points
11,000 points
14,000 points
68
20
12,000 points, 20 plagued ghouls
12,000 points
16,000 points
20,000 points
69
30
12,000 points
12,000 points
16,000 points
20,000 points
70
30
22,000 points
22,000 points
26,000 points
30,000 points
71
25
18,000 points, 60 plagued ghouls
18,000 points
20,000 points
22,000 points
72
20
12,500 points
12,500 points
16,500 points
20,500 points
73
40
37,000 points, 4 items
35,000 points
37,000 points
41,000 points
74
25
20,500 points, 40 plagued ghouls
20,500 points
22,500 points
24,500 points
75
30
19,000 points, 3 items
19,000 points
22,000 points
25,000 points
76
20
12,000 points, 35 plagued ghouls
12,000 points
14,500 points
17,000 points
77
18
13,000 points, 2 items
13,000 points
18,000 points
22,000 points
78
25
18,000 points, 50 plagued ghouls
18,000 points
21,500 points
25,000 points
79
28
15,000 points, 3 items
15,000 points
20,000 points
25,000 points
80
30
23,000 points, 60 plagued ghouls
23,000 points
26,000 points
29,000 points
Shenkuu Map
You must have 200 stars before you are able to unlock this map.
Level
Moves
Target
One Star
Two Stars
Three Stars
81
25
25,000 points
25,000 points
30,000 points
35,000 points
82
28
20,0000 points
20,000 points
23,000 points
26,000 points
83
30
15,000 points, 3 items
15,000 points
17,500 points
20,000 points
84
30
17,500 points, 40 plagued ghouls
17,500 points
20,000 points
22,500 points
85
25
9,000 points, 42 plagued ghouls
9,000 points
12,000 points
15,000 points
86
35
20,000 points, 4 items
20,000 points
24,000 points
28,000 points
87
22
22,000 points
22,000 points
24,000 points
26,000 points
88
25
25,000 points, 40 plagued ghouls
25,000 points
27,000 points
32,000 points
89
45
30,000 points
30,000 points
35,000 points
40,000 points
90
30
20,000 points, 6 items
20,000 points
24,000 points
27,000 points
91
35
22,000 points, 1 item
22,000 points
27,000 points
32,000 points
92
20
6,000 points
6,000 points
7,500 points
10,000 points
93
30
15,000 points, 45 plagued ghouls
15,000 points
20,000 points
25,000 points
94
30
7,000 points
7,000 points
9,000 points
11,000 points
95
35
22,000 points, 43 plagued ghouls
22,000 points
35,000 points
40,500 points
96
30
24,000 points, 2 items
24,000 points
29,000 points
35,000 points
97
17
5,000 points
5,000 points
6,500 points
8,000 points
98
15
6,000 points, 45 plagued ghouls
6,000 points
8,000 points
10,000 points
99
35
24,000 points, 2 items
24,000 points
30,000 points
40,000 points
100
30
33,000 points
33,000 points
36,000 points
40,000 points
Altador Map
You must have 250 stars before you are able to unlock this map.
Level
Moves
Target
One Star
Two Stars
Three Stars
101
35
15,000 points, 3 items
15,000 points
30,000 points
37,000 points
102
45
25,000 points
25,000 points
32,000 points
38,000 points
103
30
12,000 points, 30 plagued ghouls
12,000 points
15,000 points
18,000 points
104
20
10,000 points, 42 plagued ghouls
10,000 points
15,000 points
20,500 points
105
20
6,000 points
6,000 points
10,000 points
13,000 points
106
25
17,000 points, 5 items
17,000 points
20,000 points
24,000 points
107
14
7,000 points
7,000 points
9,000 points
11,000 points
108
15
7,000 points, 35 plagued ghouls
7,000 points
12,000 points
15,000 points
109
15
7,000 points, 35 plagued ghouls
7,000 points
9,000 points
11,000 points
110
15
6,000 points, 4 items
6,000 points
8,000 points
10,000 points
111
10
4,000 points, 2 items
4,000 points
6,000 points
8,000 points
112
35
20,000 points
20,000 points
27,000 points
35,000 points
113
25
12,000 points, 35 plagued ghouls
12,000 points
18,000 points
24,000 points
114
10
5,000 points, 1 item
5,000 points
6,000 points
7,000 points
115
40
25,000 points
25,000 points
33,000 points
39,000 points
116
30
15,000 points, 50 plagued ghouls
15,000 points
22,000 points
27,000 points
117
60
35,000 points
35,000 points
45,500 points
55,000 points
118
30
20,000 points, 2 items
20,000 points
22,000 points
28,000 points
119
35
25,000 points, 50 plagued ghouls
25,000 points
30,000 points
32,000 points
120
45
30,000 points, 2 items
30,000 points
35,000 points
37,000 points
TIPS
Always check to see if you can create a special tile before swapping any ghouls.
Swapping special tiles will earn you the most points and get you closer to a three star achievement.
Try not to get items you are trying to deliver stuck along the sides as this makes it more difficult to make them reach the bottom.
If you are close to running out of moves, try creating as many special tiles as possible, and they will detonate at the end of a level, giving you more points.
If you’re looking to make some quick NP, repeat level 1 multiple times. You can earn up to 50k NP a day
If you have already passed a level and are trying to get all three stars, don’t worry about delivering items or eliminating plagued ghouls if they’re being troublesome; focus on achieving a higher score as you’ll still be awarded the stars regardless of reaching the requirement.
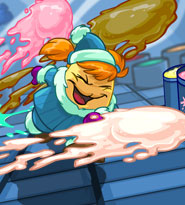
Ice Cream Machine is a fast-paced game where you play as a cute chia named Adee. Yes, “Cute Chia” is generally an oxymoron, but I like to think that Adee is the one exception. Basically, the premise of Ice Cream Machine is that you are Adee, and having some crazy dreams about killer ice cream! And by “killer” I don’t mean delicious. If Adee gets hit by these ice cream scoops she eventually dies. Who knew Neopets could be so morbid? Anyway, the goal is to move Adee around the screen and avoid hitting the melty gobs of dairy goodness. There are, however, scoops that you can hit. These ones won’t kill Adee. In fact, they’ll give her a power up! Ice Cream Machine Neopets is a very popular game that offers three different trophies and an avatar!
Ice Cream Machine Basics
So my lofty introduction didn’t scare you away? Great! Guess you’re taking this seriously enough to learn the basics. First things first: in each level you will face a different flavour of ice cream. As each level progresses, they begin to increase in speed, and quantity. It’s your job to dodge them any way you can. When you successfully dodge a scoop, it will exit through the top of the screen and be added to your final score. You start out with 3 lives. Hitting an ice cream scoop will take one away. But don’t fret! You can earn lives back, along with many other power-ups. This will be explained more in depth later on in the guide. Lastly, to control Adee, all you have to do is move your mouse around the screen.
Cheat: Type in strawberryvanillachocolate really fast at any loading screen in your game for an extra life!
The Inside Scoop on Scoops
Below are helpful guides that will tell you everything you need to know about the different scoops that you encounter in the game! Learn these before playing, so you can be prepared.
Ice Cream Machine Power-Ups
Every power-up in Ice Cream Machine can be a good power-up. It all depends on the type of situation you are in. For example, a speed increase might seem bad to some people, but if you have quick reflexes, it helps the levels go by quicker. To reap the rewards of these scoops, you must allow them to crash into you. This might throw you off, but just make sure you’re ONLY crashing into the power-up scoops.
In addition, some of the power-ups stack, and some cancel each other out. A good example is the speed increasers and speed decreasers. The more increasers/decreasers you pick up, the faster/slower the ice cream scoops will go. Of course, they do eventually wear off, so don’t expect the power-ups to last forever. Typically, they will last a few seconds.
The ones that do not stack with other power-ups, and can be cancelled out, are the size ups and size downs. While picking up multiple of these will cause you to continue to shrink smaller, and smaller, or larger, and larger, if you pick up any other power ups during this time, you will go back to your original size. The only exception to this is the shield. Your shield remains for 5 seconds. When it starts to deteriorate it will turn red, so make sure that you are in a safe zone as soon as you notice the color change.
NAME
EFFECT
Strawberry Bomb
Clears the screen of all scoops for a short time
Force field
A shield surrounds Adee for 5 seconds
Extra Life
Gives you 1 extra life
Increase
Increases the speed of the scoops
Decrease
Decreases the speed of the scoops
Size Up
Increases Adee’s size
Size Down
Decreases Adee’s size
Cherry Scoop
+100 points
Fish Scoop
+250 points
TPOSG Scoop
+1000 points
Ice Cream Bonuses
To receive these bonuses, dodge them like you would any other scoop. If two or more of these exit the screen at once, you will receive 15 points each instead of 10.
NAME
EFFECT
Chocolate Sauce
+10 points
Caramel Sauce
+10 points
Strawberry Sauce
+10 points
Ice Cream Machine Levels
With each level, the speed of the scoops will increase.
LEVEL
PICTURE
# OF SCOOPS
POINTS
1
Strawberry
25
125
2
Vanilla
50
250
3
Chocolate
75
375
4
Mint
100
500
5
Blueberry
125
625
6
Van Choc Chip
150
750
7
Straw/Van/Choc
175
875
8
Peach
200
1000
9
Van Choc Swirl
225
1125
10
Double Chocolate
250
1250
11
Tigersquash
275
1375
12
Rainbowberry
300
1500
13
Garlicy Bratwurst
325
1625
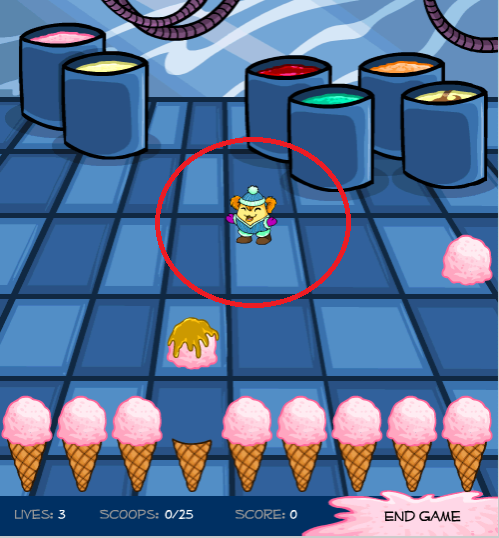
Ice Cream Machine Positioning
If you want to score a lot of points, you will need to perfect your positioning. That is the most important skill to learn while playing this game. The best place to have Adee is in the dead center of the page, anywhere in the red circle that I’ve put around Adee. This position gives you the maximum space to move freely and dodge. In the middle you are far away from the ice creams, but not too close to the top of the screen, and also won’t get boxed in by the right and left edges. If you do happen to get yourself cornered, there is a solution that occasionally works, but not always. Use this technique only if you will lose a life otherwise. First, move your cursor off of the game screen. Then, bring it back on the screen, into a safe spot away from ice creams. It’s possible that Adee will jump from her prior location to that one. As was said before, this doesn’t work all the time. But sometime’s it’s a better bet than facing some incoming scoops.
Ice Cream Machine Neopets Avatar
To get the avatar for this game, you must send a score of more than 14,500. You can achieve this by finishing all of the levels, and collecting at least one point over the minimum points you can earn. This is easy, because it’s practically impossible to not collect bonuses throughout the levels.
Neopets Ice Cream Machine Cheats
To send you off, here are some useful tips that will help improve your game play:
Using speed decreaser power-ups can cause back ups with ice cream scoops that are impossible to dodge
There is generally no benefit to increasing Adee’s size. Try to avoid this power-up if you can
Using the strawberry bomb increases the amount of time you must spend playing the game, as you do not receive any points from the cleared scoops
Speed increases can help decrease your time spent playing, as long as you are comfortable enough to dodge.
Neopets-Cheats.com does not endorse playing around in ice cream factories, or dumping scoops of the product on your face.
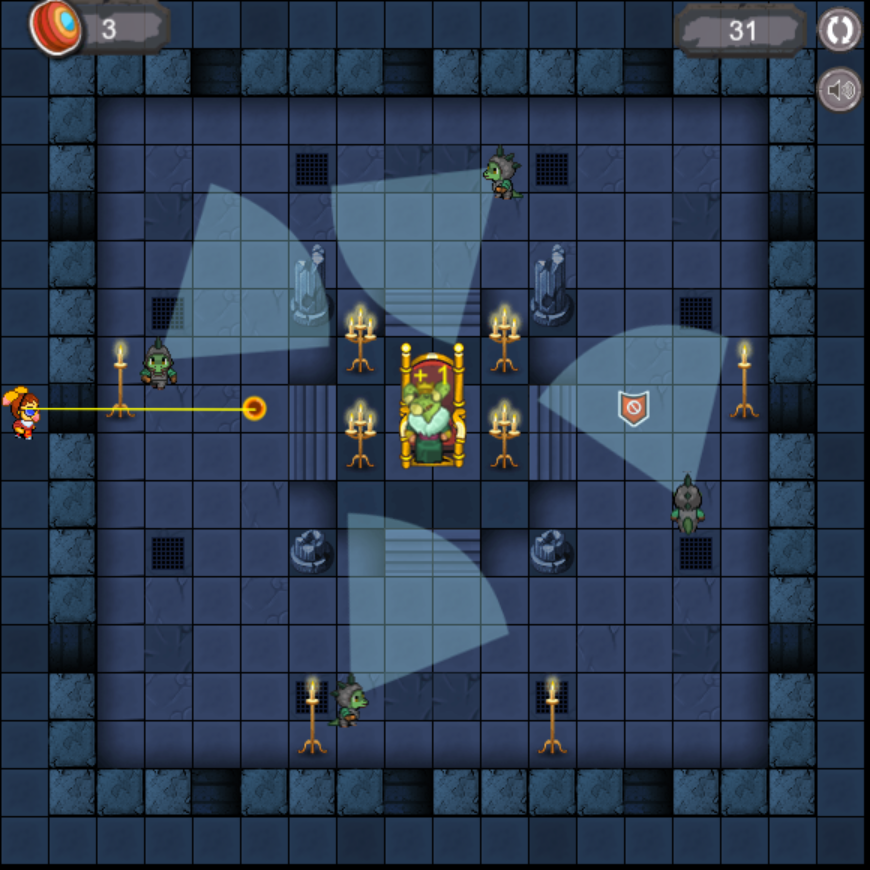
AAA’s Revenge centers around the cruelty Aristotle A. Avinroo (AAA) faced by the hands of the ruthless King Roothless. AAA has set out to seek revenge by breaking into the King’s castle!
AAA’s Revenge – How to Play
The objective of the game is simple, just don’t let King Roothless fall asleep. You will navigate AAA around the King’s castle by using the left arrow and right arrow key (which will move AAA clockwise and counter-clockwise around the castle’s perimeter. If you hit the Space Bar, you will launch AAA’s yoyo. You’ll have to continuously move around the map and hit AAA, while going undetected by the King’s guards walking around. Once the game beings everyone is stationary and you get three easy hits on the King. If you happen to pull out your Yoyo, and it lands in the line of sight of a guard, then the yoyo will be confiscated.
AAA’s Revenge – When you Lose
King Roothless will being yawning fifteen seconds after you hit him with the Yoyo, and five seconds after that he will fall asleep. Thus you have twenty seconds in-between hits to maneuver around. If Roothless falls asleep or you are out of Yoyos, than you loose.
AAA’s Revenge – Items
Items will periodically appear on the map, and you will get a small reward each time you collect them (by slinging your Yo-yo at the item). The shield however is a deterrent, as you can not just sit in one place and continuously hit Roothless. If you hit him three times from the same gap in the wall, the shield will appear, and if you use the same gap again, you will loose a yoyo.
Grants 1 additional yoyo
Freezes the guards for 5 seconds
Adds 10 points to your score
Steals 1 yoyo when solid
AAA’s Revenge – Scoring
AAA’s Revenge’s scoring system is quite simple. You get 1 point when hitting Roothless, and consecutive fast hits right after that are worth 2 points. Additionally each item you collect is worth 1 point.
AAA’s Revenge – Cheats
To maximize your points, you want to quickly hit AAA’s in rapid successions. This will earn you the most amount of points rather than hitting him once and moving around! If the flashing shield appears, hit Roothless from another angle/gap. When Roothless yawns, you have five seconds to hit him again before the game ends!
AAA’s Revenge – Avatar
To be awarded the AAA’s Revenge Avatar, you need a score of 1,000+ in AAA’s Revenge.
Neopets Splat-A-Sloth is a game that is one of the first to have been created in Neopets. It is a very old game that is similar to the copied version of Neopets Dar-BLAT!!! Neopets Splat-A-Sloth is where you aregiven the opportunity to have a bat in your hands and to wait a plushie version of sloth to splat him with it, and to earn points from there.
Gameplay
Your main objective, when you decide to play Neopets Splat-A-Sloth is to splat the sloth that comes out of the tube. The controls are really simple, and all you have to do is to actually hit the space bar whenever you see him so that you can splat him and earn points that are generated from there. You receive a bigger amount of points if you hit the end of the sloth from his right than if you hit his head, because it will mean that you reaction time was very quick and effective. From there, you can destroy him.
Once you successfully hit the sloth that comes out of the tube, you are shown the amount of points that you’ve got from the game but you do not decide whether or not you will want to send your score. For that reason, you will want to be as quick as possible in order to receive the maximum amount of points that you can. If you are slow and do not manage to hit the sloth, you will hear a big and loud laugh that will be of Dr. Sloth himself and you will then be given the option to the try game once again. This sound is very, very annoying and there is actually no way to turn it off (unless you turn off the sound on your computer) simply because Neopets Splat-A-Sloth is a very old game.
Make sure that you do not actually keep the space bar pushed when you fail at splatting sloth because this will lead in a game freeze and you will not proceed. You have the newspaper to splat the sloth, but make sure that you only do so when at least a total of 2 seconds comes by when Neopets Splat-A-Sloth starts. If you do it quickly, you may hit the metal part that the tube is on and the game will not respond anymore. If that happens, you simply refresh the game. For that reason, you do not want to keep the space bar pushed, because you would think that this way you can hit the sloth, but in reality that will not work.
The Sloth will appear on the screen at a random time. The time can be between two and 15 seconds, and there is no way that you can use to make it come faster. You have to be ready for the time he appears. There is a maximum score that can be obtained from this game, and it is actually 500. However, to achieve that, you must hit the sloth before he appears. Doesn’t make any sense, but this is really what will give you a score of 500 points. It will then go for a review by TNT, and you will finally receive it after a verification. The verification is there to avoid cheaters at succeeding at getting better score. When TNT reviews a score, it is to make sure that the legitimate players are rewarded for their efforts (trophy, avatar, etc) while the cheater gets frozen.
Neopets Splat-A-Sloth Strategy & Cheats
During the game, a good method to splat that sloth successfully is by staring at the red tube that will be open, and from there you have to wait. The black whole is where he will come out from first. You also have to make a quick move with your eyes so that you can get ready for the times he pops out in.
If you are playing on a Desktop computer where there is a keyboard that is attached to your computer, usually these keyboards will have the button keys popped out a little, then proceed and press the space bar a little. Make sure that the space bar is almost half pressed, depending of your keyboard or even more if the keyboards lets you but make sure that the space bar is not completely hit. You do not want to hit the space bar because you then just fail directly. Once this is done, wait for the sloth to appear and hit him with it. You can notice that this trick is perfect because when the sloth appears, you’ll see him and your reflexes will most likely allow you to hit him, however, since the space bar is popped out, it will take few fractions of second the time you press it and this will most likely result in a game over. You want to press it a little and when you see him, quickly press it.
For people who have a laptop, usually the keyboard is already thin and you do not really need to press the key. For that reason, you simply stare at the red tube from where the sloth will pop out, and press the space bar. The points that will be awarded to you, will depend of your reflexes. The quicker you are, the better your points. Hitting his head will give you more points, however if you manage to hit the right side (his “legs”) then you receive more points because that will mean you have been faster.
If you’re going after a trophy, you have to know that Neopets Splat-A-Sloth is a little bit different that most of the other games because many people will be achieving the same score. The maximum score that can be obtained from the game is set at 500, and once 100 people are on the high score table with 500 points, which is very likely to happen, then the high score table will start to rotate, meaning that if someone sends a score of 500 points as the 101th person, then he will be given 1st place. Then the 102th person to reach a score of 500 will take the first spot and the second person will be bumped to the second one. For that reason, the trophies are random but if you are quick enough, you can manage to get it at the first the of the month if you’re lucky. Usually there are not as much as 100 people on the high score table during the first day of the month, so if you manage to score in the 17 first spots, you will be granted a trophy.
A last strategy which is very useful is to make sure that you hit the space bar after a fixed amount of time. This strategy is recommended to the people that are going after the 500 score, simply because you have to hit the sloth before he appears, which is very hard. How can you actually hit something if you haven’t seen it? Luck! Press the space bar after 5 seconds from the start of the game, after some hours, at a given time you will achieve the 500 score.


 Below are helpful guides that will tell you everything you need to know about the different scoops that you encounter in the game! Learn these before playing, so you can be prepared.