Neopets Moltara Dark Cave

If you’ve made it here, chances are you’re looking for a less-frustrating way to navigate the labyrinth that is the Moltara Dark Cave. Just in case you have no idea what I’m talking about, or what this page is for, let’s have a recap.

Introduction to Moltara


Discovered Year-11, Moltara is a lava-oozing city of gearsmetal, and precious gems. Not to mention the coveted Magma Pool, where, if luck be in your favor, you might just find yourself owning a magma pet.

However, Moltara is also brimming with puzzles, most of which lead to only one thing: the creation of Moltaran Petpets.

Non-Store Moltaran Petpets


Moltaran Petpets are not simply purchased from any petpet store. They first must be assembled at Tangor’s Workshop through a combination of four materials — found only in Moltara by solving five puzzles.

5 Preliminary Puzzles


NOTE
For the purposes of this guide, I will not be explaining the locations of the Obsidian Quarry, Miscellaneous Gears, nor the worms of the Moltara Worm Quest. My summaries are for context. Those of you looking for such specifics should go to —


Puzzle 1 – Obsidian Quarry


Shiny Obsidian is a once-daily prize for visiting the Obsidian Quarry in Moltara City; a relatively easy brain-teaser.

Puzzle 2 – Random Scrap


Scrap Stone and Metal is also an easy item to obtain, if only insofar as out of your control — it is awarded through a Random Event alert while visiting Moltara City or the Moltara Caves. Keep refreshing, it does eventually happen.

Puzzle 3 – Gear Locations


Miscellaneous Gears ramp the difficulty up to medium. They can be found in one of eight random locations in Moltara City — these are a rarity. They appear at least four-times less often than the Scrap Stone and Metal Random Event, and are refresh and time sensitive; in other words, be careful if you see them.

Puzzle 4 – Moltara Worm Quest


Red Moltite is our hard case. You must complete two puzzles in order to locate it. First, the Moltara Worm Quest.


To begin obtain the Empty Lantern by simply visiting Lampwyck’s Lights Fantastic in Moltara City. Then, collect ten worms lurking around Moltara City and the Moltara Caves:


All worms are refresh and time sensitive. Blue, Yellow, Red, and Green are the easiest to find; Orange, Pink and Purple are slightly harder and show up less often; White, Black and Rainbow are liable to drive you insane in their unwillingness to appear. Be patient, take breaks, and check back sparringly; longer breaks have shown to yield more worms.


Once you have all 10 worms, you may fill your Empty Lantern with them, causing it to become a Brightly Lit Lantern. Why is this important? Why, you need light to explore the Moltara Dark Cave!

Puzzle 5 – Navigating The Cave


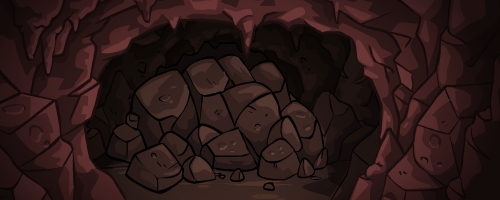
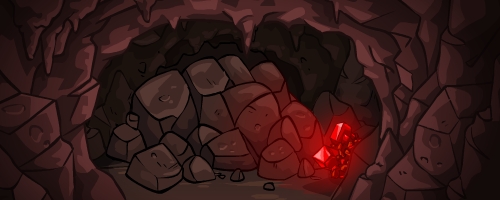
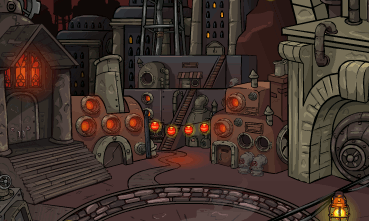
This small, eerie looking cave is the Moltara Dark Cave, which holds Red Moltite somewhere within its many corridors. However, even with your lantern, you still have to find out which corridors lead where.


This is the basic view of the start of the Dark Cave. To proceed, you must choose left or right, and see where you end up.

Some paths get you staring at a dead end


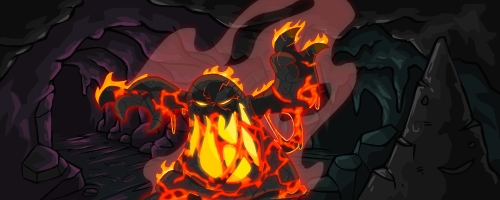
most have you fleeing from the dreaded lava monsters


both of which send you back to the beginning of the cave.



By this point, I found it exhausting to still be flailing about, clicking around blindly to find the Red Moltite, especially after spending so much time and effort to round up the worms.


So I solved the problem.

Discovery of the Solution

As random as it may seem, the Moltara Dark Cave is actually a long system of patterns. And key to the patterns is as clear as day once realized:


Your path to the Red Moltite is comprised of four turns that correspond to whatever bold sentence you encounter at the start of the cave. No two patterns are the same, and they do not change, no matter how many times you revisit the Moltara Dark Cave, and no matter which cave picture you’re shown.

Let’s start with an example. Say upon entering the Moltara Dark Cave, you are presented with this:


For this guide, take note of the first four words of your sentence–

Does it smell like… ]

Then, simply locate the start of your sentence, and follow the plotted four turns


Does it smell like

RIGHT

LEFT

LEFT

LEFT


Your Red Moltite will then be at hand!

UPDATE (01/28/12):
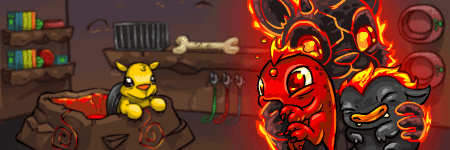


While the petpet store in Moltara never closes, collecting worms and Red Moltite is a once daily event. After you find Red Moltite within the Dark Cave, the worms will grow tired and no longer light up the lantern.


To fix this, visit Lampwyck’s Lights Fantastic again, where Lampwyck will take your lantern and promise to nurse your sleeping worms back to health by the next day.

However, upon revisiting Lampwyck, you will discover


…that Lampwyck has lost your worms!


You will have to collect the worms all over again, and refill your lantern with them, if you want to collect more Red Moltite.

The Pattern Table


[ Completed! ~ 01/04/2010 ]

If you stumble and make an incorrect turn, do not fret. When you restart at the beginning of the cave, you will be given a new sentence; a fresh start. Simply follow your new sentence to find your Red Moltite.

Alphabetical by First Word in Sentence


Sentence Start

Turn 1

Turn 2

Turn 3

Turn 4

At least it’s not…

RIGHT

LEFT

RIGHT

LEFT

Does it smell like…

RIGHT

LEFT

LEFT

LEFT

Hello? Is there anyone…

LEFT

LEFT

RIGHT

RIGHT

I hope I can…

RIGHT

LEFT

LEFT

RIGHT

I hope there’s no…

LEFT

RIGHT

RIGHT

RIGHT

I should have studied…

RIGHT

RIGHT

RIGHT

LEFT

I sure wish Roxton…

RIGHT

RIGHT

LEFT

LEFT

I wonder where this…

LEFT

LEFT

LEFT

RIGHT

It’s very hot in…

LEFT

LEFT

RIGHT

LEFT

Jordie would know what…

LEFT

RIGHT

LEFT

RIGHT

Let’s go spelunking!

RIGHT

RIGHT

RIGHT

RIGHT

Look at the shiny…

LEFT

RIGHT

RIGHT

LEFT

This lantern is bright…

RIGHT

LEFT

RIGHT

RIGHT

What a mysterious passage!

LEFT

LEFT

LEFT

LEFT

Where does this cave…

LEFT

RIGHT

LEFT

LEFT

Which way should we…

RIGHT

RIGHT

LEFT

RIGHT

Acknowledgments


Claire [fire_pets_lover]
Iliana [angelic_cow_demon]
Ayme [hisprincess]
Vikki [kounterklockwyze]
Mcshirl [loop_t_doo]
CindyMoss [tinkerbell1948]
Chris [pianomomof4]
Willa Notellya [mommajade]
bee merry [x2c5]
Kate [caiwyn]
Airy Faerie [faerieairygirl]
Helena [winx13]


To all who have assisted me with this part of my guide, or have contacted me with information and support, you have my eternal gratitude! If you would also like to contact me with any information on the Moltara Dark Cave Patterns, please do so via my main account here.

Red Moltite Petpets



Now that you have your Red Moltite, let’s see about putting it to some good use. Below is a list of Moltaran Petpets that can be created using Red Moltite.

NOTE
This is not a complete list of Moltaran Petpets. These are only the Moltaran Petpets that need Red Moltite to be created. This list was made this way on purpose. 🙂


[ Val ]

=


Red Moltite

+


Shiny Obsidian


[ Teek ]

=


Red Moltite

+


Shiny Obsidian

+


Miscellaneous Gears


[ Valteek ]

=


Val

+


Teek


[ Rav ]

=


Red Moltite

+


Miscellaneous Gears


[ Erge ]

=


Red Moltite

+


Miscellaneous Gears

+


Scrap Metal and Stone


[ Raverge ]

=


Rav

+


Erge


[ Goy ]

=


Red Moltite

+


Scrap Metal and Stone


[ Albot ]

=


Red Moltite

+


Scrap Metal and Stone

+


Shiny Obsidian


[ Nik ]

=


Red Moltite

+


Scrap Metal and Stone

+


Shiny Obsidian

+


Miscellaneous Gears


[ Goyalbotnik ]

=


Goy

+


Albot

+


Nik

Magma Pool Connection

UPDATE (06/01/12):
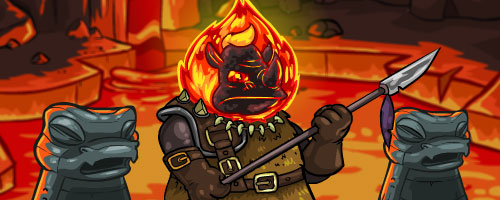


If this refusing face of the Tonu Guard is familiar to you, then you’ve joined the club of Magma Pool rejection. While awake, this Tonu Guard is very selective as to whom may step forward and paint their pet(s) Magma. Does this mean a Magma pet is hopeless for those he turns away?
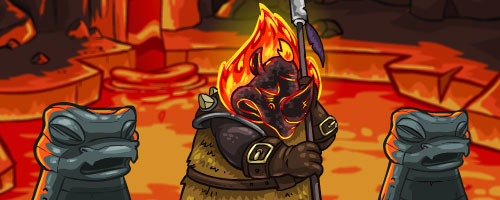


Fear not! This brute of a guard is known to fall asleep, and provide a 5 minute window of opportunity for each and every Neopian visitor. This event is time sensitive, but the time is different for each user. If you are motivated to find out when the guard is asleep for you, spend a day refreshing at the Magma Pool every five minutes or so. The time at which the guard is sleeping will not change once you find it, but you are only allowed to paint one pet per week.
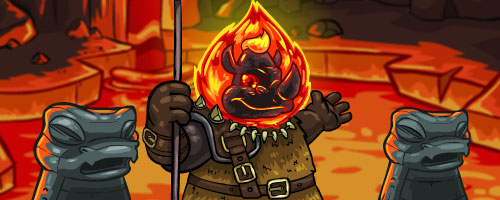


Currently, there is no known consensus as to why certain players are welcomed by the Tonu Guard. There are, however, a couple of small hints – given to us by both The Neopian Times and the research of fellow users – that pertain to being welcomed, such as:

  • You can only be welcomed on your main account
  • Being welcomed hinges on earning neopoints somehow (Editorial Wk. 433)
  • You do not need to have participated in the Moltara site plot to be welcomed

There is also some speculation that the creation of a Moltaran Petpet may be a requirement to be welcomed, but this is not proven. In theory, the petpet should be created with found materials — not second-hand store bought — and the type of petpet seems not to apply.

Neopets Invaders of Meridell

  1. Get off to a good start.
    If the army you are given is weak, delete them and try again.
    The sum of your “Attack Strength” should be > 56, your “Defense Strength” defense strength > 53.

    In particular, I advocate getting a Scorchio with 12 or 13 attack strength. Once, I got a Scorchio:13 and Grundo:14! Do not worry about your Techo or Moehog (as you can replace them with soldiers that you save from the Invaders.)

    Do not worry much about the “defense strength”, that maxes out at 14 anyway, and between the ‘lost item’ increments, the promotion bonus, and your defense items, you generally have enough defense.


  2. Do not rush to collect the lost item!
    For one thing, if you have to restart a level you want the item to still be there so you can collect it at the end. If you collect it and then restart a level, your (saved/restored) army will never benefit from the ‘lost item’ bonus.

    Especially do not hurry unless you have troops with Attack Strength ready to transition to the next level. Unless the Attack Strength is 11, 14 or 17, you will see no immediate benefit from the bonus. (Ok, you might get a defense bonus, but that levels out pretty fast at 14).

    Also, if you wait until the last battle (especially in the early missions) then you can pick up some strong troops from Invaders you have saved, and have them benefit from the ‘lost item’ bonus. It is rare that you need the ‘lost item’ bonus to win a mission. Maybe in the last mission you might pick it up early, since you are unlikely to change personnel at that late stage. (and obviously the bonus won’t do you any good after you complete the last Mission!)


  3. Get the best army you can.
    At the end of a battle, consider replacing some of your original troops with those you have saved. Many times the saved players will be stronger. If there are weapons on the field, do not rush to ‘save’ the last Invader! Consider arming the saved players or trading (if you pick up a new item, the other is dropped for someone else to pick up). Do not worry if the new members of your army do not have experience/rank, you can train them if you take a little time:


  4. Do not be in a hurry to finish off all the Invaders.
    When you get down to just one, first restore the health of all your army and get/trade weapons for the troops you want to keep.

    Consider keeping one Invader alive and let him convert one of yours back! Then you can save that one over and over! Get your Scorchio up to Soldier rank in just one battle!

    Of course, if you have no healing Grundo or potions left, don’t wait…


  5. Know when your Attack Strength bonus will increase:
    7-8 9-11 12-14 15-17 18 19
    0 1 2 3 4 5
    Note: increasing Attack Strength will not have effect until you cross to a higher cell;
    Note: Attack strength goes up by one when rank (number of saves) reaches Defender (3) and Soldier (9).
    Note: In the second wave, your Attack Strength can go up to 19, and your health can go up to 21!


  6. Know what to expect in each round:
    Mission Invader Stats Weapons on Board Second Wave
    # Invaders Health A.S. D.S. Offense Defense
    1 Moehog 8-12 5-9 6-12 Mace/Sword Staff
    2 Techo 12-16 9-13 8-14 Bow/Hammer Amulet
    3 Skeith 14-18 10-14 11-15 Scroll/Ax Helmet/Shield
    4 Scorchio 14-18 12-16 12-16 Scroll/Bow Amulet/Robe
    5 Grundo 15-19 13-16 15-17 Scroll/Ax Helmet/Shield
     
    6 Moehog 17 17 17 Double Sword Leather Vest 2 Buzz 21
    7 Techo 18 18 18 Halbred Chain Mail 3 Buzz 21
    8 Skeith 19 19 19 Lightning Wand Plate Armor 4 Grarrl 22
    9 Scorchio 20 20 20 Double Ax Amulet/Mail 5 Grarrl 22
    10 Grundo 23 23 23 Ax/Scroll Plate/Mail Buzz & Grarrl 21&22
    The Second Wave includes the dreaded “Buzz” and “Grarrl”!


  7. Arm your troops with the best and appropriate weapons, trade up when possible!
    Bonus Offense Defense
    1 Mace Sword (3:Techo) Staff (3:Grundo)
    2 Hammer Bow (4:Scorchio), Wand (4:Grundo) Amulet (4†T:Skeith)
    3 Ax** Scroll (5:Grundo) Helmet (5:Moehog)
    4 Halbred* Dbl Sword (min 6) (6:Techo) Robe (7:Grundo)
    5   Double Ax (min 5) Shield (7:Techo), Leather Vest –
    6     Chain Mail –
    7     Plate Armor —
    • A Skeith with an amulet can Teleport; with an amulet and an ax can Teleport then attack!
    • A Berserker Battle Ax can be held only with 14 Attack Strength. **
    • A Halbred gives the holder unlimited moves (not if you teleport) *
    • A Double Sword does a minimum of 6 damage
    • A Double Ax does minimum 5 damage
    • Leather Vest only for Scorchio, Moehog, and Techo.
    • Chain Mail now works for everyone. –
    • Plate Armor only works for the Moehog —
    • The Lightning Wand heals all in the selected column, from the top!
      Consumes a turn for each Defender in column, whether they need healing or not!
      If you have one turn left, only the top one is healed, not the one you click on…


  8. Know the attack plan of the Invaders:
    1. Sack a village
    2. Attack an adjacent Defender (see chart below)
    3. Move to empty square (see chart)
    If an Invader can sack, it will!
    If an Invader can attack, it will not move!

    When an Invader attacks, it looks for a target
    in a specific search order:

      3 1 6  
    X 4 I 7 X
      5 2 8  
      Rarely, an Invader (Techo04 ?) uses an alternative pattern:
      8 1 3  
    X 7 I 4 X
      6 2 5  

    Invader (I) will attack the lowest number neighbor that is a Defender.
    Invader will move to cell 4 or 7 if nearest Defender is at X.
    Otherwise, Invader will generally move straight ahead, but will veer diagonally to go around mountains.

    Use the table above to position your troops so a strong defense (for example, a Moehog with a Helmet) take the attacks while the strong attackers are in a higher numbered cell and can attack without retaliation. (so your Skeith can attack without getting hit every time).

    In the Second Wave, the Buzz/Grarrl do not follow these rules; they prefer to move forward. If they cannot go straight forward, they will go diagonally down to left if able, then try diagonally to the right. If they cannot go forward, they will attack if able, else move sideways left or right. (which can happen if they are stuck behind their own troops or mountains)

    If they detect a village in the X position, they will move toward it. If they get next to the bottom row, they start moving left/right to find a village. See Bug Report at bottom about moving right from the right-hand column.


  9. What species to use:
    • You will want a Moehog, with a Helmet.These guys are really hard-headed, they can withstand blows from three or four Invaders at a time! Plus, with up to three moves in a turn, they can get into position fast, pinning the Invaders until your (slower) attackers can arrive.

      In the Second Wave, arm your Moehog with a Double Sword. In Mission 6, you can get a new Moehog, with 16 defense!

    •  There is not much to recommend a Techo. The †3 sword is not much compared to a †3/†5 scroll or †4 bow. And anyone with a †5 Helmet or Shield will have enough defense (and a Moehog is faster than a Techo).
      When you can get a second Skeith (and give it an amulet), drop your Techo.

      Note: in the Second Wave, a Techo is more useful! Especially when fully equiped with Chain Mail and a Double Sword This Techo can get a 11 Attack Bonus! Necessary for the timely demise of those Grarrls and Grundos. So when you get to Mission 7, consider dropping your old Techo (or Moehog) and keep one of those 16 defense Techos.

    • Scorchios are fun in the first wave, with a bow, and Soldier rank. When a Scorchio gets 9 saves it is promoted to a Soldier; and gets an extra boost to Attack Strength. More importantly, it gains the ability to shoot the bow 2 cells in any direction. Which means they can attack without being hit back, can even attack over mountains. Let a Moehog hold the Invaders in place, taking hits on the Helmet (which the Grundo can repair) and shoot with the †4 bow!

      In the Second Wave, you probably won’t get much benefit from a Scorchio. The action is too fast and the fighting too close; the opportunities to shoot two cells are rare, and you can use a Grundo with Lightning Wand for that!

    • You will need at least one Skeith; once equiped with an amulet they are excellent at getting to the front line to slow down the Invaders and with a scroll or ax, they deliver a devastating blow. By meeting/blocking the Invaders early, you can protect your villages and protect the weapons for later use (see above). Even without delivering a blow, a forward Skeith will attract and ‘pin’ the Invaders so you have time to position your other troops. Don’t forget to teleport away if/when the Skeith is facing 3 or 5 attackers!
      Skeith is also perfect to attend to the Invader that sneaks down the side trying to find your one un-defended village; quickly teleport and block him! [good duty for the Skeith who is then facing only one attacker]

      For the Second Wave, you will want two Skeiths. This ensures that you can get five troops to the fifth row (from the top) before the Invaders slip by. Armed with the Ax, they can even penetrate to the third row on the first turn.

    • You will need at least one Grundo; equip with a Scroll as soon as possible (usually in mission 3). Get a Robe in mission 4.
      Keep your original Grundo; you cannot replace it until Mission 5!
      Note: your other troops can be healed by the Grundo, but the Grundo can only be healed by the potions, so when in doubt keep the Grundo in positions where it will not be attacked.
      Note: in Mission 5, give a Scroll to one of the Grundos you save. Now each Grundo can heal the other. More likely, the original Grundo is wearing a robe and has 15 or 16 Attack Strength and will be a potent member at the front lines; the new Grundo will have little defense and can stay in the back as a medic (heal the fighting Grundo first, then it can heal others if necessary) Consider dropping a Moehog or Techo (you can get more next mission) and keep two fighting Grundos..

      To solve the Second Wave, you must have two Grundos. The Invaders have too much attack strength, you will need plenty of healing; and everybody must be at the front lines.


  10. Note: If you get new troops, promote them to Defender/Soldier as fast as possible. Do what is necessary to get their Attack Bonus up to 4 or 5. (A.S. = 18/19) (If you need help raising your Attack Strength, ask for extra help)


  11. The key to this game is: the best offense is a good defense.
    That means your first priority is to heal your troops! Since a Skeith has only a †4 defense weapon (the amulet) they may need plenty of healing. Keep restoring the health of your army and you will not be beaten. (unless you let an Invader slip through to a village 🙂
    Note: if one of your Defenders is weak, but is attacked by only one Invader, see if you can save the Invader, so you can delay the healing. Or if necessary, just move the weak Defender out of the line of fire.
    If you must leave someone at risk of being converted to an Invader, let it be someone without weapons.


  12. In the Second Wave, the best defense also means you must build a wall on the fifth row (from the top). This defense keeps the Buzz/Grarrl from slipping through to your villages. There is one map (board layout) where there is only one mountain on row 5, in that case, and in only that case, you may let one Invader slip down the side line. (where you must trap it against your mountain) Other than that particular case (which was encountered in Mission 10, Game 2), never let the Invaders get on your side of the board!


  13. Attack where it does the most good.
    When attacking, attack with your greatest Attack Strength against the Invader with the lowest defense. This will generally give you the quickest conversion of Invaders to saved. [ok, really you also want to look at the Invader’s health, and attack Invaders with low health and finish them off] [and also consider that the important factor is the difference between your Attack Strength and the Invader’s Defense Strength] But if those things are about equal, favor attacking someone with lower defense.


  14. Look to see who is your most endangered troop (certainly anyone being threatened by 3 Invaders!), and destroy or save one of those Invaders first. Otherwise, against three Invaders, any player can be destroyed in one lucky roll of the dice. (three individual hits of 7 or 8 will convert 21 Health to zero…)


  15. Collect and keep the good weapons.
    Early on, give amulets to as many as you can. Later, they can be traded for a Helmet and the Amulet picked up by a saved Skeith. Likewise, arm with a Scroll when possible (for your Moehog), later trade it for a Bow or Ax and the Grundo you save in Mission 5 can pick up the Scroll.


    Get the Double Sword and Double Ax for your Moehog or Techo when you can.
    Get the Lightning Wand for your Grundos when you can. These will heal anything with a single zap!
    Alas, the Skeith are stuck with the Amulet and Battle Ax. The ability to Teleport and immediately move may be essential.


  16. Relative strength/probability of damage:
    Expected
    Damage per 20
    Draco Defense Strength  Meridellian Attack Bonus
    Weapon: (Min) 8 9 10 11 12 13 14
    Regular: (1) 72 66 55 45 36 28 21
    Double Ax: (5) 78 71 65 60 56 53 51
    Dbl Sword: (6) 81 75 70 66 63 61 60
    This table shows the expected damage (based on a uniform distribution of dice values from 1-20) that would occur from attacking 20 times. (you can divide by 20 to get the expected damage per roll). The columns are calculated by the difference between the Defense Strength of the Invader you are attacking and your Attack Bonus (usually †7 to †11).

    A Techo at A.S.=18 with a †6 Double Sword gets Bonus = †10
    Against a Grarrl with D.S.=22, we use column 12 (22 – 10 = 12)
    We see a relative strength of 63, or an expected damage of 3.15 per turn.

    This table could tell you that against weaker opponents, a Moehog does better with a Double Sword than a Double Ax, but otherwise, the Double Ax is more powerful (especially for a Techo). And there are no ‘weaker’ opponents by the time the Double Ax appears. So grab it!


  17. When you destroy a Buzz/Grarrl, they leave a smoking hole into which you cannot travel… but the Invaders can!


  18. Above all, plan ahead!
    Although this game is listed as an “Action Game”, it is really more of a strategy puzzle. The movement of the Invaders is predictable. Plan your movement to ensure that you get your troops (and the Invaders) get where you want them, when you need them there.

    Now Available: To help you plan or to test your knowledge, use the interactive IoM Training page (“http://home.pacbell.net/jeffpeck/iomscript.html”). The IoM Battle Planner lets you set up a board and see how your strategy works, against realistic Draco movement! Try your battle plan before running the real game. [runs on your local browser; much faster than waiting for the web-site, and there is an undo button!] Includes the IoM Board Generator that produces IoM Boards you can put on your web page (in HTML, they are not screen dumps!)

    Note: Click on the Mission Planner for help/explanation of that page.


  19. More help:
    There is enough information above to solve the puzzle.
    But if you want more explicit information, see IoM Spoilers .
    But you might enjoy trying to figure it out yourself first.


  20. Wondering how that Buzz/Grarrl sneaked up on your left?
    In the Second Wave, they can move from the right edge to the left! Their own version of Teleportation…

    Bug report: I’m guessing the board is a linear array of cells, and moving right just increments the cell number. Apparently, for the Buzz/Grarrl there is no ‘mod 10’ check, so a right move may end up in the left column, one row down.
    Note: when Grarrl is in the lower-right corner and moves right, it wraps to the left edge and opens a new row below the others! From there it can continue to move right on the new (11th) row.

Neopets Skies Over Meridell

In the game you take the place of a young pilot just starting out in one of the most challengeing and exciting sports in all of Neopia in the present day. The game envolves you pitting your self against other competitors who like you are trying to knock there opponent out of the skies over meridell. Armed with a slowish plane and a ‘pop gun’ it is your mission, or destiny to become one of the greatest “fighter pilot” in all of Neopia!

Getting Started

To be taken to the game right now click HERE. I just know your itching to have ago as soon as possible!


Here are some important points to know when playing Skies Over Meridell so you can become a champion or simply to score 240 points to earn 1000nps each turn.


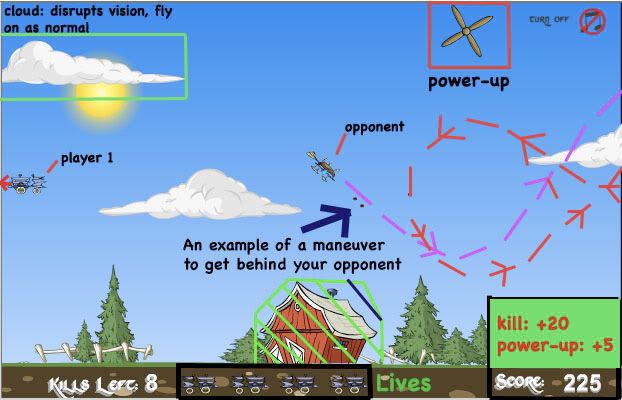
  1. The left and right arrow keys are the two main controls. The left arrow key turns the plane ANTI-CLOCKWISE. The right arrow key turns the plane CLOCKWISE. This will come second-nature after a few games practice. To complete the maneuver above I would have tapped the right arrow key before holding the left arrow key to complete an anti-clockwise change in direction.
  2. Hold your finger down on the Shoot Button for the whole time, this works best for me. This being either (m) or the comma (,) or the full-stop (.)
  3. The Golden Rule I play by is to always be behind my opponent
  4. Only collect power-ups when you judge it is safe to
  5. LIVES are the most important thing when going for a high-score. It is FACT that no one is perfect so the more lives you have in reserve, the further you should get.
  6. HAVE FUN, this game is so fun to master, you will actually enjoy cruising around the sky in no time!


The Power-ups!

  1. EXTRA LIFE – this is probably the most useful power up as since you only have three lives to start with. Try to grab these ASAP without to bigger risk taking. adds +5 points
  2. INCREASED NUMBER OF SHOTS – a good power up but not important, don’t go out of your way to grab it. adds +5 points
  3. EXTRA POINTS – this has no benefit to your fight against your opponent but grab a few of these throughout the game and it will bump up your score considerably. grab it with out taking risks. adds +10 points
  4. INCREASED SHOT DISTANCE – you will benefit from this but do not take risks to obtain it adds +5 points
  5. INCREASED SPEED – can work against you or for you, can be come hard to control. does not come in to affect until you lose a life. Quite useless. adds +5 points
  6. INCREASED TURN ABILITY – is quite useful, especially in the later levels. Still though, don’t take great risks to obtain it. adds +5 points

Opponents!

Each Opponent is QUICKER than the last


Player Number of Kills comment on speed
2 very slow, careful not to run into the back of this opponent
3 quite slow, do not lose early lives
5 starting to get a little quicker, beat this level to avoid embarrassing low scores
8 medium-fast many people lose here, practice hard, master this pace
10 quick though easily containable (my favorite level)
12 little quicker than last, goes up and down a lot so can be completed with minimal lives lost
13 This guy is Very quick, a lot of experience, practice and lives are needed from now on
15 lightning quick requiring quick thinking and complex maneuvering, you will lose lives
17 this level like the last is lightning quick, not many have reached it, a Lot of Luck is needed, 17 kills on this guy may as well be called impossible
??? I only know of Duke, I have never versed The Duke

Summing Up

Always remember the golden rule! ALWAYS STAY BEHIND YOUR OPPONENT! As with everything, practice will make perfect. The game is one of the most under-rated games in neopia. I urge everyone to tell your friends about it and you could even set up a game challenge with your friends by following this link:


Send Challenge
OR
World Challenge

THE HIGHSCORE TABLE FOR THE GAME CAN BE FOUND HERE:

High Score Table


When high score tables are reset: You can usually obtain a trophy with a score of 700+ One extra thing: To see a demo of skies over meridell, click the sun in the menu window!

To see a demo of Skies Over Meridell, click the sun in the menu window once the game has loaded!

Neopets Shenkuu River Rush

While Mystery Island would seem like the obvious choice for surfing in Neopia, surfers in the know will tell you that waves don’t get much bigger than those at the waterfalls of Shenkuu! It’s time for Shenkuu’s surfing crowd to show their wave-riding skills to the rest of Neopia, and there’s no better way for them to do it than to take on the terrifying ramps and rapids of their land’s highest waterfalls.

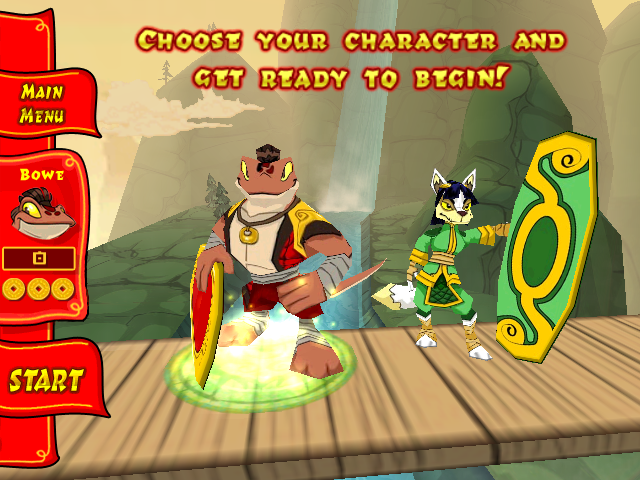
Play as either Cassile or Bowe and ride the roaring rapids of Shenkuu on your riverboard.
Don’t forget to wow the crowd (and earn points!) by doing some amazing tricks.
Just make sure your feet are back on your board before you hit the water… otherwise, you’ll be sunk!
Keep an eye out for powerups that can help you really show off.
Carefully dodge the obstacles that lie in your path, or else you’ll lose a life!

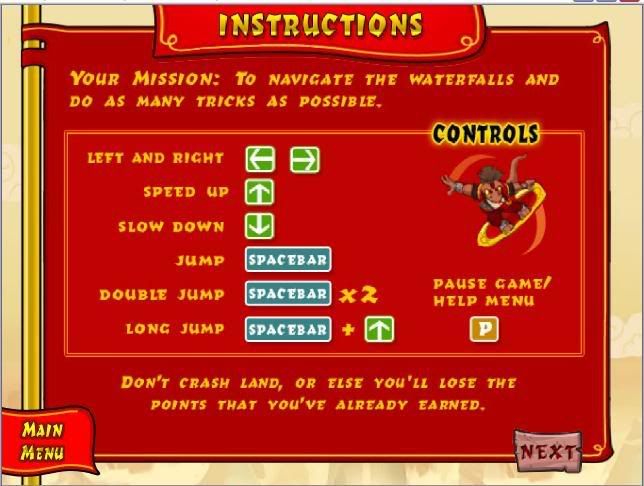
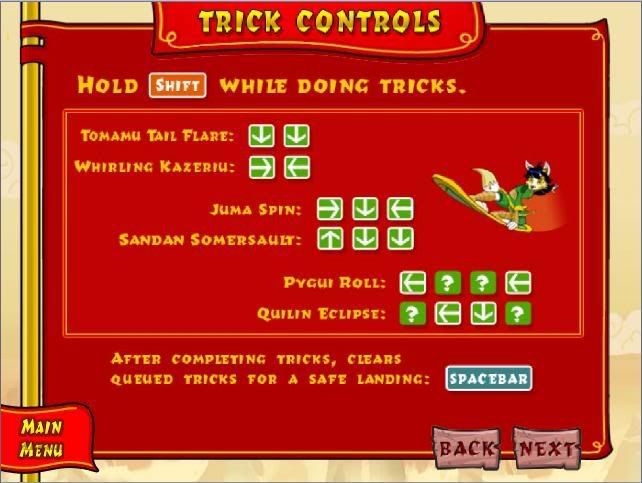
The following are images of the instructions


For the above image : the special tricks are :
LRDL = left right down left
ULDU = up left down up


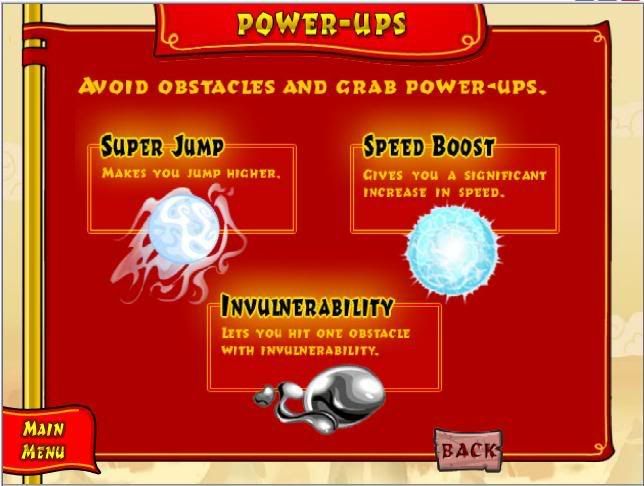
In the image above is shown the different orbs you can collect during the game.


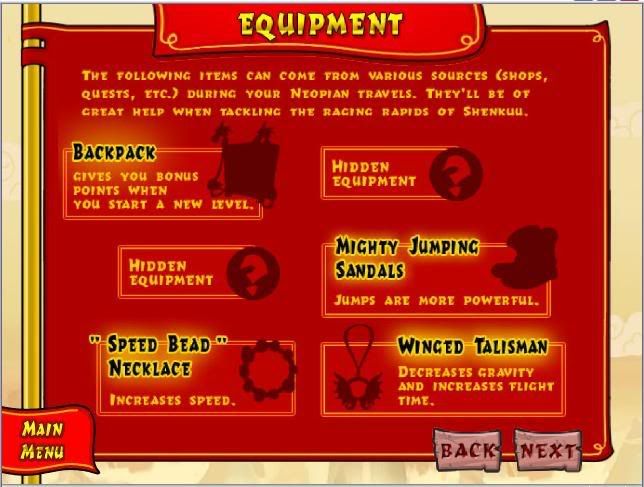
For the above image : the items are slowly being released :
Pack of Holding, Bracers of Fury,
Helm of Recovery, Boots of Leaping,
Speed Beads, Winged Talisman
the Talisman was removed from the NCMall
Items are being bought at Wonderous Weaponry in Shenkuu
I have 4 of the items and am testing them to add info to the guide :
The pack adds a few points to your score when you cross a new level threshold
I got 3 points for crossing a new level even when I had one life.
The boots increase your jump/air time.
The bracers create a softer landing on your tricks/jumps
but you still have to be on your board to land or you will still lose a life.
But with them you no longer die when doing a trick, pulling it and landing hard as long as you are on your board before the water.
Personally, so far my favorite items are the boots.
Also the boots paired with the bracers.

Scoring for this is game is basic.
You get points for the faster you complete it.
For each orb you get one point.
For the tricks :
DD = down down = Tomamu Tail Flare = 1 point
RL = right left = Whirling Kazeriu = 1 point
RDL = right down left = Juma Spin = 4 points
UDD = up down down = Sandan Somersault = 4 points
LRDL = left right down left = Pygui Roll = 8 points
ULDU = up left down up = Quilin Eclipse = 8 points
Shift = Hold left shift while you are completing a trick
Spacebar = press this to jump


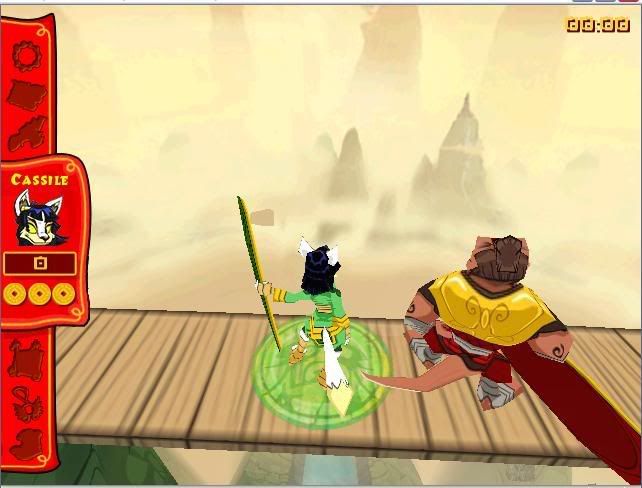
When starting the game, you see the image below.
When the above items are available they will show up in the proper spot of the game screen.


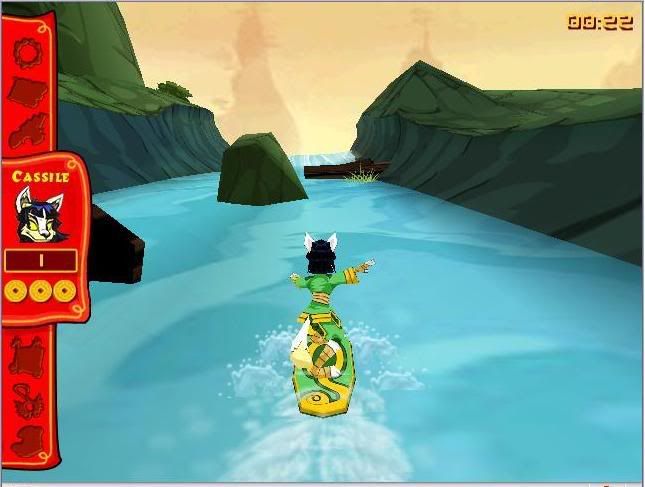
During game play, there are a few obstacles you must avoid or jump.
In the image below there are two obstacles shown. Rocks and logs.

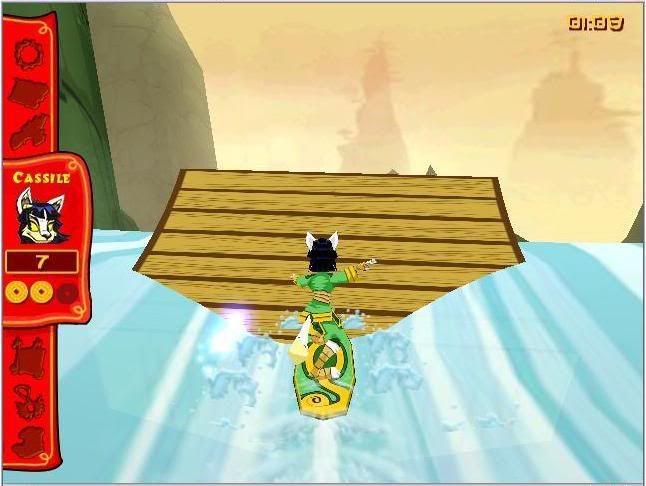
There are also some ramps along the game to increase your jumping.
Some jumps are in the middle of the river.
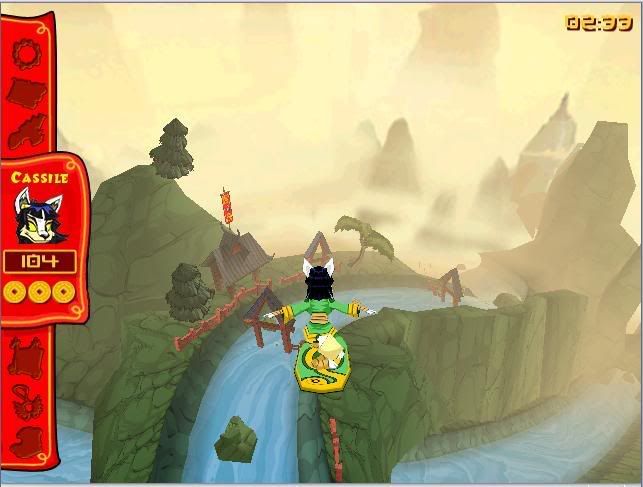
Other jumps are at the top of waterfalls as in the image below.


There is point in the game where you can access a Secret River.
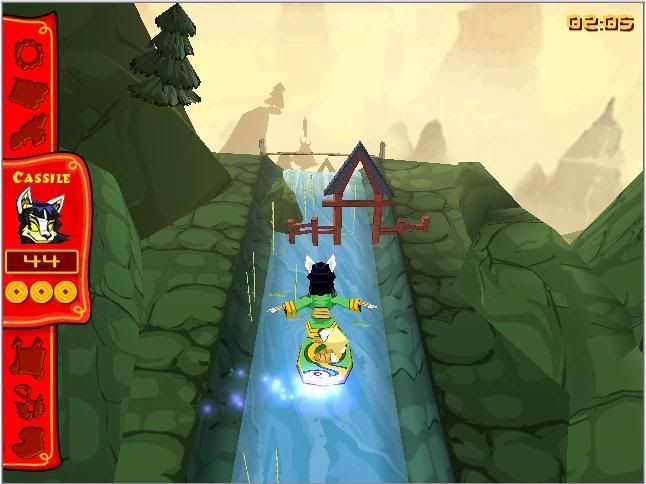
While playing, when you see the below image in your game,
you know you are about at the spot to find it.
As soon as you go under the structure you see, there is a waterfall.
This waterfall is where you see and access the secret river path.

As you take off from the waterfall, you will see the following image.
The river running left to right under the main river is the secret river path.
Start turning right or left immediately off the waterfall to make this path. The path is rather long, fast and fun and has some large obstacles in the way.
Prepare for lots of jumping or taking your time to manuever the obstacles.

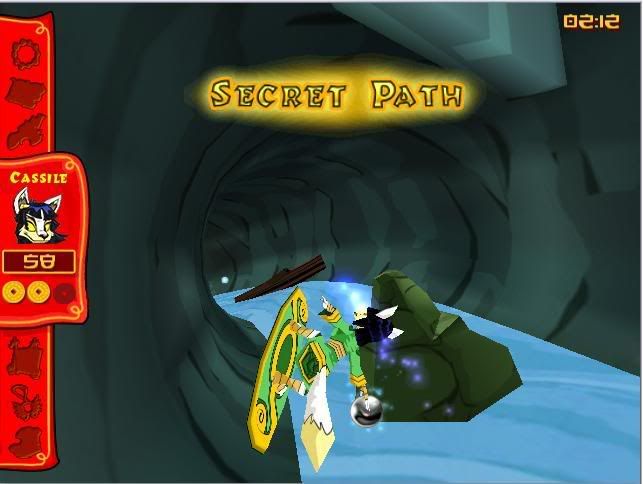
You will know you found the secret river when you see the words Secret Path as in the image below.
The secret river path eventually flows back into the main river.


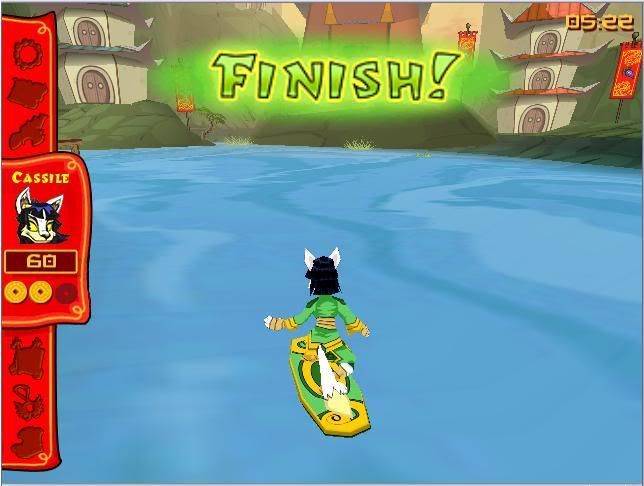
The end of the game, literally says “Finish” as below.
There are 6 levels to complete.
Each level gets a little bit harder by adding more obstacles to avoid.

After you finish the game it tallies your points for your score.
You do get points added for finishing in a good time.
You will get points taken away for taking too long to finish.


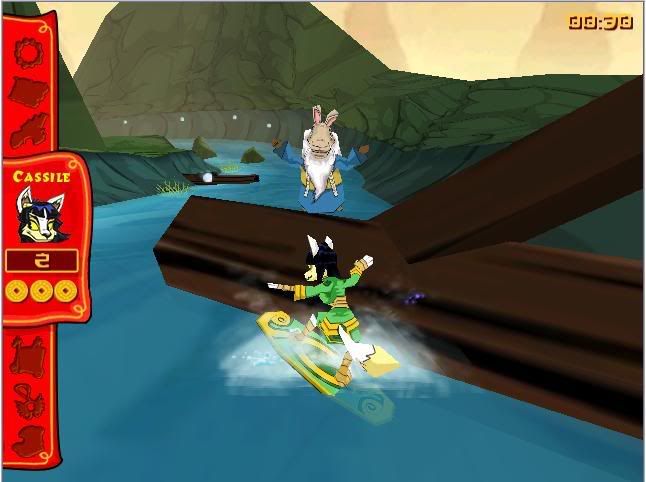
During the game you also come across the Wise Old Gnorbu, seen below.
He doesn’t do anything to affect your game, he is just cheering.

Neopets Dice Escape Guide

You must enter his evil dimension and free the dice! Control each dice by using the arrow keys. The topmost face of the dice must match the exit tile in order to finish the level. Every move that you take will make your bonus smaller, so try and complete the levels as quickly as possible. You will lose a life if time runs out, and you only get three lives.

There are 24 levels in Dice Escape. 

Lives and Points
Lives : You have three lives per game. You will lose a life if you run out of time, land on a lava-tile or click the button to reattempt a level. The game ends if you lose your third life. There are no bonuses for completing the game with extra lives remaining.
Time Pts: You have 59 seconds to complete each level, which is plenty of time. You receive a ‘Time Bonus’ of 19 points when you complete a level with all 59 seconds intact and lose a point every 3 seconds. If the timer reaches zero, you will lose one of your three lives and will have to restart the level.
Round Pts : The less moves you make, the more points you get. You start each level with 100 ‘Round Points’, but every move you make loses you 4. Like with the Time Pts, they are only awarded once you complete the level. You will not lose a life if you reach zero round-points.
Coin Pts : Each stage contains a coin that will instantly award you an extra 5, 10 or 25 points when you pick it up. They are always positioned in the same place on the board, but its value is random.
WARNING! : If you minimize the game window at any time it will automatically restart the game, losing you your score!
Cheats
There are two codes in the game that, if typed correctly, will reset the timer. A valuable use of those codes can be found in the ‘Tips’ section below.
Tips
1. If you pick up a coin and then restart the level, a new coin will reappear in its place for you to get. Take advantage of this by clicking the ‘restart’ button every time you get collect a 25 point coin.
2. Do not collect coins if the points it awards are less than the round-points you will sacrifice trying to get it. It sounds pretty obvious, but it’s a common mistake. My level-guide is written so that you avoid those coins.
3. The game occasionally ‘flips’ the maps from level 2 onwards_ The best thing to do when playing the mirrored version is to just restart your game, because my guide will not then be accurate.
4. You need a good connection to the internet and a computer that can run the game fast (3D accelerator card required), otherwise you will lose a lot of points from your time bonus.
5. The ‘flybywire’ and ‘topdown’ cheats have no benefit, so don’t waste your time using them.
6. If you score 1,800 points or more, TNT will review your score before you are credited on the high-score table.
The Step-by-Step Guide
These are the directions to take to complete each level of Dice Escape in the minimum amount of moves – maximizing your ‘Round Points’. I have also noted some tips on the guide to help you along. Make sure you have a read before starting each level.
I have listed the steps to take according to the coin that is generated when you begin the level. If, for example, you play a level with a 25 PC but there are no steps, then use the route for the coin immediately above (5 or 10 PC).

English (Espanol/Francais/Deutsch/Italiano)
U : Up (Arriba/Haut/Hoch/Su)
R : Right (Derecho/Droite/Rechts/Destra)
D : Down (Hacia abajo/Bas/Runter/Gi*)
L : Left (Izquierda/Gauche/Links/Sinistra)
HU : Hold Up (Tenga Arriba/Tenir en haut/Hoch gedrueckt halten/Tenere Su)
HR : Hold Right (Tenga el Derecho/Tenir droite/Rechts gedrueckt halten/Tenere Giustamente)
HD : Hold Down (Tenga hacia abajo/Tenir bas/Runter gedrueckt halten/Tenere Gi*)
HL : Hold Left (Tenga a la izquierda/Tenir gauche/Links gedrueckt halten/Tenere la Sinistra)


– Level 1 –
05 PC: HU
10 PC:
25 PC:

Tip: For a high-score, never play a game where you start with anything other than a 25 point coin.

– Level 2 –
05 PC: U-R
10 PC:
25 PC: U-U-R-R-D-L
– Level 3 –
05 PC: U-U-U-U-R-U-U-L
10 PC: U-U-U-U-R-U-U-R-L-L
25 PC:
– Level 4 –
05 PC: HL-HU-HL
10 PC:
25 PC:
– Level 5 –
05 PC: L-L-U-U-U-R-U-U-HL-U
10 PC: L-L-U-U-L-R-U-R-U-U-HL-U
25 PC:
– Level 6 –
05 PC: L-L-L-L-L-U-L-D-U-D-R-R-U-U-R-R-R-U-R-HU-L
10 PC:
25 PC:
– Level 7 –
05 PC: R-D-R-U-L-U
10 PC:
25 PC:
– Level 8 –
05 PC: D-R-HD-L-L-HD-R
10 PC:
25 PC:
– Level 9 –
05 PC: HL-U-L-U-L-U-L-HU
10 PC:
25 PC:
– Level 10 –
05 PC: U-R-R-R-HD-R-HD-HR
10 PC:
25 PC:
– Level 11 –
05 PC: HU-HL
10 PC:
25 PC:
– Level 12 –
05 PC: U-D
10 PC:
25 PC:
– Level 13 –
05 PC: U-L-L-HU-L-U-U-HR-D
10 PC: U-L-L-HU-L-L-R-U-U-HR-D
25 PC:
– Level 14 –
05 PC: U-U-L-HU-D-D-D-HL-D-R-R-R-U-U-U-U-HR-HU-L-L-D-L-L-L-U-L
10 PC:
25 PC:

Tip: Type helpmeplease before you make your last move on this level! It will reset the timer, which will give you the maximum time bonus.

– Level 15 –
05 PC: HL-U-D-R-R-R-R-R-HU-D-L-L-U
10 PC:
25 PC:
– Level 16 –
05 PC: L-L-L-L-U-U-L-L-HU-HR
10 PC:
25 PC:
– Level 17 –
05 PC: L-L-U-L-D-L-L-L-R-U-R-U-R-U
10 PC:
25 PC:
– Level 18 –
05 PC: R-L-U-U-HL-R-D-HL
10 PC: R-L-U-U-L-L-U-D-L-R-D-HL
25 PC:
– Level 19 –
05 PC: HR-U-L-L-U-D-R-D-L-U-U-L-L-L-U-U-U-L-U
10 PC: HR-U-L-L-U-D-R-D-L-U-U-L-L-L-U-U-U-U-D-L-U
25 PC:
– Level 20 –
05 PC: L-L-L-U-L-L-U-D-R-U-R-R-R-L-L-L-U-U-U-L-L-U
10 PC:
25 PC: L-L-L-U-L-L-U-D-R-U-R-R-R-L-L-L-U-U-U-L-L-D-D-R-U-U-L-R-R-R-R-R-U-D-HL-U

Tip: Type moretimeruki before you make your last move on this level! It will reset the timer, which will give you the maximum time bonus.

– Level 21 –
05 PC: U-L-L-L-L-L-D-L
10 PC:
25 PC:
– Level 22 –
05 PC: U-L-U-L-U
10 PC:
25 PC:
– Level 23 –
05 PC: R-U-U-L-HU
10 PC:
25 PC: R-R-R-HU-HL
– Level 24 –
05 PC: U-U-U-L-U-L-U-L
10 PC:
25 PC:

Tip: It’s the last level! If you have any lives remaining, collect the coin (regardless of value) in the top right corner and restart the level.


hi_scores_icon-8082025 356_1-6737844356_2-8429900356_3-8172859